1 I56-6304-000
CONTENTS
Introduction.......................................1
Connecting pipes ..................................1
Wiring up a FAAST LT-200 unit .......................2
Power connections and supervision 2
Sounder EOLs 2
Programmable input (Reset) 2
Front panel LEDs – what they show...................3
Front panel buttons – what they do ...................5
Reset 5
Test 5
Disable 5
Password access to Maintenance mode ...............6
FAAST LT-200 device operation ......................6
Power on sequence 6
Normal operation 6
Troubles 6
Operating modes 6
Factory default settings (‘out-of-the-box’) .............7
Connecting to a PC ................................7
Remote Maintenance mode 7
First time connection. 7
Communicating with a FAAST LT-200 Device. 8
Disconnecting a FAAST LT-200 device from a PC 8
FAAST LT-200
FIRE ALARM ASPIRATION SENSING TECHNOLOGY
®
SET-UP AND TROUBLESHOOTING GUIDE
INTRODUCTION
The purpose of this document is to help installers and technicians
connect, commission and check out a FAAST LT-200 system in
the eld.
It includes information on wiring and setting up, what the indicators
and switches do, the device operating modes and factory default
settings and how to connect a unit to a PC. It highlights common
mistakes that can be made during an installation and provides a
useful section of dos and don’ts to ensure a successful application.
This document is not a substitute for the comprehensive information
contained in the current Quick Installation Guide or the Advanced
Set-Up and Control Guide.
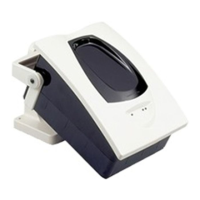
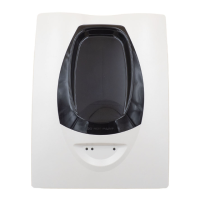
CONNECTING PIPES
Be sure to connect the inlet and outlet pipes to the unit correctly;
the table below shows the pipe options available for the dierent
FAAST LT-200 models. Each channel has 2 functional inlets and
one outlet. Either inlet can be used for a single pipe design, or the
2 inlets can be used as a T junction for a branched pipe design. If
only one pipe is used for a channel, blank o the other inlet.
Setting the fan speed ...............................8
Auto mode 8
Manual mode 8
Fan Speed Indication 8
FAAST LT-200 Alerts and Faults . . . . . . . . . . . . . . . . . . . . . . 8
Fault delay 8
Flow Fault Delay 9
Events log 9
Relay outputs .....................................9
Resetting a detector from alarm or fault. 9
General reset of a detector. 9
Password recovery.................................9
DOs and DON’Ts with FAAST LT-200 devices ...........10
Pipe network and device installation. 10
Device operation and maintenance 10
Actions that could aect the operability of the detector: 10
Damage resulting from poor installation or misuse ......11
Fans broken by use of compressed air for cleaning 11
Devices subject to water or liquid ingress 11
Corrosion caused by aggressive chemicals 12
Glued-in pipes 12
Contamination and mechanical damage 13
Voiding warranty 13
FAASTLTMODEL DEVICETYPE INLETPIPE OUTLETPIPE
with11inmodelname Onechannel 1and/or2 5
with12inmodelname Onechannel
with2sensors
1and/or2 6
with22inmodelname Twochannel Channel1:1and/or2
Channel2:3and/or4
5
6
Leave the blanking bungs that are supplied in the inlet/outlet holes
in place until the pipework is connected to the unit to avoid any
dirt or debris ingress. When not using exhaust pipes, make sure
that the blanking bungs have been removed prior to powering the
device on.
On a 1 channel unit, holes 3 and 4 do not function.
1
2
3
4
5
6
CHANNEL 1
CHANNEL 2 (ONLY
FUNCTION ON 2
CHANNEL UNITS
Do not glue the pipes into the inlet and outlet holes. This
will invalidate the warranty and also make removing the
device dicult should this be necessary at a later date.