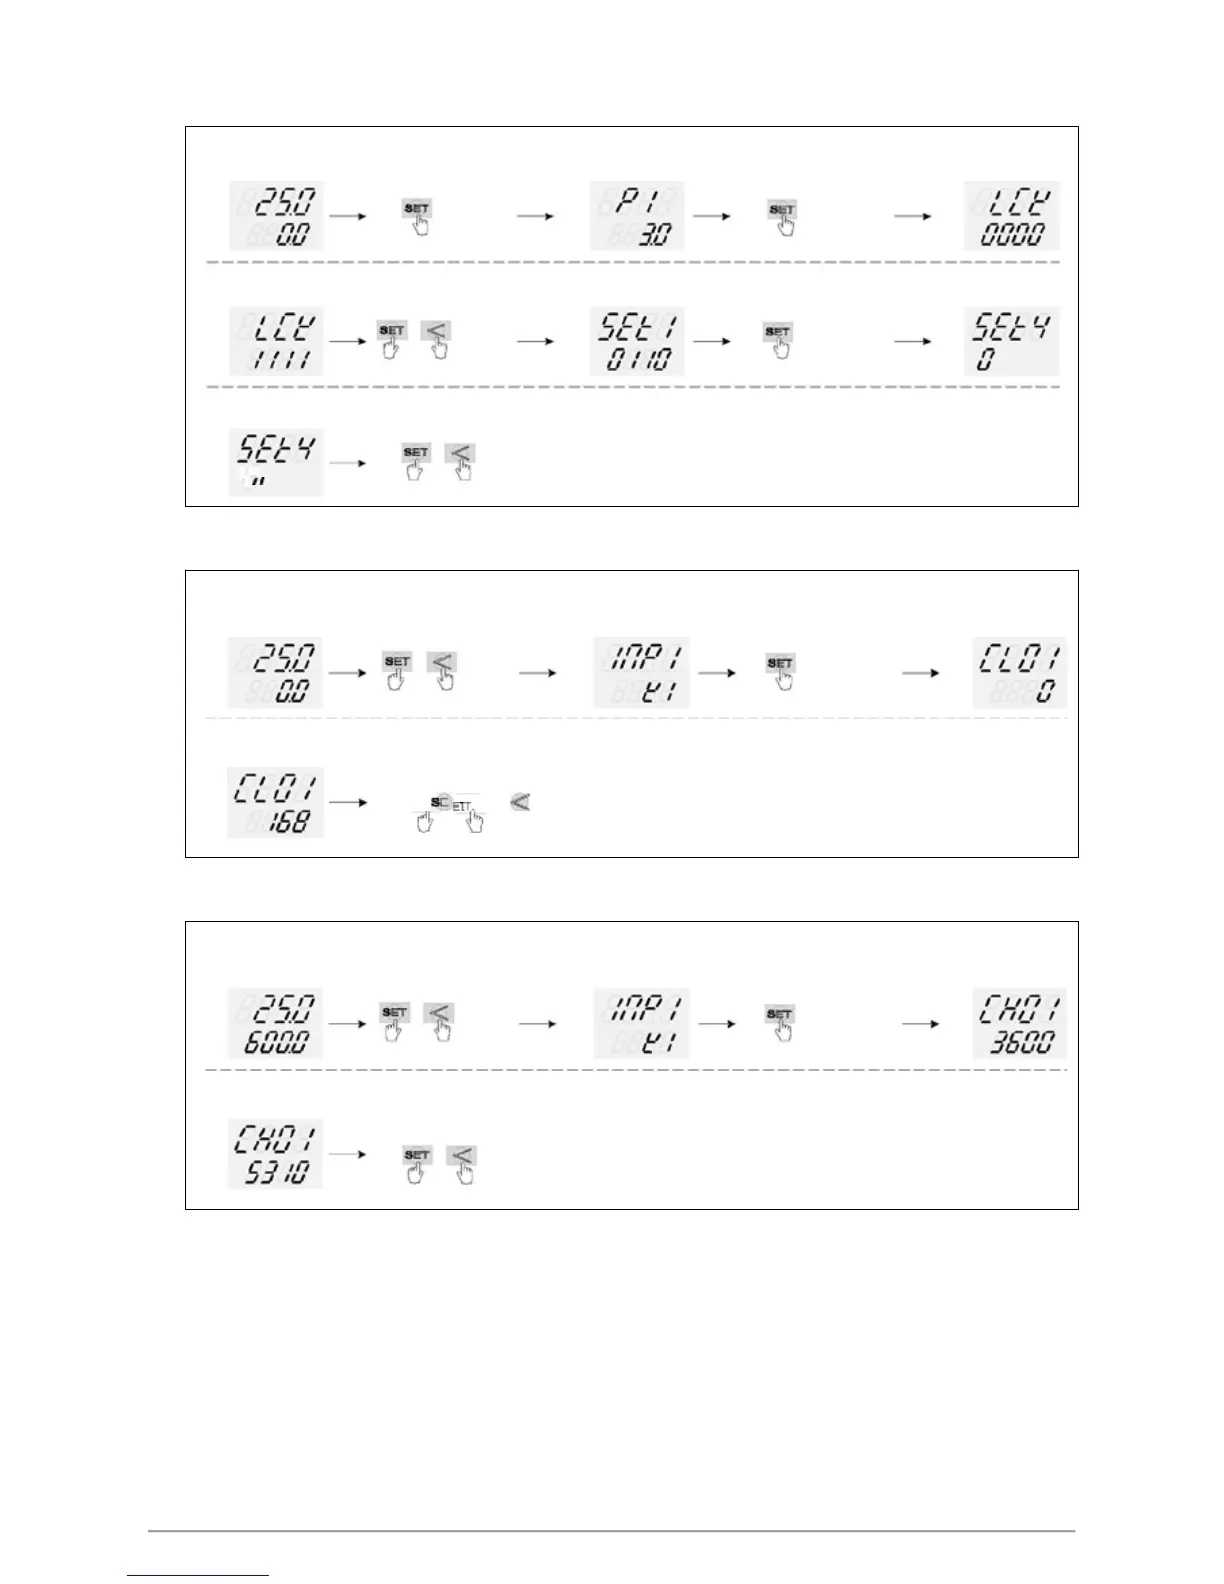
14.6 Output Calibration Steps
1. Display CLO1 & CHO1:
PV / SV monitor
Enter to Level 2
show P1
PV
press
key 3 seconds
PV
press key switching to
PV
SV
SV
display"LCK "
SV
LCK setting to 1111
Enter to Level 4
SET4 X is
show SET1
current value
PV press +
VP ot gnihctiws yek sserp VPsdnoces 3 yek
SV
SV
display"SET4 "
SV
XXX
SET4_4= 1
open CLO1
、
CHO1
if SET4_4 setting finish
PV
press
+
key 3 seconds , return to PV / SV monitor
SV XXX
※ : X is default value which does not need to be modified
2. Adjust CLO1 low-point calibration value :
SV = LSPL
Enter to Level 3
Minimum output
show INP1
ot gnihctiws yek sserpVPsdnoces 3 yek + sserp VP
PV
SV
SV
display"CLO1 "
SV
adjust CLO1 until
meter = 4mA
PV
if CLO1 setting finish
SV
press + key 3 seconds , return to PV / SV monitor
※ : CLO1 calibration value of each controller is different from the other
3. Adjust CHO1 high-point calibration value
SV = USPL
Enter to Level 3
Maximum output
show INP1
PV press +
ot gnihctiws yek sserp VPsdnoces 3 yek
PV
SV
SV
display"CHO1 "
SV
adjust CHO1 until
meter = 20mA
hsinif gnittes 1OHC fi VP
SV
press
+
key 3 seconds , return to PV / SV monitor
※ : CHO1 calibration value of each controller is different from the other
55 FY/FU operation manual



 To Next Page