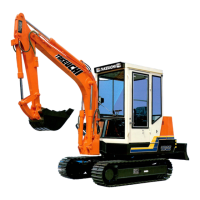
2. Loosen the bolts and remove the under
cover.
3. Place a pan for catching the spent oil under
the drain plug (3).
4. Remove cap (A), install connector (B) and
drain the oil. (The oil comes out when the
screw is tightened.)
5. Remove connector (B) and install cap (A).
IMPORTANT: Check the spent oil. If it
contains large amounts of metal powder,
consult a Takeuchi sales or service
outlet.
6. Install the under cover.
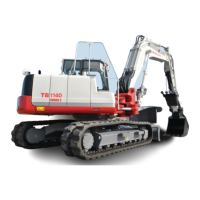
7. Open the maintenance cover.
8. Using a filter wrench, turn the filter (4)
counterclockwise and remove it.
9. Clean the surface of installation of the filter
stand.
10. Apply a thin layer of oil to the packing of
the new filter.
11. Install the new filter by hand.
12. Tighten 3/4 more turn with the filter
wrench after the filter packing comes in
contact with the surface of installation.
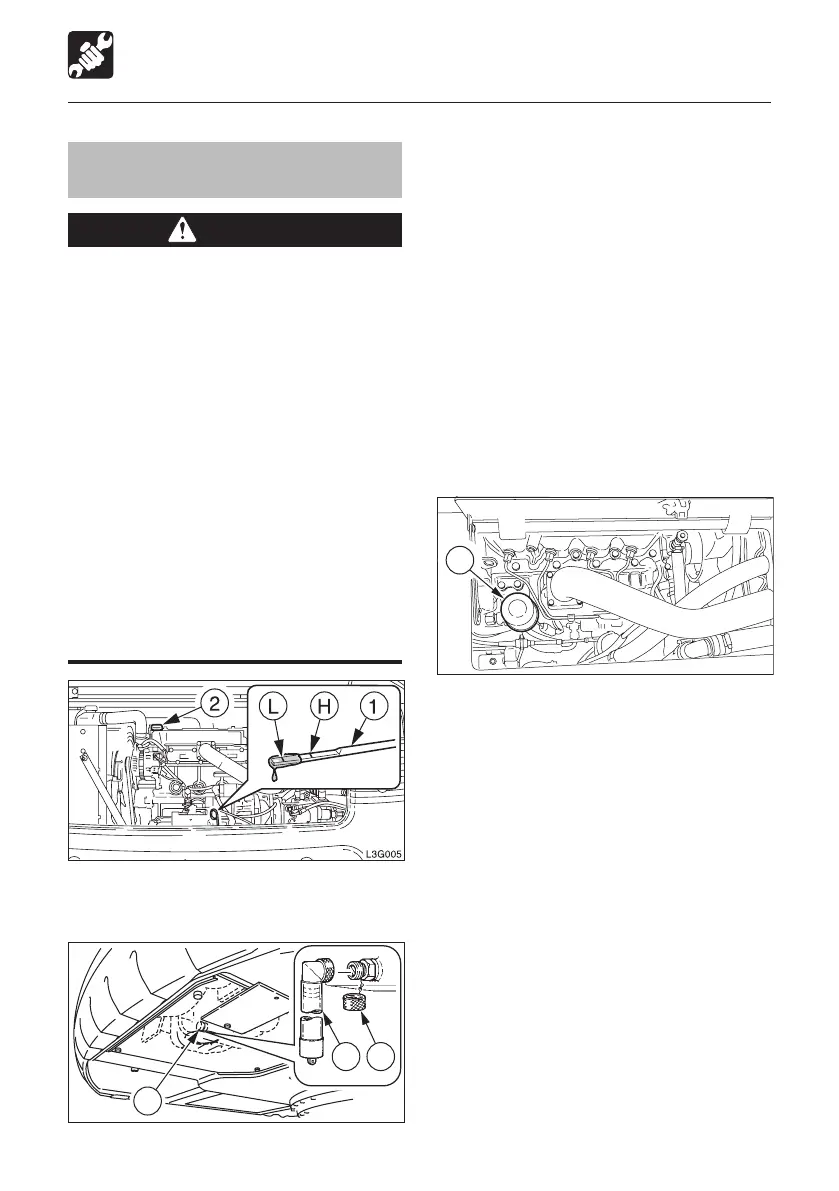
13. Supply oil up to the upper limit (H) of the
dipstick (1). Problems could arise if the
oil level is either too low or too high.
14. Tighten the oil supply cap (2).
15. Start the engine, run it at low idle for about
3 minutes, then stop it.
16. After about 10 minutes, inspect the oil
level.
After First 50 Hours (New Machines Only)
Replacing the Engine Oil and Oil
Filter
WARNING
� Stop the engine and allow the machine
to cool down before performing
maintenance.
• The engine, muffler, radiator and
many other parts of the machine
are hot directly after the engine is
stopped. Touching these parts will
cause burns.
• The engine oil is also hot.
Be careful when loosening caps
and plugs. Working on the machine
under these conditions could result
in burns.
�
Never jump off the machine. Use the
steps and handrails when climbing on
and off the machine, and always support
your body at three points with your
hands and feet.
1. Open the engine hood and remove the oil
supply cap (2).