EasyManuals Logo

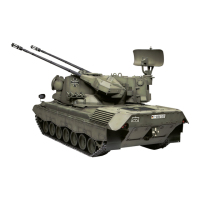
Tamiya GEPARD User Manual

Tamiya GEPARD
24 pages
To Next Page IconTo Next Page
To Previous Page IconTo Previous Page
Page #10 background imageLoading...
Page #10 background image
Ll receives
torce and nlust bs firmly
cement€d
@
..""0r,
"''
Attach
crown
gear
with ref€rence to the
llqure
fight.
Hold 2mm
x
19
shaft
in
place
temporarily
with cellophane tape
until@ so that it do€s
not come off radar
gear
cage.
Kronenzahnrad
wie unten
gezei8t
ein-
bauen. Schaft 2mm
x
19
mit
Tesafilm
bis
zur
Stufe
@
halten.
<<Part!
(lull
alze)>>
<<reib
in oridnalgrösse>>
r----]
M21
2mm
x
19
Shaft
@
..eaa.,
a,,
Sftfüi
M
1 1
/^!
v
M12
L1 muss
gut
eingeklebt sein.
(trägt
Tuüet A
Turmteile A
DI
D3l
DI
N2
D3
(Opposite
side: L36)
(left)-
D23
D13
Stnoke Discharger
(lett)
Rauch"Nebel
palronen
(linkt
741
Raüt
^
\t
<<Radar Base
(risht)
';
<<RadärlaEer
kechls),-
L12
<<Badar
Sase
(lell).'
<<Radädater
(linkt
-
Lt0
Dt9 L
t3
9lE\
n"a",e
Ml2
Fasten M21 wirh
celloohane
laoe
X
(ri9ht)
M11
Ll
müss gul
eingeklebt
sein.

Questions and Answers:

Question and Answer IconNeed help?

Do you have a question about the Tamiya GEPARD and is the answer not in the manual?

Tamiya GEPARD Specifications

General IconGeneral
BrandTamiya
ModelGEPARD
CategoryToy
LanguageEnglish

Related product manuals