EasyManuals Logo

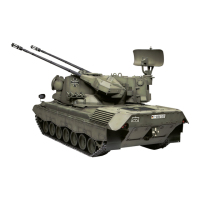
Tamiya GEPARD User Manual

Tamiya GEPARD
24 pages
To Next Page IconTo Next Page
To Previous Page IconTo Previous Page
Page #7 background imageLoading...
Page #7 background image
<<Flxing
ot Wh€elr>>
<<Einb.u
der Räder>>
'Pass
froni
shaft, to whtch
front wheel B
6as
been attached in
O,
through
H8.
Pass
th6 shattthrough chassis.Then,
at-
tach
Front Wheel
A to the shaft and
tighten
up
the
grub
screw with the allen
Frontachse
mit Rad B
durch Wanne
schieben, dann Rad
Aaufsetzen und fest-
<<Road
Wh€el>> Make 14
sets
<<Laufrad>> t4
Satz
<<P.rt8 (t||ll
slze)>>
<<Teile
in odtinalgrai6se
>>
@
M16
ltl
<<upp6r
Hurl In3lde>>
V <<Panzel-Obeteil>>
<<Turret
Stay>>
<<Pert3 (full
slze)>>
<<Teile
in
Originrlgrösse>>
@M3
Zlittt r, {
@'o
(9)
vts
<<Fixing
of Driver's Hatch>>
<<Einbau
der
Fahr€rluke>>
To
open hatch P8, raise
it and
then turn
it.
Zum
Offnen
der Luke P8
erst
hochheben
-
Pans
to
be cement€d. Apply
cement to both
surface.
dunkelblau : Klebeierlen
(Kebstoft
auf beiden Seiten
anbrinBen)
This mark shows colour
Zeichen iür BemalunS
TAMIYA
Flxlng
ol Whe€13
6nbau der Räder
oil
Fetlen mil
BI
M16
,,o-€
gf
oil
H8
Anach front
wheel to the
shan änd tighten up the
grubsüewwiihthe
hex
Vold. Rad
aufselzen und
Lauiräd Boad
El
BI
Upper Hull
Inllde
Pinzer-Oberteil
M3
ll lh€re
ls
ilash or unevenness,
turet
will not revolve smoolhly, Caretully
re-
mde
ihem
with a knite,
Darauf achi€n, dass Tu.mdrehkhnz
vollkommeneben undflach ist, enl. Bit
Messer oder Feile
Elärten,
FB
Front Parls
tront
T€ile
<<Front
Lighr (righ,
-
<<Fronllich (re.hrt>>
<<Fronr
Lighl
(t€ir)-2,
<<f
ronilicht
(li
nls)
>>

Questions and Answers:

Question and Answer IconNeed help?

Do you have a question about the Tamiya GEPARD and is the answer not in the manual?

Tamiya GEPARD Specifications

General IconGeneral
BrandTamiya
ModelGEPARD
CategoryToy
LanguageEnglish

Related product manuals