Ml
@tu
@
no
@rts
3mn Nur 3mm
Washer
M16
<<Flrlng
ot
Totsion
Plet€>>
<<Einbäu
der Dr€hstäbe>>
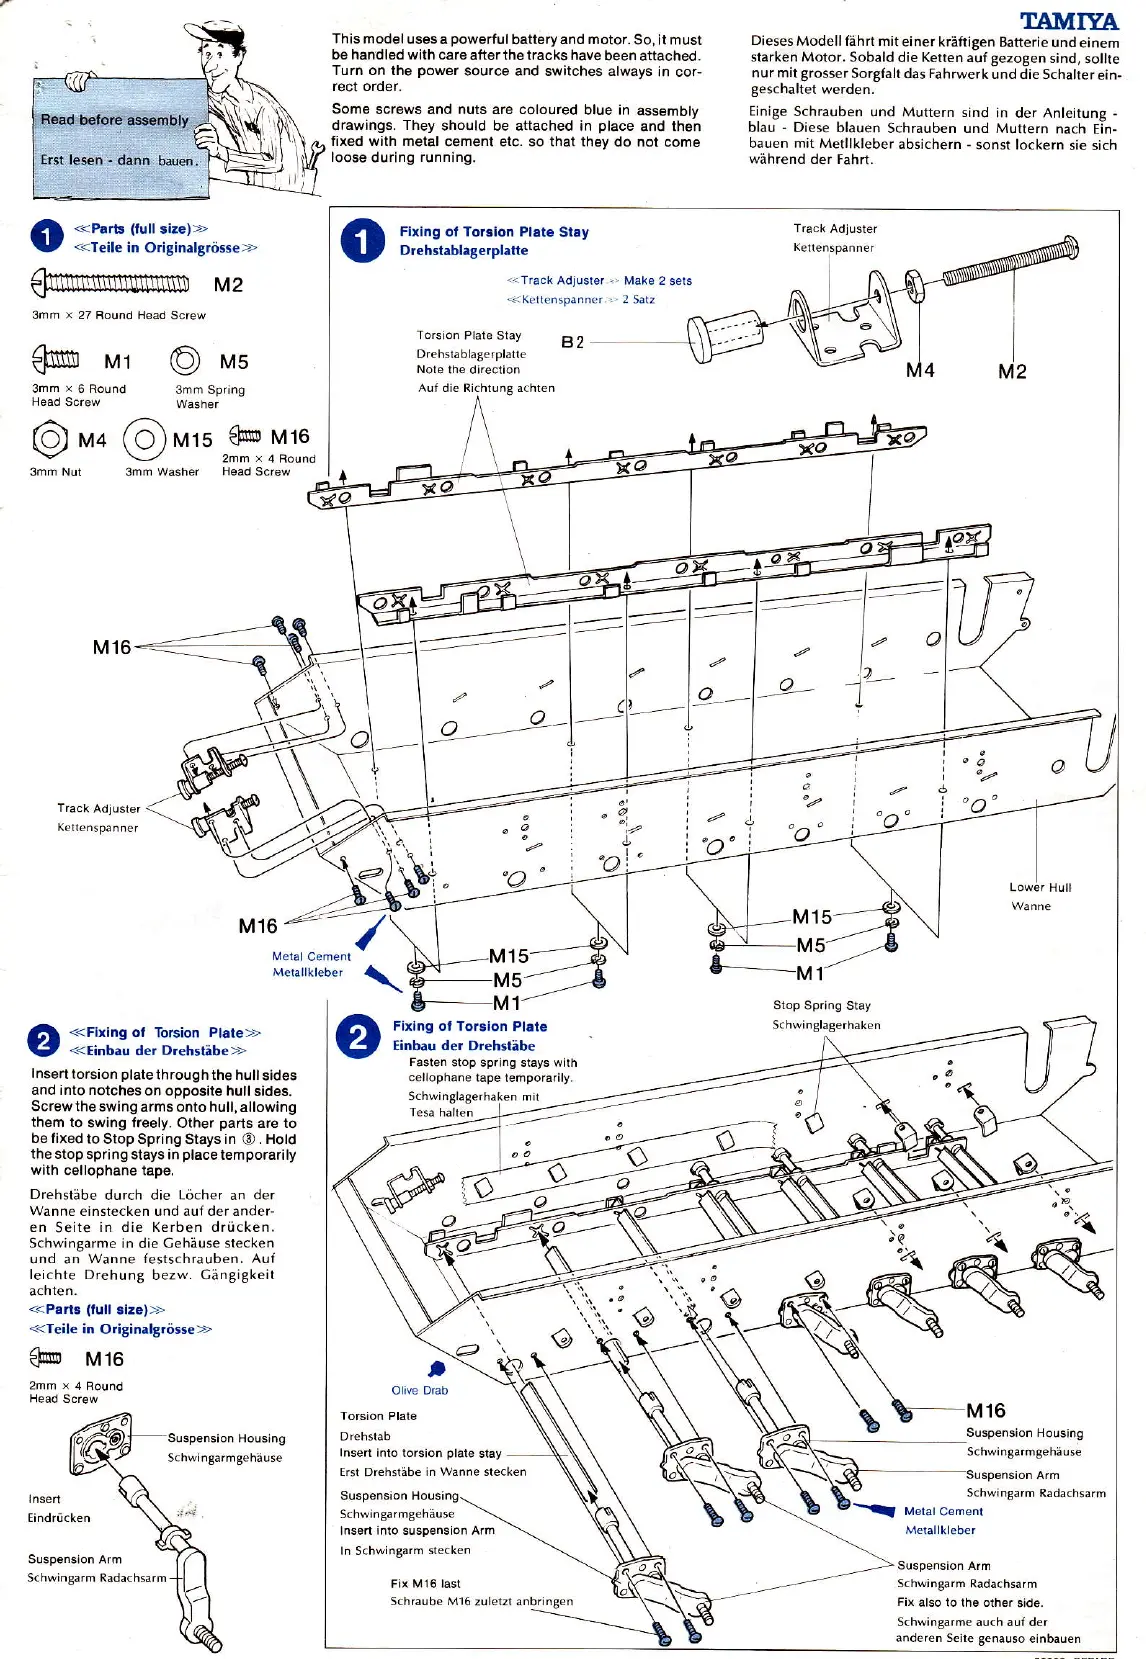
Insert
torsion
platethroughthe
hull
sides
and into notcheson
opposlte
hullsides.
Screwtheswing
arms onto hull, ellowing
them to
swlng freely. Other
parts
are to
betixed
to Stop Spring
Stays
in
@.
Hold
the stop spring
stays In
placetemporarily
with
cellophane tape.
Drehstäbe
durch die Löch€r an der
wanne einstecken und auf der andeF
€n
Seite
in die Kerben drücken.
Schwingarme in die Cehäuse
srecken
und an
Wanne festschrauben. Auf
leichte Drehung
bezw.
CänBigkeit
<<Par|s (full
slze)>>
<<reile
in
O.igin.lgrösse>>
€m
uro
€oo
vrs
This mod€luses
a
powerfulbattery
and motor.
So, it must
be handled with c6re
afterth6tracks have
been attached.
Turn on lhe
pow€r
source and s$,itches always
in cor-
Some screws and nuts are coloured
blue in
assembly
drawings.
They
should be attached in
place
and th€n
fixed with metal
cement etc. so lhat they do not
come
loose during
running.
<<P.rt3
(lull
3lze)>>
<<Teile
in Originilgrösie
>>
Fixlng of Toralon Plate
Slay
Dl€bt.bl.8e.pl.tt€
TAMIYII
Dieses
Modellfährt mit
einer kräftiten
Batterie und
einem
starken Motor. Sobald
die Ketten aufgezo8en
sind, sollte
nur mit
tross€r
Sorgfalt
das
Fahrwerk
und die Schaherein-
Eeschaltet
werden.
EioiSe
Schrauben
und Muttern sind in
der Anleitung -
blau. Diese blauen
Schrauben und Mrittern
nach
tin-
bauen mit Metllkleber
absichern
-
sonst lockern
sie sich
während der Fahrt.
I
M
M2
.<Träck
Adjusre,
.'
Make 2
sers
<<Kellenspanner..'
2 Satz
3mm
t
27 Round Heäd Screw
Torsion Plare sray
B2
Aul di€ RichlunS achlen
3mm Sping
"ao
"g
15
c€lloPhan€
täpe tehporarily
'o
srop
Spring stay
Inserl inlo torslon
plat€
stay
Erst
Drehstäbe
in Wanne ste.ken
lnsgrt into susp€nsion Arm
In scheingarm
steck€n
S.hraube Ml6
zuletzt anbrin8en
--
16
schwingam
Radächsarm
Fix
also 10 lhe oiher
sld€.
schwingarme auch auf der
anderen Seite
tenauso
einbauen