EasyManuals Logo

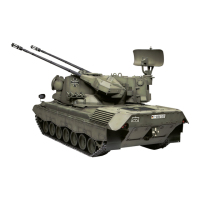
Tamiya GEPARD User Manual

Tamiya GEPARD
24 pages
To Next Page IconTo Next Page
To Previous Page IconTo Previous Page
Page #5 background imageLoading...
Page #5 background image
o
<<Parb (lull
.lze)>>
<<Teilc
in O
eir.lE.ös€>>
-@r"rr
49
6
@
M5
Fixlng ot
cea. Bor
Getriebe
<<Shock
Abso.ber> Make
10 sets
<<Stossdämpler'
10
Salz
'15
M5
M15
M5
M6
I
M13
M13
TAMTXA
Smmm
rr,ro
@vrs
€fiqrsp
M13
<<Shock
Absorber>>
<<Stossdämpfer>>
Attach
shock
absorbers to their
sus.
pension
arm with
El. Shock absorbers
should be scr€wed
last.
Stossdämpfer
mit El an
Schwingarm be-
festigen
und dann erst
einschrauben.
<<Ilrotor
and Swltch>>
<<Moto.
und Sch.lter>>
M9
Insert
motor
coupling and tix motortirm-
ly onto
chassis.
Motorkupplung
anfsetzeh
und Motor-
block
tut
in
Wann
einschrauben.
Molo.
and Swltch
Einb.u
des Motores
(tull
3l2e)>>
in Origin.lgrösse>>
Otu
3mh
Sping
Washer
M12
M15
<<Front
Wh€el>>
Front
Wheel A:
Ins€rt 3mm x
3
grub
screw into
wheelstopper.
Then,
cernent
lronl
wheel
parts
H13 and H17
tog€ther
with
their notches
coinciding
with
th€
grub
screw. Allen
key
should be kept
on
the
grub
scrcw
until front
wh€elA is
at-
tachod
to
front shatt inll).
Front
Rad
A : Rädhalften
H13 und H17
über Radhlater
mit
eingeschraubtem
Ce-
windestift
zusammenkleb€n.
<<P!rt! (tull
alze)>>
<<Teile
in Originrlgösse>>
(I
M17
3mmx3c.ubScrew
M15
M5
M1
rNole
lhe
posilion
ol H18 and
H14
*H18
und H14 nicht vetuichseln
<<Fixing
oi Moror Coupling>'
<<Moior
OetriebekupplunE>>
A little space
Motor
K!ppl!nE
M12
M11
HI8 B4
HI4 E}4
'/.
O::i.",f
@ur
@
M11
) M1r
€!!lo
rö)
\-_/
@::*r::''
<<
Front WheelA>>
M17
m)
\\\ l
Y
Hl3
H17
Ht7
Ht3

Questions and Answers:

Question and Answer IconNeed help?

Do you have a question about the Tamiya GEPARD and is the answer not in the manual?

Tamiya GEPARD Specifications

General IconGeneral
BrandTamiya
ModelGEPARD
CategoryToy
LanguageEnglish

Related product manuals