39
Table 4.3 Zero, calibration, bump test, response and recovery time testing
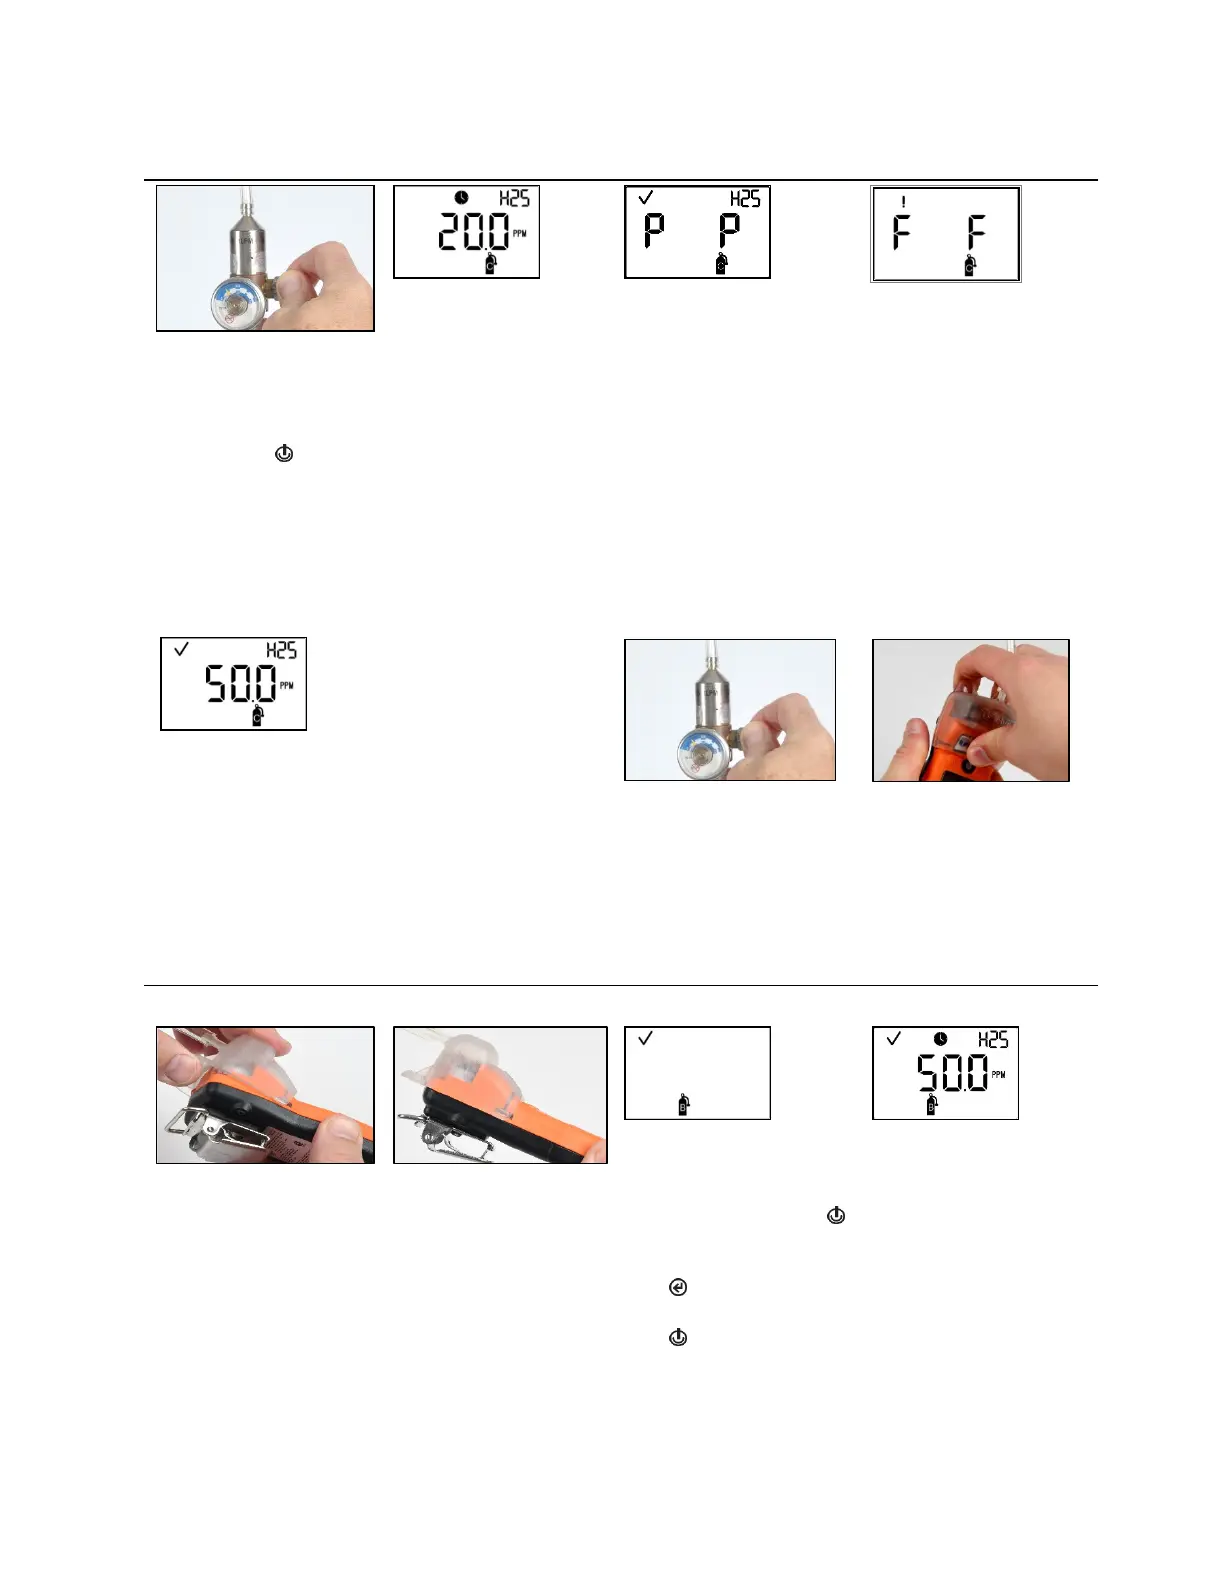
Calibration in progress
Calibration results (pass)
Calibration results (fail)
To start the flow of gas, turn the regulator knob in a
counterclockwise direction.
While the sensors are calibrated, the calibration-in-progress
screen displays the span reserve value.
If desired, press to cancel the calibration.
When the calibration is complete, the blue LED will flash, and
an audible beep will occur. If at least one sensor passes
calibration, two results screens are alternately activated; one
indicates the pass or fail result for each sensor and the other
displays the span reserve value.
If neither sensor passes calibration, the audible, visual, and
vibrating alarms turn on. Two results screens are alternately
activated; one indicates the fail results and the other displays
the span reserve value.
Note: With two installed, working sensors, the span reserve
value is the algorithm calculation of the DualSense
®
Technology.
Note: If the sufficient calibration gas value isn’t reached in
five minutes, the instrument will fail calibration
Span reserve value
—
If at least one sensor passes the calibration, the home
screen will be automatically activated.
Note: The span reserve value divided by the calibration gas
concentration yields the span reserve percentage. A span
reserve percentage of greater than 70% indicates a “good”
sensor; 50%-70% indicates “marginal” sensitivity. When the
span reserve percentage is less than 50%, the sensor will not
pass calibration.
To stop the flow of gas, turn
the regulator knob in a
clockwise direction and
tighten.
To remove the calibration
cup, lift up from the cup's
tabs. Set aside or store for
future use.
Bump testing
Initiate bump test
Bump test apply gas
Place the calibration cup over the case top; align its top
groove with the small ridge at the top of the instrument.
Press down to secure the cup in place; a click will sound.
Visually inspect the calibration cup to ensure its edges along
the top and sides align with the case top edges.
Note: From anywhere in the
operation-mode loop, press
until the initiate-bump-test
screen is activated.
Press to start the bump test
process.
Press to cancel the bump
test.
started, the apply-gas screen
is activated; the expected
type and concentration of
calibration gas are displayed.
This screen remains
activated for up to 5 minutes
as the unit awaits the
application of calibration gas.