18
Model 342 Tim HortonsOperating Procedures
150126
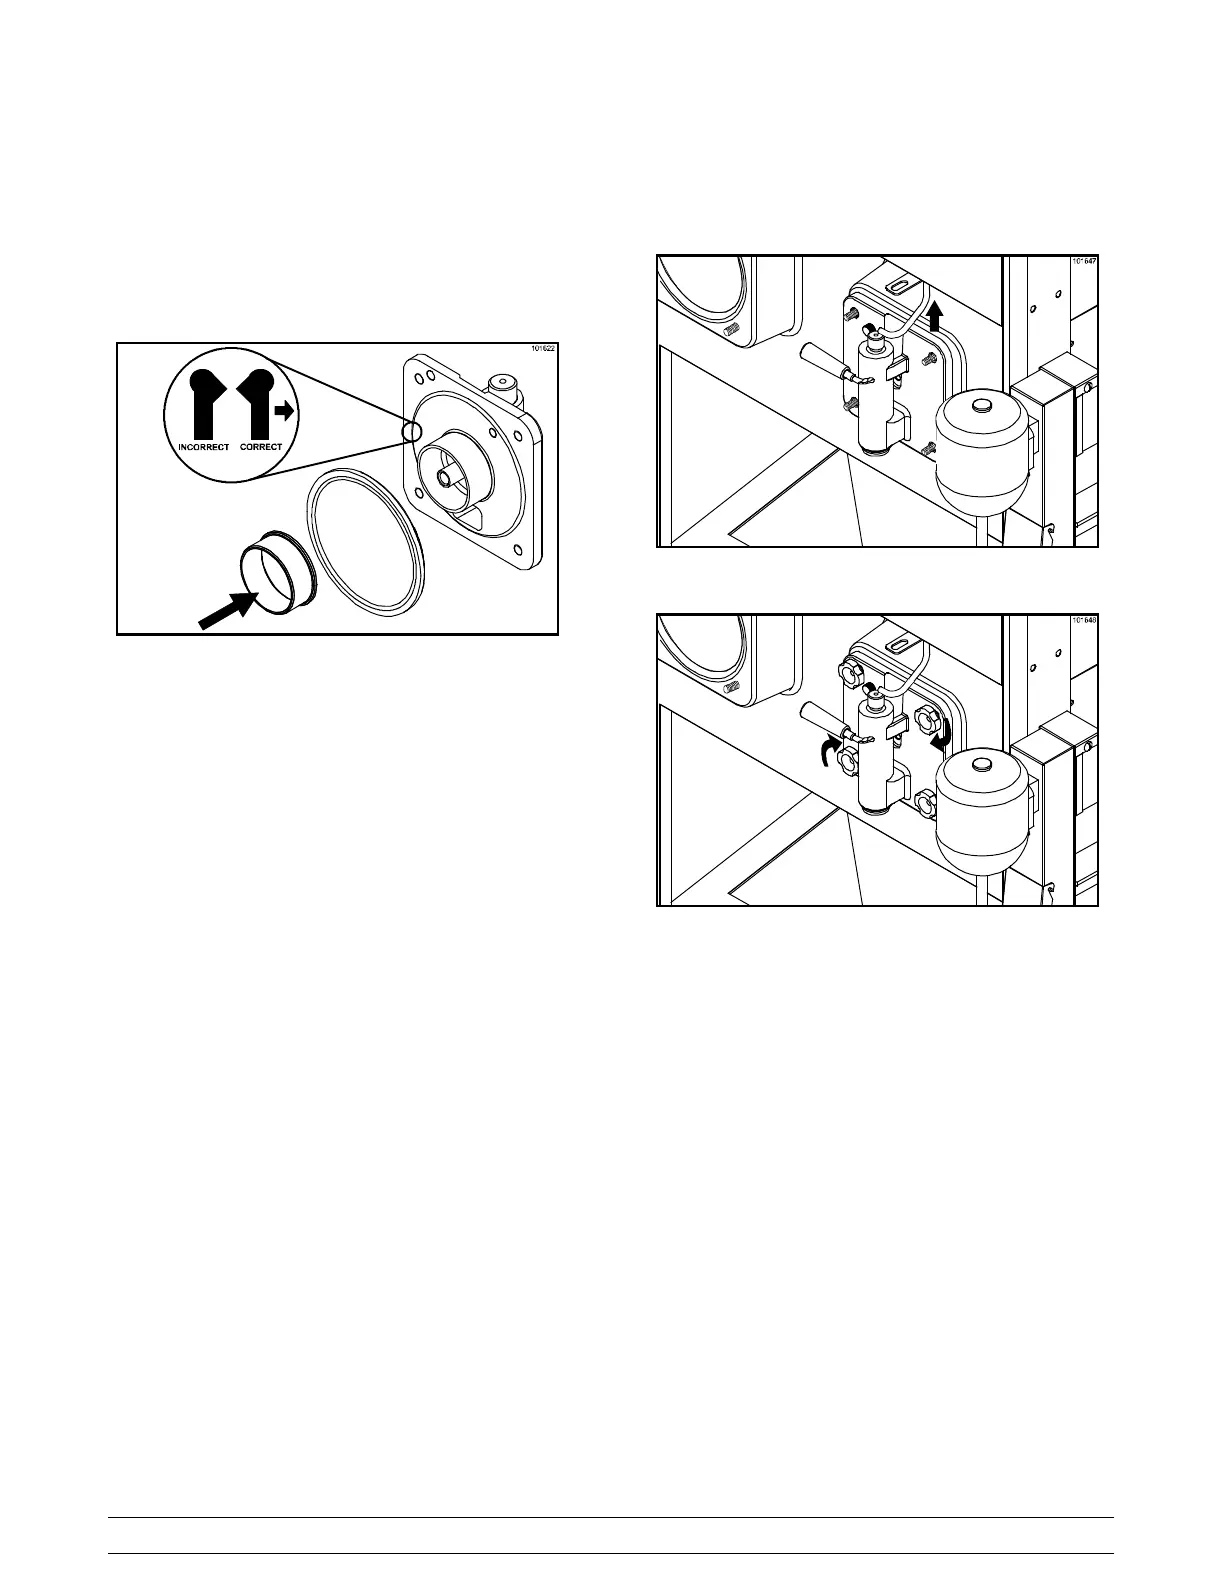
Step 14
Place the rounded side of the large rubber gasket
into the groove on the back side of the freezer door.
Slide the white plastic front bearing onto the bearing
hub, making certain that the flanged end of the
bearing is resting against the freezer door. Do not
lubricate the door gasket or the front bearing.
Figure 19
IMPORTANT: The door gasket must be installed
with the rounded side in the groove on the back
side of the door. If the door gasket is incorrectly
installed, mix can leak from the freezing cylinder.
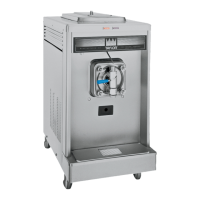
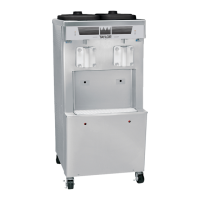
Step 15
Place the front end of the torque rotor into the hole
in the center of the door. Position the door onto the
four studs on the front of the freezing cylinder. Raise
the lever that rests on top of the draw valve and
push the door into place. Install the four handscrews
onto the studs and tighten them equally in a
criss-cross pattern to insure the door is snug. DO
NOT over-tighten the handscrews.
Note: Be sure to lift the draw lever when placing the
door into position. Failure to do so may cause a
failure to the related components.
Figure 20
Note: If the freezer door does not go into place
easily, position the open end of the beater assembly
in the 11 o'clock position.