Do you have a question about the Taylor Tim Hortons 390 and is the answer not in the manual?
Review installation area for hazards and equipment placement.
Specifies minimum air clearances required for proper unit operation.
Essential safety practices for installation personnel.
Guidelines for proper electrical installation and safety.
Ensuring correct clockwise rotation of the beater assembly.
Instructions for connecting water supply to water-cooled units.
Details on R404A refrigerant and handling precautions.
Details on warranty exclusions related to refrigerant usage.
Essential safety warnings and procedures for operation and maintenance.
Safety measures for operation, product handling, and environmental conditions.
Identifies components of the beater door assembly.
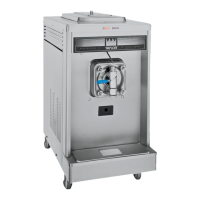
Lists and identifies various accessories for the unit.
Description and function of unit controls and indicator lights.
Explanation of the power switch positions: OFF, AUTO, and WASH.
How to reset the beater motor after an overload condition.
Indicates low product supply in the mix hopper.
Signals that the mix hopper is empty and refrigeration stops.
Lights indicating proper blend time for spinner operation.
Step-by-step guide for assembling the freezer parts.
Steps for cleaning and sanitizing the unit.
Procedure for filling the freezer with product.
Steps required when closing down the unit.
Steps to drain product from the freezing cylinder.
Procedure for rinsing the unit after cleaning.
Detailed steps for cleaning the unit.
Steps for disassembling the unit for cleaning or maintenance.
Guidelines for using brushes to clean unit parts.
Key points to ensure proper cleaning and sanitizing.
Steps to address high bacterial counts.
Routine checks for maintaining unit performance.
Precautions for protecting the freezer during winter storage.
Diagnosing and resolving issues when no product is dispensed.
Troubleshooting steps for when the unit won't operate in AUTO or WASH.
Addressing issues where the compressor does not run.
Resolving issues where the product is too thick.
Resolving issues where the product is too thin.
Addressing damage to the freezing cylinder walls.
Troubleshooting leaks into the rear drip pan.
Resolving issues with leakage from the door spout.
Steps for removing the drive shaft when it is stuck.
Conditions that must be met for the equipment warranty to be valid.
Items and costs not covered by the equipment warranty.
Exclusions and limitations of the equipment warranty.
Procedures for notifying Taylor of defects and pursuing remedies.
Conditions for the validity of the parts warranty.
Items and costs not covered by the parts warranty.
Exclusions and limitations of the parts warranty.
Procedures for notifying Taylor about part defects.
| Brand | Taylor |
|---|---|
| Model | Tim Hortons 390 |
| Category | Freezer |
| Freezing Cylinder Qty | 1 |
| Hopper Qty | 1 |
| Certification | NSF, cUL |