17
4 Loading Media
4.4.2 Adjusting the Printhead Pressure
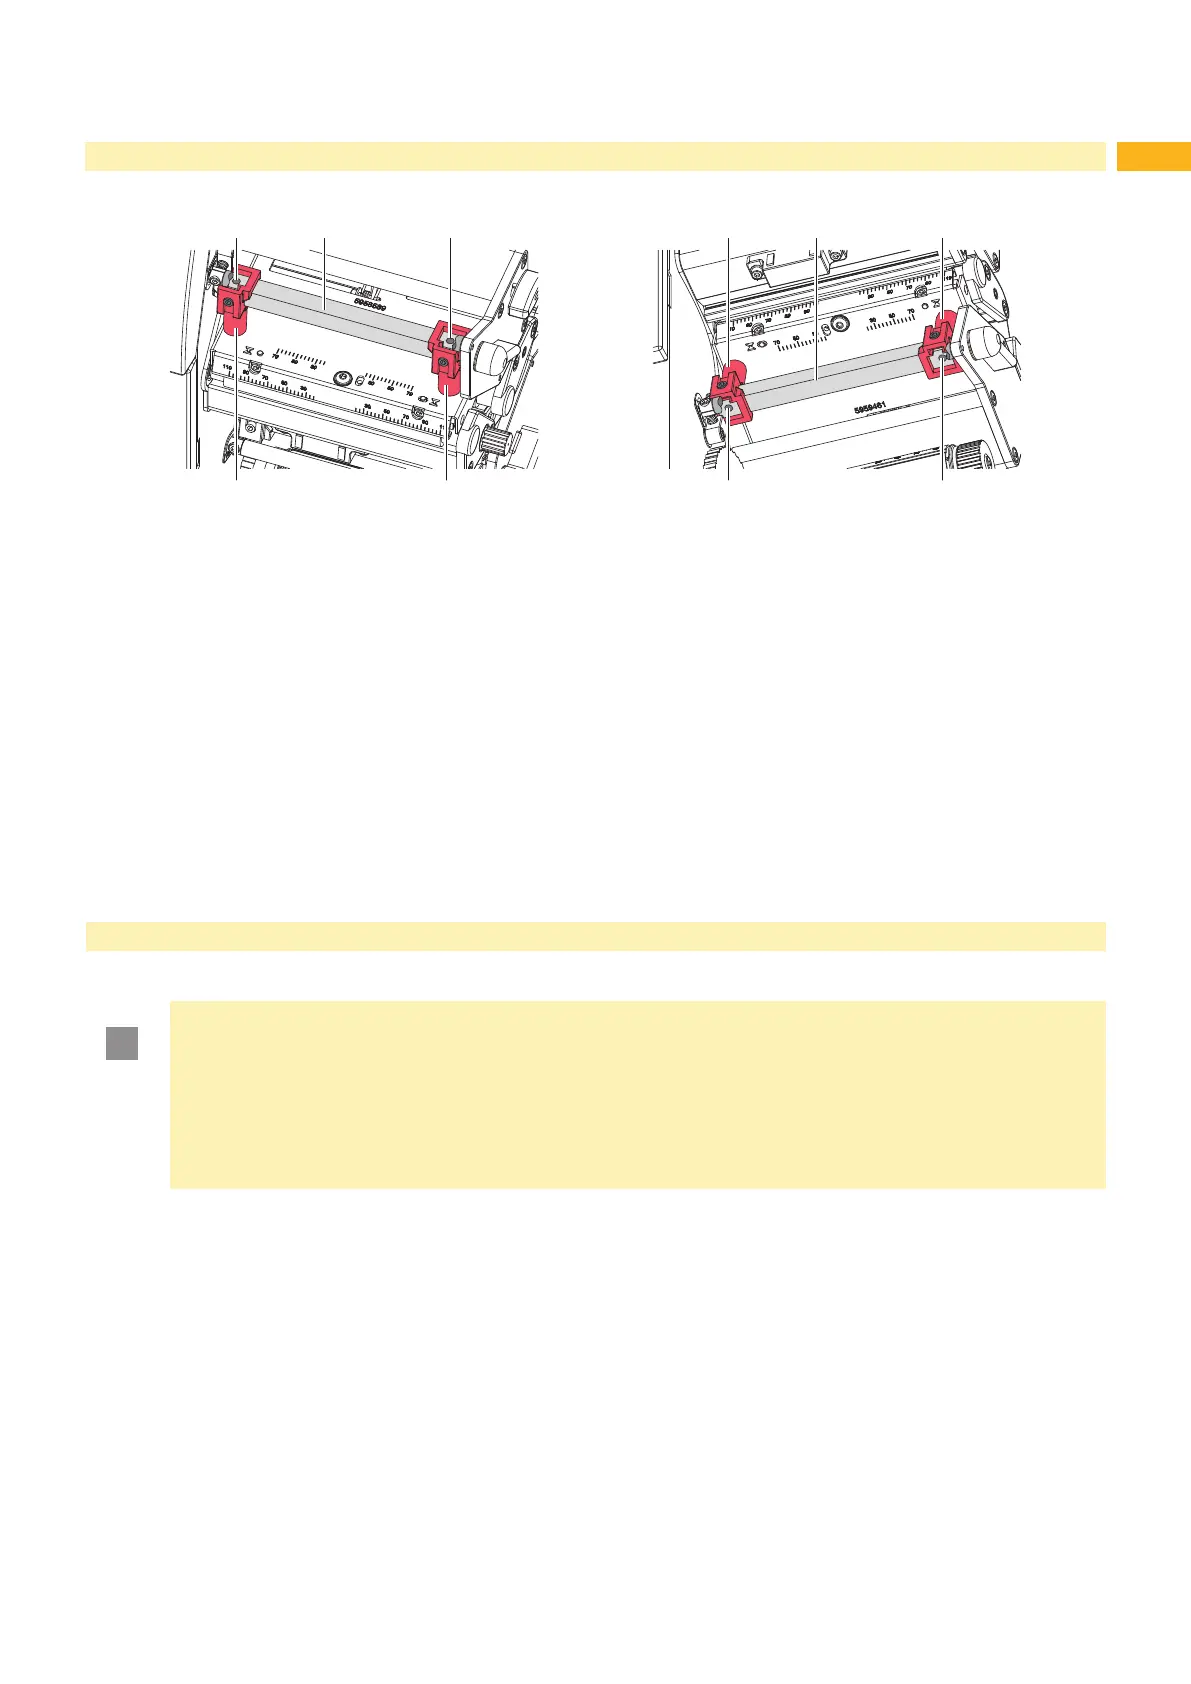
1 12
3 32
Fig. 19 Adjusting the printhead pressure Fig. 20 Adjusting the printhead pressure
at the upper printhead at the lower printhead
Normal operation of the printer will not need a change in factory set print head pressure. However if it becomes
necessary to please contact your local TE Connectivity representative for advise.
The printhead pressure can be changed with the screws (1) within the plungers (3). Increasing the head contact
pressure leads to an improvement of the print image density on the corresponding side and to a shifting of the ribbon
feed path in the corresponding direction.
1. To access the screws (1) through the holes in the square axle (2) move the plungers to the outermost positions
4.4.1 on page 16.
2. Turn the screws (1) in small steps to adjust the printhead pressure :
- To increase the printhead pressure turn the screws clockwise.
- To decrease the printhead pressure turn the screws counterclockwise.
3. Move the plungers to the operating position and check the result. If necessary rerun the procedure.
5 Printing Operation
5.1 Printhead Protection
!
Attention!
Printhead damage caused by improper handling!
Do not touch the heating elements of the printheads with the ngers or sharp objects.
Ensure that the media is clean.
Ensure that the media surfaces are smooth. Rough media act like emery paper and reduce the service
life of the printhead.
Print with the lowest possible printhead temperature.
The printer is ready for operation when all connections have been made and media and transfer ribbon have been
loaded.
5.2 Synchronization in Cut Mode
To guarantee the correct length of the rst label a cut prior print job is required :
Activate in the printer driver menu General > Print Settings > Advanced Setup the setting "cut before labels".