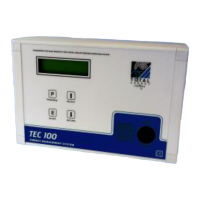
Do you have a question about the TEC 100 and is the answer not in the manual?
Qualified engineers required. Volt-free circuits, careful wiring essential for preventing PCB damage.
Instructions for connecting the 240V AC 1Ph 50Hz supply to the TEC 100/200 PCB, including diagram.
Connecting control wires to boiler terminal blocks, including link removal. Notes on flex cable and conduit.
Details on using the three control relays for pumps, boiler circuits, HW pumps, and solenoids on TEC 100/200.
Connecting Flow, Return/Hot Water, and External sensors to the TEC 100/200 PCB. Includes sensor fitting guidance.
Connecting an optional HW tank sensor, replacing the Return Sensor, and its recommended mounting location.
Guidance on optimal positioning of the external sensor for accurate readings, considering north-facing walls and shade.
Calibrating the TEC 100/200's temperature display to compensate for heat losses using Program 17.
Overview of the 18 main programs available on the TEC 100/200 Digital, detailing their functions and typical value ranges.
Understanding the PROGRAM, SELECT, and RETURN buttons for navigating menus and changing settings in running and programming modes.
Explanation of display indicators like BOOST, FIRING, TEMPERATURE SET, ECONOMISING, and EXT flashing.
Procedure for establishing the maximum flow temperature by adjusting boiler thermostat and observing system response via bypass.
Step-by-step guide to setting the system's date, time, and day of the week for accurate scheduling.
Final steps to confirm the programmed calendar settings and proceed to the next configuration program.
Detailed instructions for programming two daily ON/OFF periods, including setting hours and minutes for heating operation.
Setting second ON/OFF times and repeating daily schedules. Managing multiple days' programming efficiently.
Configuring the time clock operation: ONCE, TWICE (two periods), or 24 HOUR continuous operation.
Selecting the days the heating system operates: EVERY DAY, WEEK ENDS only, or WEEK DAYS only.
Setting a variable pre-heat period to ensure target temperatures are reached before occupancy, specifying duration in minutes.
Configuring the system to switch off earlier than programmed based on external temperature for energy savings.
Adjusting the maximum allowable flow temperature for the heating system to meet specific heating requirements.
Establishing a minimum flow temperature to prevent excessive temperature drops and ensure heating system performance.
Defining the minimum return temperature, critical for hot water supply or heating-only systems based on specific needs.
Configuring the flow temperature for periods between the first OFF time and the second ON time.
Using Night Temperature for frost protection or for energy savings during unoccupied periods.
Defining the external temperature threshold below which frost protection (and potentially Night Temperature) is activated.
Setting the external temperature above which the heating system will automatically switch off, acting as a summer cut-off.
Setting the differential to match the boiler thermostat's cycling behaviour for optimal system stability.
Setting Hot Water Priority to YES (24hr), NO (during ON periods), or HW ONLY, controlling heating pump behaviour.
Activating Internal and External Optimisation for the heating pump to improve efficiency and comfort.
Calibrating Flow, Return, and External temperature sensors for accurate readings by adjusting offsets.
Completing the calibration process for all temperature sensors and exiting the calibration mode.
Configuring the TEC 200 unit to rotate the lead boiler daily for balanced wear or to fix boiler 1 as lead.
Steps to safely exit programming mode and return to the normal operating display, including auto-reversion.
Instructions for wiring the monitoring socket, including connections for timeswitch output and burner supply for demand/firing meters.
How the integral digital timer controls active/bypass periods and displays firing and demand hours on meters.
Procedure for testing the monitoring system by initiating active/bypass periods and resetting hour meters.
| Brand | TEC |
|---|---|
| Model | 100 |
| Category | Control Unit |
| Language | English |