11
Model: TX-247 Article No. 5073, 03/2023
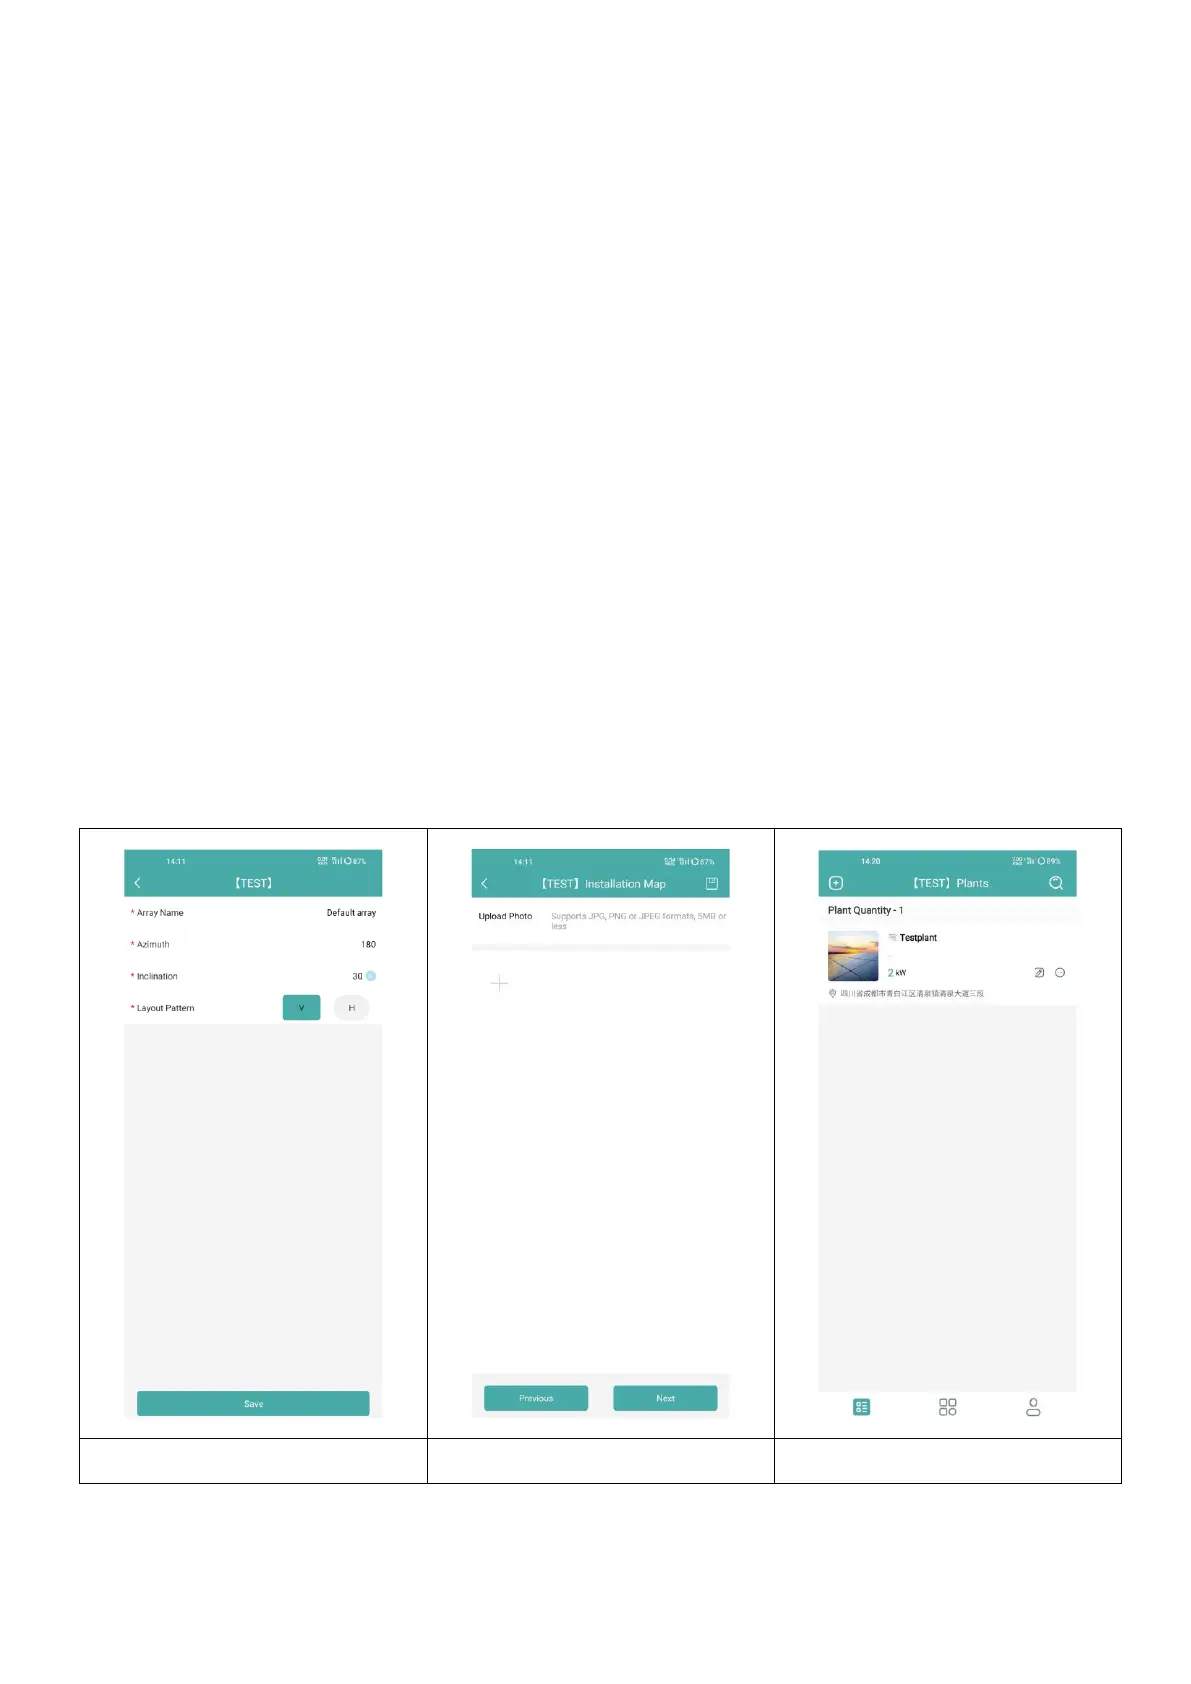
9. Complete the information of your solar panel array according to the
actual installation situation.
• Array Name: Enter a name for the array. Freely selectable.
• Azimuth: Enter the angle for the celestial direction of the panel. E.g.:
East = 90°, South = 180°, West = 270°
• Inclination: Enter the angle for the inclination of the solar panel. E.g.:
30°, 35°, 40° 45° depending on the location the plant is set up.
• Layout Pattern: Select either the solar panel is mounted vertical (V)
or horizontal (H).
10. Click “+” to complete the remaining information. By clicking on “+” you
can add further photos of your plant. But it is not necessary.
In the last step you need to enter some settings for calculation.
• Plant Name: Was already given in the beginning, but could be
changed here.
• Currency: Select the currency.
• Electricity Price per Unit: Enter the price you are currently paying for
electricity. This is just for calculating the money the plant is saving
you.
• Networking: Enable to sync your data with server.
11. Now your solar balcony power plant has been successfully set up. It
shows up on the start page in the App under plants.
 Loading...