10
Model: TX-247 Article No. 5073, 03/2023
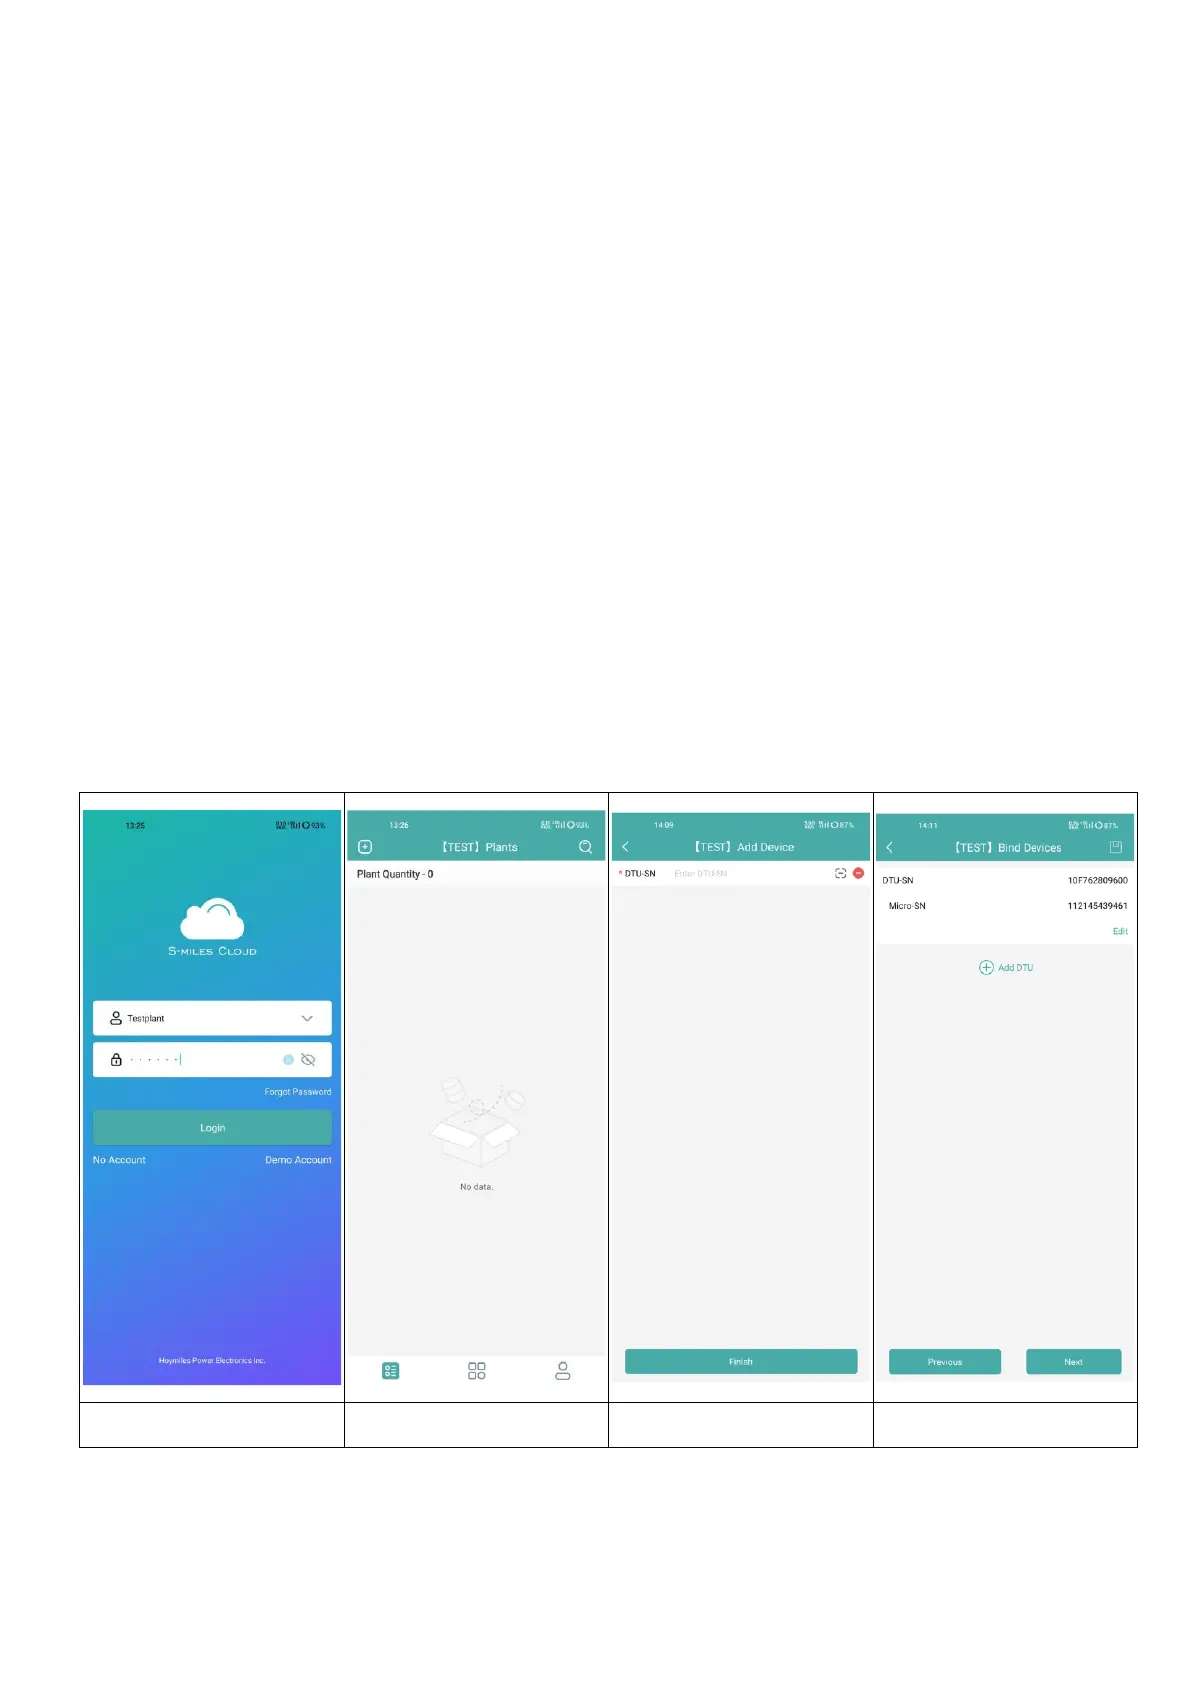
Creating a plant
5. Log into your account that has just been created.
6. Click “+” on the upper left and complete the basic information of your
solar balcony power plant.
• Plant Name: Enter a name for the plant. Freely selectable.
• Plant Type: Choose Residential Plant for solar balcony power plant
• Capacity (kW): Fill in e.g. 300W =0.3kW; 600W=0.6kW;
800W=0.8kW depending on the solar balcony power plant you own.
• Time Zone: Select the Time Zone for your Location. Best is to search
for the capitol city of your country.
• Address: The Address is chosen by your GPS Location. To correct it
zoom in by clicking on +/- and move the map.
• Region: First choose the country. If necessary choose the state and
after that the district.
• Upload Photo: Not necessary. You can upload a photo of your solar
balcony power plant if you want.
7. Add the DTU by typing in the DTU SN manually or scan the SN sticker
on it.
8. Click on Add Micro to add your microinverter by typing in the
microinverter SN manually or scan the SN sticker on it.
 Loading...