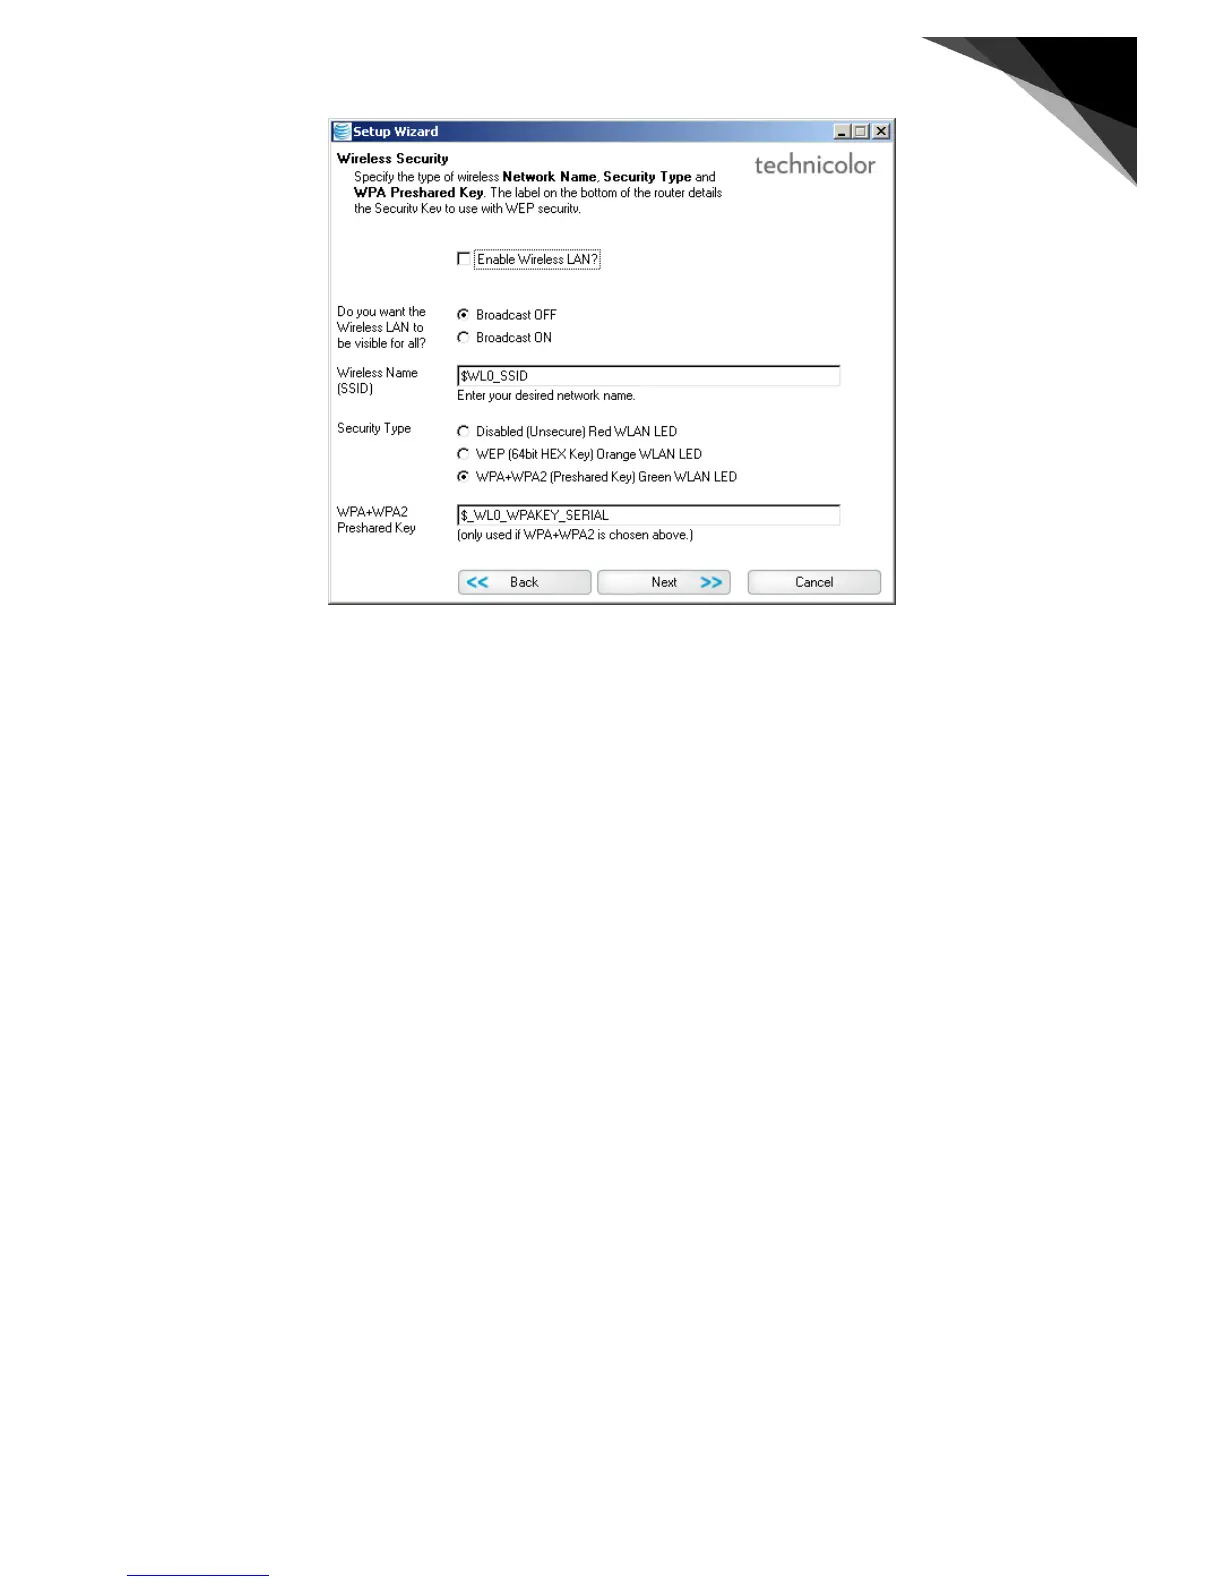
Figure 25 Ticking the box will enable WLAN access.
If you do not want to activate the Wireless LAN, just click “Next”.
Several options can be set via this Wizard, but by default the best option is select or completed:
• To enable the WLAN check the box next to “Enable Wireless LAN”
• As additional Security the WLAN SSID is not broadcasted. This prevents your neighbor to see your WLAN, and
you can only connect to it, if you manually complete the configuration on your home devices. WPS ( the easy
help option to register home devices) is also de-activated if “Broad-cast” is off.
• SSID: by default the SSID consists of “ATTTG” concatenated with the last 6 characters of the MAC address of
the Gateway. This MAC-address can be found at the bottom of the Gateway, on the left side of the label
starting with “MAC: 10134573EE21“ . A resulting +example SSID is e.g. ATTTG73EE21 . The main reason for
this is to avoid identical SSIDs. But the field can be freely edited. Both the 2.4 GHz and the 5GHz frequencies
will use the same SSID.
• Security type; this has 3 options:
◦ Disabled; the LED indication at the front of the gateway of the WLAN is red. This security level is dis-
advised as it offer no security at all.
◦ WEP; the LED indication of the WLAN status is orange. This level is not advised either as its security is
minimal.
◦ WPA-WPA2: the LED indication of the WLAN is green. This is the most secure WLAN configuration
possible.
• Pre-shared Key: this is the security key used to encrypt the network connection between the device and the
gateway. It is used for both WEP and WPA-WPA2. The default key can be found at the back of the gateway on
the label.
If all settings have been selected, click “Next”. This will present the last panel completing the configuration Wizard.
 Loading...