EasyManuals Logo

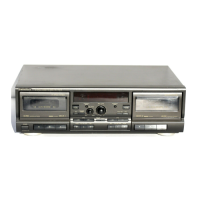
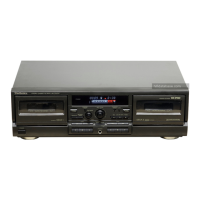
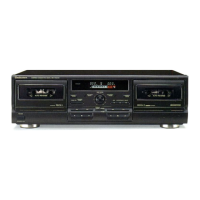
Technics RS-TR979 Operating Instructions

Technics RS-TR979
24 pages
To Next Page IconTo Next Page
To Previous Page IconTo Previous Page
Page #12 background imageLoading...
Page #12 background image
Recording
Either
normal,
Cr0
2
or
metal
type
cassettes
can
be
used.
398
74
52n
11
RS-TR979
l
H
i
111
li
11
h
i!
h
i!
h n n
i
m
i
m
i
i'h
sTTiI
11111111111111
li
The
steps
described
below
are
an
example
for
recording
on
deck
2.
To
record
on
deck
1
,
the
corresponding
buttons
for
deck
1
should
be
used
in
steps
2,
5,
7
and
11
,
as
well
as
the
corresponding
pause
and
stop
buttons.
|Oii
RS-TR777,
recording
Is
only
possible
on
deck
2.1
Notes:
Switch
OFF
(by
pressing
the
tape-to-tape
recording-speed
but¬
ton)
whichever
tape-to-tape
recording-speed
indicator
that
is
il¬
luminated.
(Refer
to
step
3
on
page
16.)
If
this
unit
is
used
In
combination
with
a
Technics
compact
disc
player
that
has
a
synchro-edit
terminal,
switch
OFF
the
com¬
pact
disc
edit
indicator
on
the
compact
disc
player
(by
pressing
the
stop
button
on
the
compact
disc
player).
Be
sure
to
set
the
bias-adjustment
control
to
0.
1
Select
the
input
source
on
the
Amplifier.
Insert
the
cassette
to
be
used
for
recording
into
deck
2.
Recordings
cannot
be
made
on
the
leader
tape
(attached
to
each
end
of
recording
tape),
so
advance
the
tape
slightly
from
its
end
before
starting
a
recording.
5
Press
the
ATC
button.
ATC
(auto
tape
calibration)
will
begin,
and
will
be
completed
in
approximately
one
minute.
(For
detailed
information,
refer
to
“About
the
ATC
function”
on
page
13.)
(Recording
is
also
possible
without
performing
ATC.]
6
The
sound
source
to
be
recorded
should
be
played
before
the
recording
Is
started
in
order
to
adjust
the
recording
level.
7
Press
the
record
button.
(The
recording
indicator
will
illuminate
and
the
playback
in¬
dicator
will
flash
continuously.
The
unit
will
be
in
the
recor¬
ding
stand-by
mode.)
8
Adjust
the
recording
level.
While
watching
the
level
on
the
Input
level
meter,
adjust
the
"REC
LEVEL"
control
so
that
the
peak
Indication
Is
as
high
as
possible,
without
exceeding
the
indication
noted
in
the
chart
below.
3
Select
the
Dolby
noise-reduction
system
(B
or
C)
to
be
used.
Set
to
"OFF”
if
neither
of
the
Dolby
noise-reduction
systems
is
to
be
used.
4
Select
the
appropriate
reverse
mode
(“
or
“cu>”).
zzt
Select
this
mode
to
record
on
one
side
only.
cTz>
Select
this
mode
to
record
on
both
sides.
The
recording
will
be
made
on
side
"B"
after
recording
on
side
“A".
The
tape
will
stop
at
the
end
of
side
"B”.
9
A
djust
the
left/right
recording
balance.
1
0
Stop
playback
of
the
source.
1
1
Start
recording,
then
start
playing
the
source
to
be
recorded
from
the
beginning.
The
playback
indicator
will
illuminate
steadily,
and
the
recording
will
begin.
if
only
one
side
of
the
tape
(reverse
mode
position:
zZ)
is
to
be
recorded,
press
the
playback
button
that
cor¬
responds
to
that
side.
To
record
on
both
sides
of
the
tape
(reverse
mode
posi¬
tion:
ciu
),
press
the
“A”
side
playback
button
(
).

Other manuals for Technics RS-TR979

Questions and Answers:

Question and Answer IconNeed help?

Do you have a question about the Technics RS-TR979 and is the answer not in the manual?

Technics RS-TR979 Specifications

General IconGeneral
BrandTechnics
ModelRS-TR979
CategoryCassette Player
LanguageEnglish

Related product manuals