44
2. Quick Installation Guide
2.1 VP-II X Location
Installation Environment
It is strongly recommended that the VP-II X be installed in a place where it is not exposed to direct rain,
excessive dust or excessive direct sunlight over 20,000 LUX. Excessive dust and sunlight may
degrade verification performance, and exposure to rain may cause damage to the system. An enclosure
shall be used for outdoor installations.
Also, do not install the VP-II X where the floor is inclined. Inclined floors may cause an unstable standing
position for Users when placing hands which can degrade verification performance.
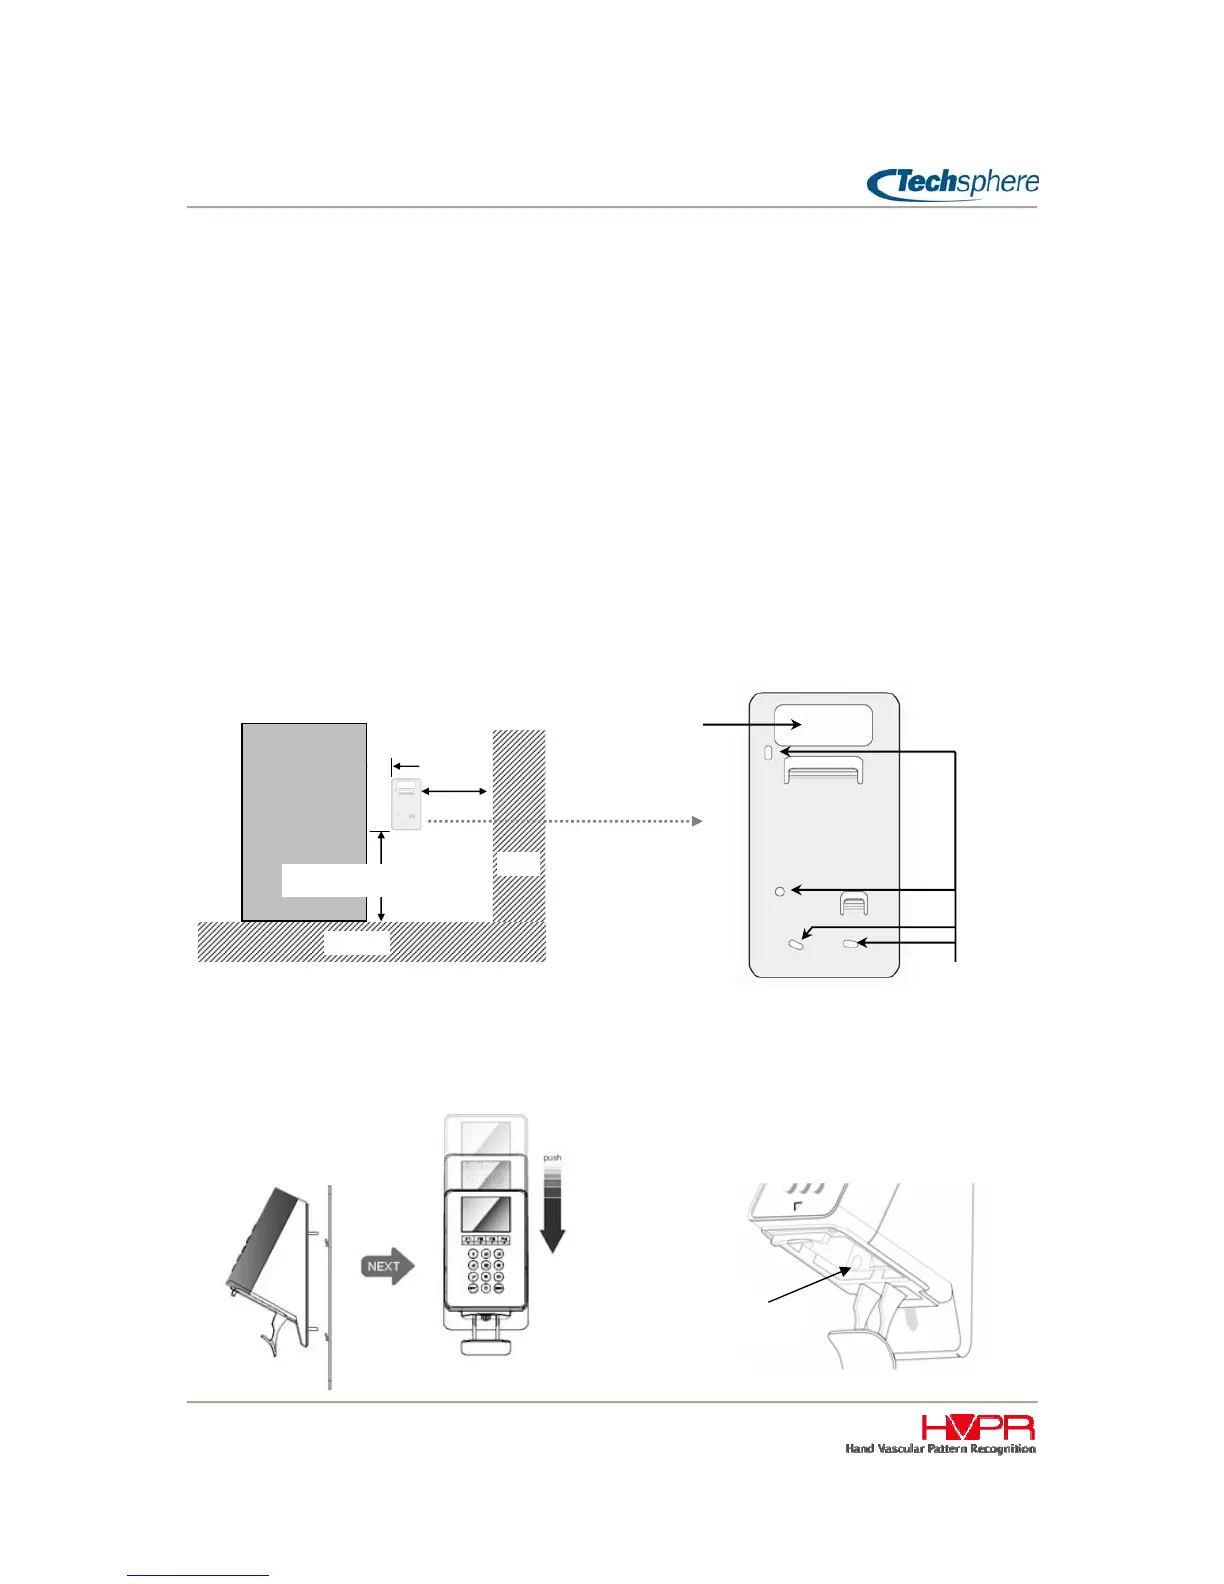
Locating Bracket and Scanner
Install the VP-II X at a height of 1,010 ~ 1,045mm from the floor and 100mm from the doorframe. If there
is a nearby wall perpendicular to the door, the VP-II X should be at least 200mm away from the wall in
order for Users to be able to stand properly to place hands.
Put the bracket in place for installing the VP-II X and make a hole after checking the hole-location for
cabling. Fix the bracket on the wall using the bracket screws.Ԩ
Fix VP-II X on the Bracket
Put the VP-II X on the bracket and push all the way down. And then fix the VP-II X on the bracket using
the bracket screw located in the sensor module hosing.
Bracket screw
Cabling hole
Door
100mm
200mm
Floor
Wall
Screws
(4Φ×30mm)
1010~1045mm