8
Measurements
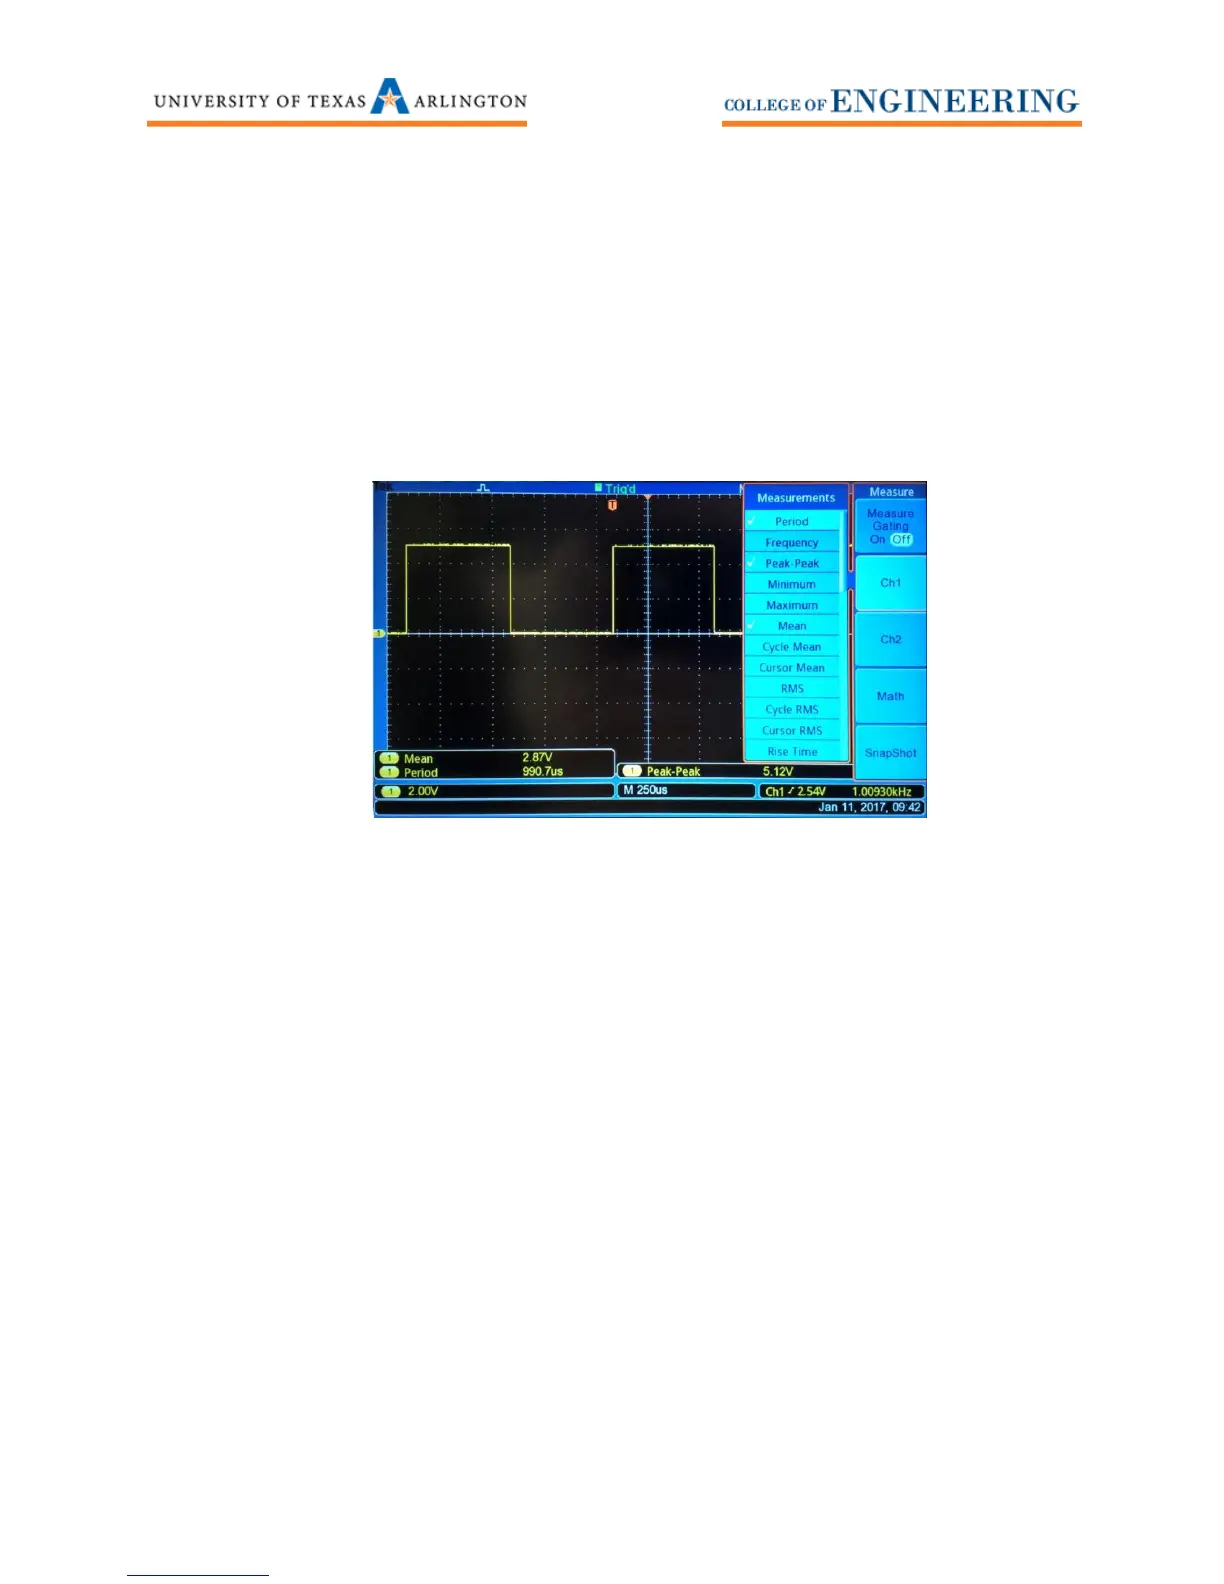
The Tektronix TBS1052B-EDU oscilloscope makes a wide variety of automated measurements.
1. Select Measure. Select the channel you wish to measure (Ch1 or Ch2 or Math).
2. Use the Multipurpose wheel to turn on or off any of the available measurements. See
Figure 8.
Figure 8: Some of the many measurements the TBS1052B-EDU can measure.
Save / Recall – Screenshots, CSV and Setup
The TBS1052B-EDU has a USB port on the front of the oscilloscope that will accommodate a USB drive.
You can save screenshots, comma separated value files (CVS files), and oscilloscope setup information to
your USB drive. You can only recall setup information from a USB drive on the oscilloscope.
Saving a BMP/JPG to your USB drive
1. Insert a USB jump drive into the front of the oscilloscope.
2. Press the Save Recall button.
3. Press the Print Button - Prints softkey. Use the Multipurpose wheel to scroll to Save Image to
File then press the Multipurpose wheel to select it. Press the Select Folder softkey if you wish to
store screenshots into a different folder. You have now set the Print button (The button with a
small image of a 3.5 floppy disk) to save screenshots from the oscilloscope to your USB drive.
4. If you wish to save your screenshot in a different format, select the softkey Action. Use the
Multipurpose wheel to scroll to Save Image, then press the wheel to select it. Now you can
access the softkey File Format and select from either BMP or JPG image formats.
 Loading...