Installation Instructions
1. Pull the shelf o
ut from the rack.
2. Place the instrument on the shelf.
3. Align the instrument bracket screw holes with the threaded holes in the shelf.
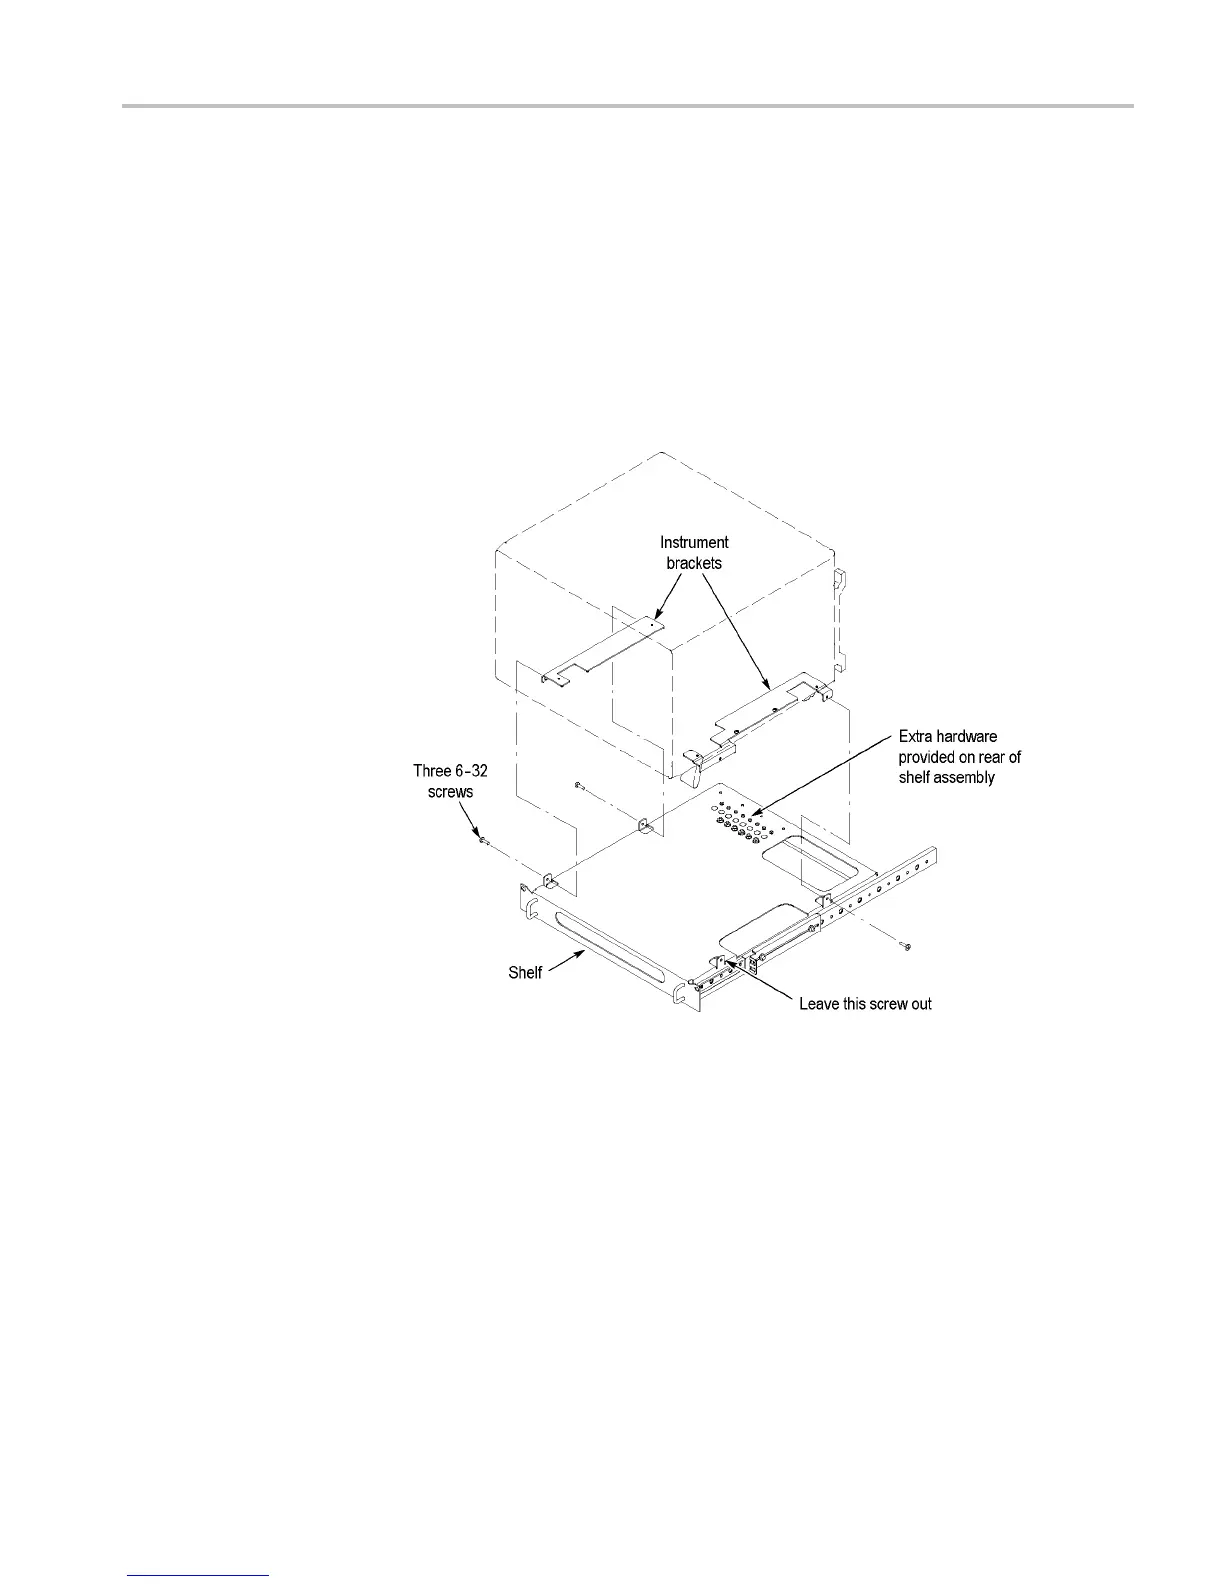
4. Attach the instrument to the shelf with three 6-32 screws. Leave the front
right-side screw out. The screws are stored on the rear of the shelf.
The following figure shows a TLA6400 series instrument. The instrument
brackets for the TLA7012 and TLA6200 series instruments look similar.
Figure 14: Mounting the instrument to the shelf
5. Slowly push the shelf back into the rack.
If your instrument is a TLA7012 or TLA6200 series, verify that the instrument
handle and power cord clear the right-side rack rail. If nece ssary, remove
from the instrument:
a. The handle, by first removing the right-side cover (six screws), and then
the two handle screws. Replace the cover and mount the h andle on the
shelfasdescribedinstep8.
b. The power cord, by disconnecting it from the socket of the instrument and
pushing the cord flat agains t the instrument. If necessary, remove the cord
entirely by turning the cord mounting post 1/4-turn clockwise.
TLA6200, TLA6400, & TLA7012 Rackmount Kit Instructions 19

 Loading...


