P/N 95B-6131-00 (April 2022) RiverRay Deployment Guide
Page 12
EAR-Controlled Technology Subject to Restrictions Contained on the Cover Page.
Run Built-In Tests
The RiverRay is commanded to perform a BIT test on power up, and flashes its LED lights to indicate the
results of the test. It simultaneously transmits the results of the BIT test, the status of the internal GPS
connection and any ancillary devices connected to it to the host computer. On the Acquire menu, click
Execute ADCP Test to verify the ADCP is functioning properly.
See Chapter 3 Tutorials and Chapter 9 QA/QC in the WinRiver II User’s Guide.
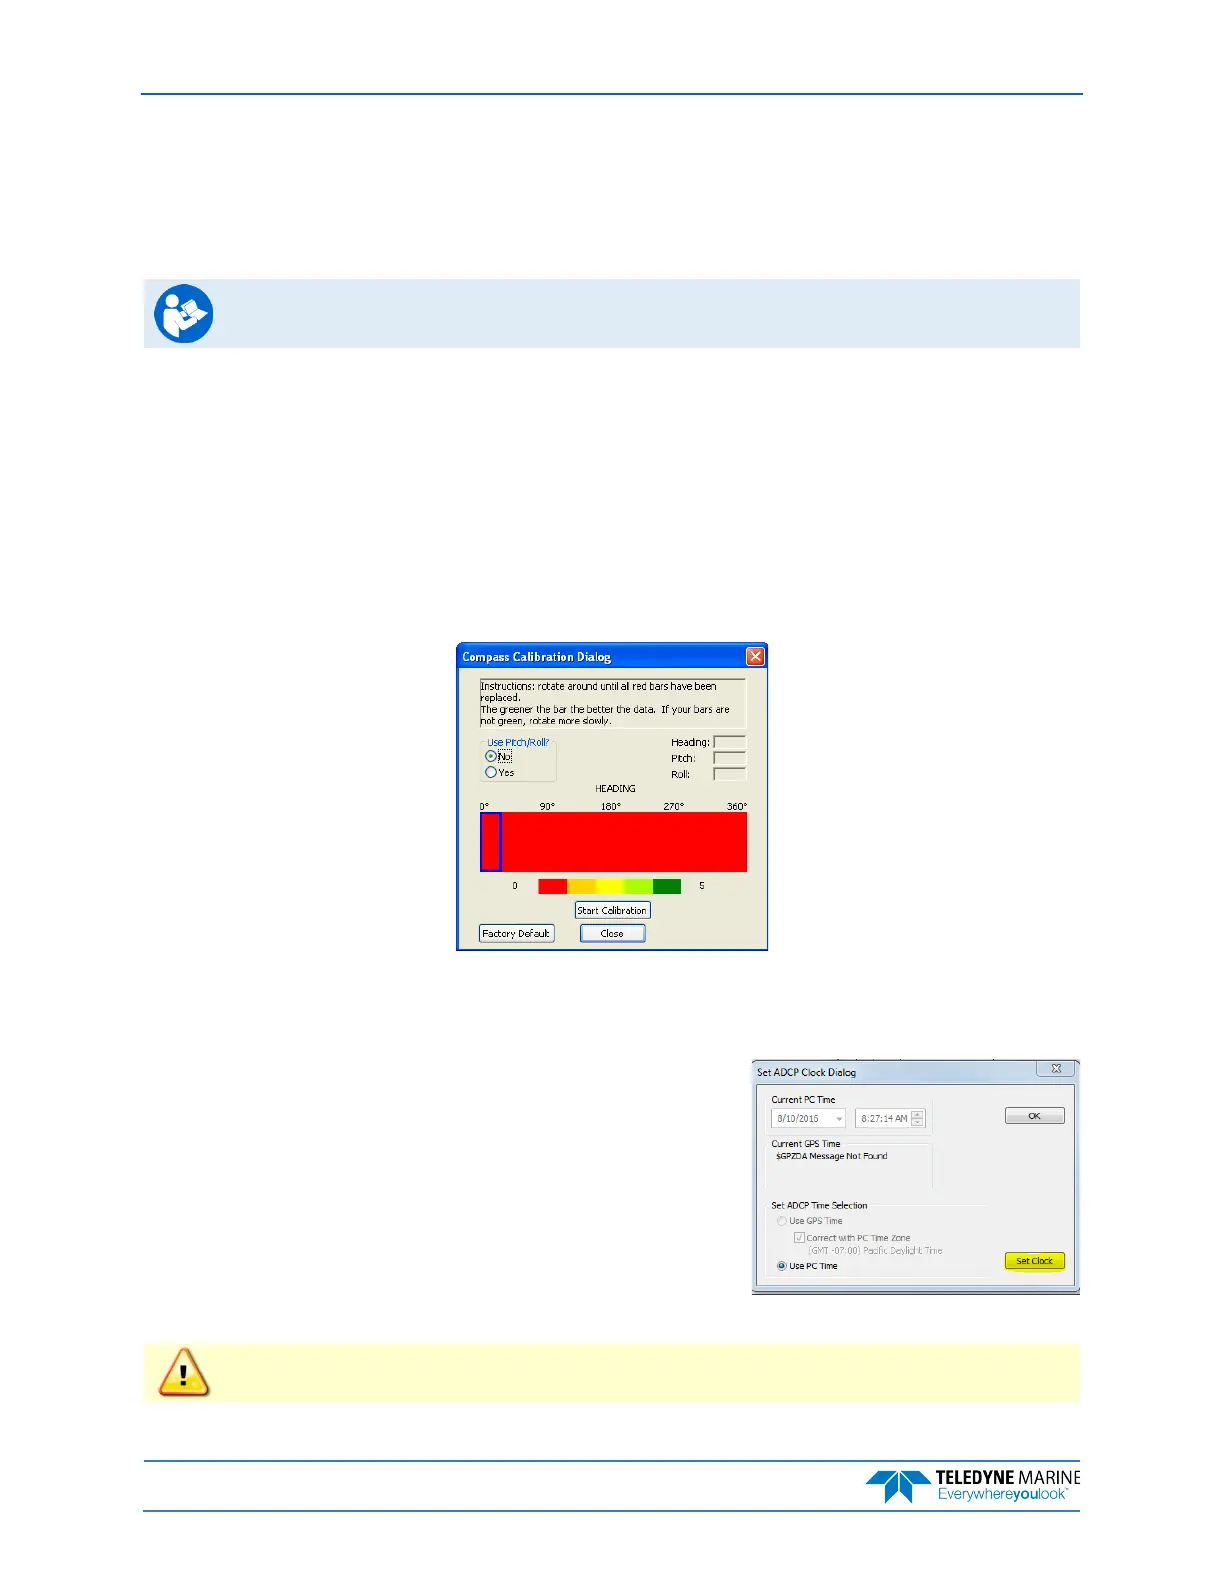
Compass Calibration
Next, the Hydrologist performs a compass calibration. After ensuring that the system is well away from
sources of magnetic interference, the Hydrologist starts the compass calibration within the application
and then either: slowly rotates the RiverRay as suggested by the application (tethered boat/SxS) or slowly
drives the boat in circle (manned boat). During the calibration process, feedback is provided to the user as
to the quality of the collected magnetic field data at each partition of the 360° of rotation.
On the Acquire menu, click Execute Compass Calibration. When the calibration starts, select No for
the Use Pitch/Roll selection. In normal river discharge circumstances, using the “No” Pitch and Roll se-
lection is sufficient.
The no Pitch/Roll calibration (also called a single-tilt
calibration) requires two rotations while the ADCP is
on a flat, level surface.
Moving Bed Test/Set the Clock
At this point, the RiverRay should be tested and the compass cali-
bration completed; once those steps are complete, it is ready to
start the moving bed test. The RiverRay is placed in the water, and
the Hydrologist enters the command to start it pinging using the
Acquire menu, and click Start Pinging or use the shortcut key
F4. If this is the first measurement taken, WinRiver II will prompt
for the clock to be set. Click the Set Clock button.
On the Acquire menu click Select Moving Bed Test. Select
Stationary or Loop Test and click the Start button.
Only clicking the OK button will NOT set the clock. The user MUST click the Set Clock button.