EasyManua.ls Logo

Telstra Smart Modem GEN 2 - User Manual

Telstra Smart Modem GEN 2
3 pages
Print Icon
To Next Page IconTo Next Page
Loading...
1.3) Click on the 'Wi-Fi' icon (Refer to Diagram B)
Diagram B
1.5)To verify that you had correctly turned off the band steering, go to your
phone’s settings -> Wi-Fi
You should now have two Telstra Wi-Fi names displayed, one ending with -5G
and the other without.
Please refer to the image, you will see Telstra Wi-Fi Names marked with 1 & 2.
The Telstra Wi-Fi signal marked with #1 is the one that needs to be selected, as
it does not end with (-5G)
Do not
select the Wi-FI signal #2 as it ends with 5G, as Genio smart products do
not support 5FHz Wi-Fi signal.
Genio Device
How to make your product blink
SLOWLY
1 Blink every 2 Seconds in order to use AP Mode to pair with your phone.
Lighting devices
While the light is blinking quickly, turn the power off, on, off, on, off, on
Smart plug without USB port
While the on/ off switch is blinking fast, press and hold the on/off button until it is blinking slowly
Smart plug with 1 USB port
Hold down the power button for 5sec until you hear a click. Let go of the power button and then press the power button again.
Smart plug with 2 USB port
While the on/ off switch is blinking fast, press and hold the on/off button until it is blinking slowly
Smart power-board, Smart Desk Lamp
While the on / off button is blinking fast, press and hold the on/off button until it is blinking slowly.
LED strip light, fairy light,
While the light on the adaptor is blinking fast, hold down the button on the adaptor until it starts to blink slowly.
Neon light, patch light, spotlight
While it is blinking fast, turn it off on off on, off on
Smart portable lamp
While it is blinking fast, turn it off on off on, off on
Once you have selected the 2.4Ghz Network, the next step is to Pair your Genio Smart Device with your phone.
For this product we need for the product to be Blinking slowly, (1 Blink per 2 seconds).
Detailed below are instructions on how to change your product from blinking quickly (2 Blinks per second to 1 Blink every 2 seconds)
The Genio Smart camera’s don’t have the AP mode, in order to pair, you will need to reset it and use the QR code scanning method to pair
PAIRING INSTRUCTIONS FOR Testra NBN MODEM
Step 1: Set up network connection
The following instructions are for Telstra Customers who are experiencing issues such as - Time out error - Device not found error or having trouble connecting their
Genio Smart Devices to the Genio app.
1.1) Login into your modem's access page by typing http://mymodem into your web browser's address bar (not the google search box) on your PC, laptop or smart phone.
Please ensure your device is connected to your Telstra network.
If http://mymodem doesn’t work, please try http://192.168.0.1
1. 2) You will now be navigated to the Telstra router login page, the username & password by default are already populated, all you need to do is click on the Sign in button,
if however the username and password are not there simply type - admin for the username & Telstra for the password (note Telstra is with upper case T)
1.4) Scroll down to Wi-Fi Network, untick the Band Steering Enabled, then hit
Save
Question and Answer IconNeed help?

Do you have a question about the Telstra Smart Modem GEN 2 and is the answer not in the manual?

Summary

Telstra Modem Setup for Genio Devices

Accessing Modem Settings

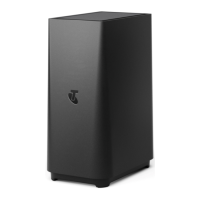
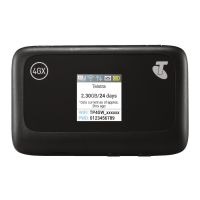
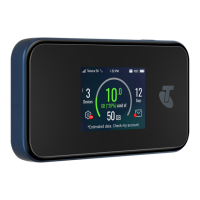
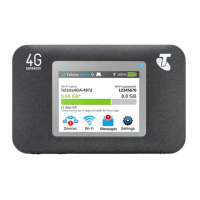
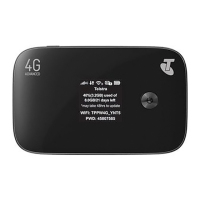
Login to your Telstra modem's access page via web browser to configure network settings.

Disabling Band Steering

Turn off band steering in modem Wi-Fi settings to ensure compatibility with Genio devices.

Selecting 2.4 GHz Wi-Fi

Verify and select the 2.4GHz Wi-Fi network for connecting Genio smart products.

Genio Device Preparation for Pairing

Achieving Slow Blinking Mode

Instructions for various Genio devices to achieve slow blinking (1 blink/2 sec) for AP mode pairing.

Genio Smart Camera Pairing Note

Genio Smart Cameras lack AP mode; use QR code scanning for pairing instead.

Genio App Pairing Procedure

Initiate Device Addition

Start the pairing process by adding a new device within the Genio app interface.

Select Product and Network

Choose your Genio product and confirm the 2.4GHz Wi-Fi network and password.

Switch to AP Mode

Navigate from EZ Mode to AP Mode and reset the device if necessary for pairing.

Connect to Device Hotspot

Connect your mobile phone to the Genio device's Wi-Fi hotspot (SmartLife-XXXX) to proceed.

Complete Pairing Process

Once connected, the app initiates pairing. Click Done after the countdown to finish.

Troubleshooting and iOS Settings

Time-Out Error Troubleshooting

Diagnose time-out errors by checking Wi-Fi signal, blinking lights, and network settings.

Enable Local Network for iOS 14

Instructions to enable the 'Local Network' permission for Mirabella Genio on iOS 14.

Overview

This document provides detailed instructions for pairing Genio Smart Devices with a Telstra NBN modem, specifically addressing common issues like time-out errors, device not found errors, or connectivity problems with the Genio app. The process is broken down into several steps, starting with network setup and progressing through device pairing using the AP (Slow Blinking Method).

Function Description:

The primary function of this guide is to enable users to successfully connect their Genio Smart Devices to their home Wi-Fi network via a Telstra NBN modem. It outlines a systematic approach to configure the modem's Wi-Fi settings and then pair various Genio devices, such as lighting devices, smart plugs, smart power boards, and LED strips. The core mechanism involves disabling band steering on the Telstra modem to ensure that Genio devices connect to the 2.4GHz network, which is essential for their operation. The guide also details how to prepare Genio devices for pairing by setting them to a "slow blinking" mode, indicating they are ready for AP mode connection.

Usage Features:

  1. Modem Access and Configuration:

    • Users are instructed to log into their Telstra modem's administration page using http://mymodem or http://192.168.0.1.
    • The default login credentials (username: admin, password: Telstra) are provided, simplifying access.
    • A crucial step involves navigating to the Wi-Fi settings and unticking the "Band Steering Enabled" option, followed by saving the changes. This ensures that the modem broadcasts separate 2.4GHz and 5GHz Wi-Fi networks.
    • Verification of this step is done by checking the phone's Wi-Fi settings, where two distinct Telstra Wi-Fi names (one ending in -5G and one without) should appear. Users must select the one without -5G, as Genio devices do not support 5GHz Wi-Fi.
  2. Device Preparation for Pairing (Slow Blinking Method):

    • The guide provides specific instructions for various Genio devices to enter the "slow blinking" mode (1 blink per 2 seconds), which is required for AP mode pairing.
    • Lighting devices: Turn power off, on, off, on, off, on.
    • Smart plug without USB port: Press and hold the on/off button until it blinks slowly.
    • Smart plug with 1 USB port: Hold down the power button for 5 seconds until a click is heard, release, then press the power button again.
    • Smart plug with 2 USB ports: Press and hold the on/off button until it blinks slowly.
    • Smart power-board, Smart Desk Lamp: Press and hold the on/off button until it blinks slowly.
    • LED strip light, fairy light, neon light, patch light, spotlight: Hold down the button on the adaptor until it starts to blink slowly.
    • Smart portable lamp: Turn it off, on, off, on, off, on.
    • For Genio Smart cameras, a reset and QR code scanning method is recommended instead of AP mode.
  3. Genio App Pairing Process:

    • Users open the Genio app, navigate to "Add Device," and select their specific Genio product from the menu.
    • The app guides users to select the 2.4GHz Wi-Fi network and enter its password.
    • Users confirm that their device is blinking slowly and then proceed.
    • The app then instructs the user to connect their mobile phone to the device's hotspot, which will appear as "Smart Life-XXXX" in the phone's Wi-Fi settings.
    • After connecting to the "Smart Life-XXXX" hotspot, users return to the Genio app, where the device adding process commences.
    • A countdown clock indicates the progress, and upon completion, a "Device added successfully" message confirms successful pairing.
  4. Troubleshooting and Error Resolution:

    • The guide addresses common time-out errors during pairing.
    • If the device light never stops blinking, it suggests a potential product issue requiring return.
    • If the light stops blinking but fails to "register on cloud," it indicates a communication error between the router and the cloud service, prompting a check of router settings.
    • Users are advised to ensure they enter the correct 2.4GHz Wi-Fi name and password.
    • It emphasizes ensuring the device receives a good Wi-Fi signal and is not obstructed by glass or metal.
    • Crucially, it reiterates that the 5GHz Wi-Fi signal must be turned off on the router.
    • For iOS 14 users, a specific instruction is provided to turn on "Local Network" access for the Mirabella Genio app in the iPhone's settings.

Maintenance Features:

While the document doesn't explicitly detail ongoing maintenance, the troubleshooting section implicitly guides users on how to maintain a stable connection:

  • Network Health Check: Regularly verifying that the 2.4GHz Wi-Fi network is active and band steering is disabled is a form of network maintenance to ensure Genio devices remain connected.
  • Device Placement: The advice to ensure good Wi-Fi signal reception and avoid obstructions (glass, metal) helps users maintain optimal device performance and connectivity.
  • App Permissions (iOS): Ensuring the Genio app has "Local Network" access on iOS 14 is a maintenance step for app functionality and device communication.
  • Reset Procedures: The detailed instructions for resetting various devices to enter slow blinking mode can be considered a maintenance feature, allowing users to re-pair devices if connectivity issues arise.
  • Contact Support: The provision of a tech support number (1800 636 528) serves as a crucial maintenance resource for users who encounter persistent difficulties beyond the scope of the guide.

Telstra Smart Modem GEN 2 Specifications

General IconGeneral
Wi-Fi Standard802.11ac
Wi-Fi BandsDual-band (2.4GHz and 5GHz)
Wi-Fi SpeedUp to 1733 Mbps
Ethernet Ports4 x Gigabit Ethernet
USB Ports1 x USB 2.0
Backup Connectivity4G LTE
Backup Battery SupportNo
Voice SupportYes
DSL CompatibilityADSL2+/VDSL2

Related product manuals