Section 3 - Step-By-Step Assembly
Temp-Cast 2000 Installation Manual
10
SECTION 3: STEP-BY-STEP ASSEMBLY
ASSEMBLY NOTES
1. Dry-assemble the heater upon
delivery, to check the condition of all
parts and to familiarize yourself with
the modules. (If all of the parts are not
numbered, you may find it helpful to do
so, using this manual, before taking
the unit apart again.)
2. Cutting of flue tiles and fireplace
modules should be done outdoors due
to the excessive dust created. WEAR
SUITABLE EAR, EYE AND LUNG
PROTECTION.
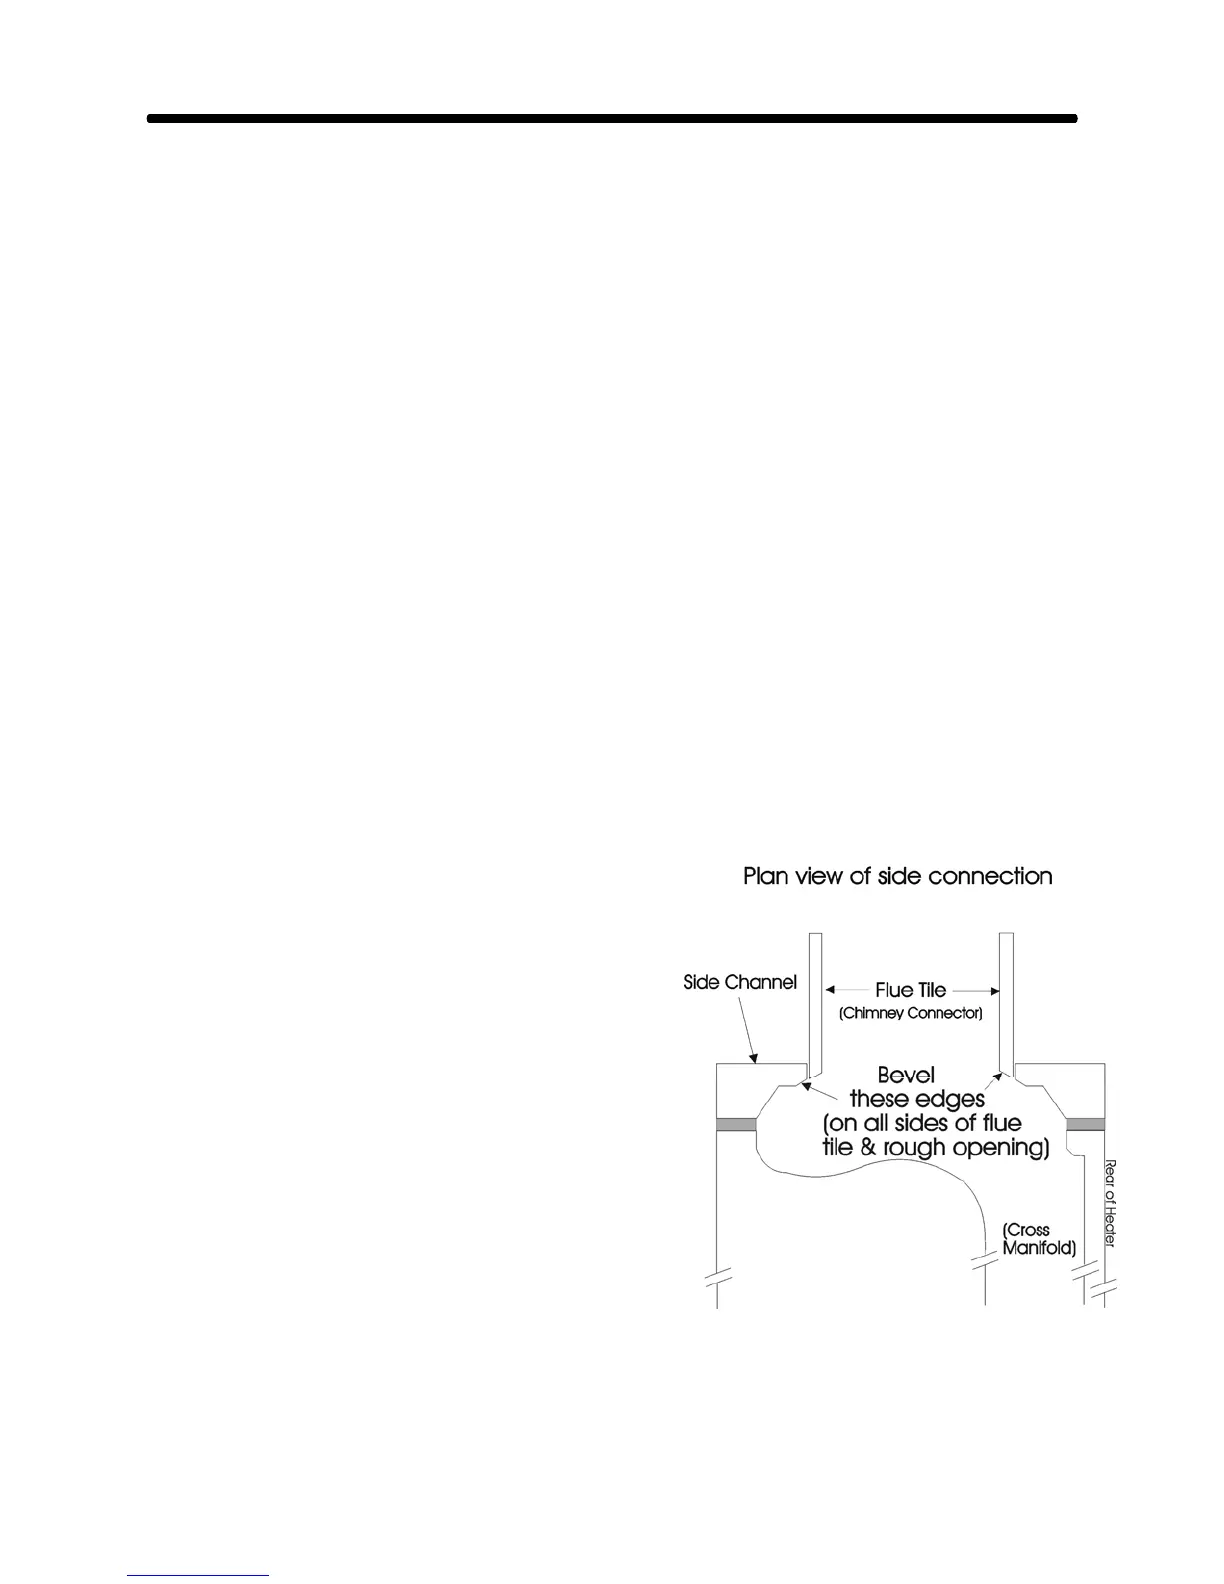
3. A 4” grinder with a diamond blade is
best for cutting holes in flue tiles and
fireplace modules. Or round holes can
be cut as six or eight-sided shapes
with a gas, water or circular saw or
drilled every inch (25mm) and then cut
with a reciprocating saw fitted with a
masonry blade. Rounding or beveling
the inside edges of the hole in the
module creates the least resistance to
the flow of smoke and gases,
maximizing draft and performance.
(See Fig. 8)
4. When using the ceramic-fibre gasket
material, it should only be slightly
compressed. Compressing it too
much will defeat its purpose as an
expansion gasket. (A small amount of
refractory mortar can be used to
cement the gasket in position.)
5. Refractory casting occasionally leaves
behind rough spots or small bumps on
the modules. If these rough spots
should occur in a joint between 2
modules, they may prevent a tight joint
and make installation of subsequent
parts more difficult. Remove any such
bumps with a rasp or scraping tool
before assembling.
6. Refractory mortar should be used
sparingly, applying a small (1/4” to
3/8”) bead between modules. The
finished joint should have a very thin
skin of refractory mortar, which is the
strongest. (In addition, the parts will
only fit properly if the thinnest possible
joint is created.) Apply a small amount
on the outside edges of the part, where
indicated by the shaded areas. Do not
use a full bed of mortar. Seat the
parts completely, using a rubber
mallet, so that a little mortar squeezes
out. After each course, scrape off and
save excess mortar for possible later
use. Periodically wipe the modules
inside and out with a damp sponge to
ensure that excess mortar has not
been left behind.
Fig. 8