Page 11 of 20
In most cases, the factory setting is best, however if the GPS signal is poor, or being
affected by terrain, then the setting can be changed to make the unit less sensitive to
such interference.
To set the threshold in an environment where the GPS signal is causing the unit to
count without moving, raise the start threshold in 0.1 increments and check the
distance display. Stop incrementing the threshold when the distance display remains
stable. Likewise, the start threshold can be reduced if necessary; however we have
found the optimum value to be 0.5.
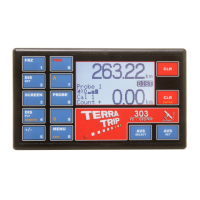
9.2 Standby Probe:
Our GPS is very accurate, however there maybe circumstances where the
environment where you are driving can cause errors in readings through loss of signal.
For example tunnels, steep rock faces next to the road, and dense tree cover can all
interfere with the GPS signal.
To combat problems with loss of signal, you can make the unit ‘revert’ to a fixed
mechanical probe in the event of signal loss. Once the signal returns the unit will
automatically switch back to GPS mode. (Note. You need a wheel, gearbox,
Electronic probe (DSI) or speedometer cable probe fitted to the car, and calibrated to
use this feature.)
If the standby probe setting is ‘Off’ then the GPS probe will remain selected, and the
unit will not use a secondary probe to correct the distance driven, instead the GPS will
calculate the distance from the last known position once a satellite reception is re-
established.
10.0 Time / Date:
Note: Time and date settings are available only on the 303.
10.1 Time:
Time is adjusted by pressing MENU, use the \/ key to select ‘Time / Date’, then press
ENTER. If Time is highlighted in black press ENTER, otherwise use /\ \/ to select
time before pressing ENTER. The current time will freeze, and a black indicator will
appear on the hours. Use the number keys to enter the time in 24 hour format. I.e. for
18:05:30, press 1, 8, 0, 5, 3 and 0 then press ENTER to set. After setting time press
MENU to exit. Press upper CLR at any time to cancel.
10.2 Date:
Date adjustment is located in the ‘Time / Date’ menu. Press MENU, use the \/ key to
select ‘Time / Date’, then press ENTER.
Select Date by pressing the \/ key and then press ENTER. Use the number keys to
enter the date in YY/MM/DD format. I.e. for (20)13 / 12 / 20, press 1, 3, 1, 2, 2, and 0
then press ENTER to set. The time will resume counting just before the date is set.
Time is not affected by setting the date. After setting date press MENU to exit. Press
CLR at any time to cancel.