www.ti.com
Procedure
7
SLUUC60–February 2020
Submit Documentation Feedback
Copyright © 2020, Texas Instruments Incorporated
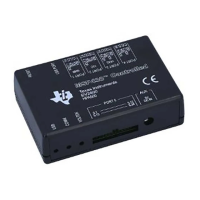
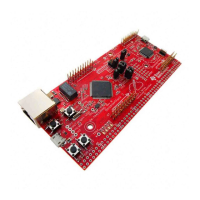
BQ24800 EVM
3 Procedure
3.1 AC Adapter Detection Threshold
Use the following steps for AC adapter detection threshold:
1. Ensure Equipment Setup steps are followed.
2. Turn on PS#1
Load #1 and Load #2 are not connected during this step.
3. Increase the output voltage of PS#1 to 20.0 V
• Measure → V[TP23(VCC)] = 19.6 V ±0.5 V
• Measure → V[TP12(ACDET)] = 2.7 V ±0.1 V
• Measure → V[TP13(ACOK)] = 3.3 V ±0.1 V
• Measure → V[TP3(SYS)] = 20.0 V ±0.5 V
• Measure → V[TP22(REGN)] = 6 V ±0.6 V
• Measure → V[TP20(ILIM)] = 0.79 V ±0.1 V
3.2 Charger Parameter Settings
In the main software window, click the Refresh button on the top right corner. Make sure there is no error
information.
1. Type “512” (mA) in ChargeCurrent Register and click OK. This sets the battery charge current
regulation threshold.
2. Type “12592” (mV) in ChargeVoltage Register and click OK. This sets the battery voltage regulation
threshold.
3. Measure → V(TP5(BAT)) = 12.6 V ±200 mV
3.3 Charge Current and AC Current Regulation (DPM)
1. Connect Load #2 in series with a current meter (multimeter) to J2 (BAT, GND). Make sure a voltage
meter is connected across J2 (BAT, GND). Turn on Load #2. Use the constant voltage mode. Set
output voltage to 10.5 V.
2. Connect the output of Load #1 in series with a current meter (multimeter) to J2 (SYS, GND). Make
sure a voltage meter is connected across J2 (SYS, GND). Turn on the power of Load #1.
The setup is now like Figure 4 for BQ24800EVM.