9.
Having removed the termination
packs
!rom ali bui
lhe
lasl drive
(the
one
larthesl away !rom
lhe
Controller),
connecl
lhe
drives in
seri
es.
The
connectoron
theendolthe
second
drive's
cable
plugs
inlo the adapler board in
lhe
middle
ol
lhe
lirsl
drive's
cable. The
third drive is
connecled
lo
lhe
second drive in
lhe
same way.
Whelher
you h ave two
or
lhree drive
s.
lhe
drive
larthesl
away l rom
lhe
conlroller
should
be
the one
lhal
has
noi
been modilied.
The
lirsl drive, the one
connected
directly
lo
lhe
Conlroller
Card. is
idenlilied
as
DSK1
by
n BASIC. The
second
drive,
connecled
lo
lhe
cable
ol
DSK
1,
is DSK2. The third drive is DSK3. The labels provi d ed
wilh
your
drive(s) can be used
lo
idenlily
each drive.
CAUTI ON
Always
disconnecl
lhe
Peripheral Expansion
Syslem
belore
moving
the
computer
console. The cable connecting the
console
and peri-
pheral syslem is not designed
lo
suppor! the
weighl
ol
the unils. T o
prevent damage, always
disconnect
ali devices before moving any
part of
your
Home Computer system. For long
distance
moves. remove
ali
cards
!rom the Peripheral Expansion System and
repack
lhe
devi-
ces
in their originai packing materia!.
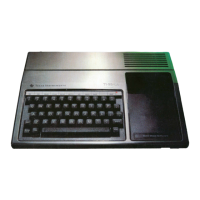
STARTING
THE
SYSTEM
Alter
lhe
Controller has been inserted into
lhe
Peripheral Expansion
Syslem
unii
and the drives have been
connecled,
plug
lhe
power
cords
into your eleclrical wall outlels. Next,
turno
n the
power
switches
o n the
backs
of
your
external
disk
drives (il any) and
lhen
the
swilch
o n
the front of the peripheral system unit.
Note:
When you turn on the
peripheral syslem, the internai
disk
drive is automalically turned o
n.
WARNING
Each
time
you
operate
your
computer/disk
system,
follow
this
power-up
sequence:
1.
Turn on
the
external
disk
drives.
2.
Turn
on
the
Peripheral Expansion
System
unil
3.
Then
turn
on
the
monitor
and
computer
console.
For
proper
memory allocati o n
by
lhe
computer, the Peripheral Expan-
sion
System
musi
be
ON
when
lhe
computer
console
is
switched
o
n.
Otherwise, l h e
disk
drives,
Conlroller
Card, an d Disk Manager module
wilt not lunction correctly. The
computer
console
musi
be turned off
and
lurned
back
on in
order
to resto
re
normal operalion.
When you turn on the console,
lhe
disk
drives' working
lighls
may
come
on brielly and then go
oH.
Il they slay on, the
disk
drive cable is
probably
plugged in upside down. Turn
oH
ali units and make su
re
l hai
the
disk
drive cable
connections
h ave bee n m ade proper1y.
5
IN
CASE
OF
DIFFICUL
TY
<!ID
PHP
1250
PHP
1850
Il
the
disk
system does
noi
appear t o be working proper1y,
check
the
following:
1.
Power
- Be sure ali devices are
plugged
in. Then turn on the
power
lo
the units in the proper sequence:
disk
drives and Peri-
pheral Expansion
Syslem first, lollowed
by
the
console
and the
monitor.
2.
Card
Position-
Turn the powerOFF, wait two minutes,
andremo-
ve
the top. Verily
lhat
ali
cards
are inserted proper1y, and
lhen
replace
lhe
top.
3.
Cable
Connection
-
Check
lor
proper
connection
between the
console and expansion
unii.
4.
Cable-
Check
lhat
lhe
proper cables are
being
used.
Check
the
cables
!or
loose
or
broken leads.
Check
lo
see that the cables are
proper1y connected,
righi
si
de
up.lf
two drive
lights
come
on al the
same lime. you need
lo
add an adapter board to
lhe
connector.
5.
Peripheral
Expansion
System
-
Check
!or
proper
connection
between the console and expansion
unii.
6.
Home
Computer-
Check
lo
see t hai the
Home
Computerworks
proper1y with ali accessori es
disconnected.
7.
Il
none
olthe
above procedures
correcls
lhe
difficulty,
consull
·lf
You H ave Questions
orNeed
Assislance•
or
see l h e
·Maintenance
and Service lnlormalion• section of the
User's
Reference
Guide.
CARING
FOR
DISKETIES
1.
Handle
lhe
diskette
by
its protective cover.
Do
noi
touch
any part
of the diskette's surface; finger prints
will
destroy
disk
contents.
2.
Be careful noi to bend the diskette.
3.
Do not write on the diskette cover with a bali
point
pen
or
pencil;
only use a
lelt tip pen.
4.
Do no t scratch the surface of the diskette, any scratch, even il too
small to be seen, may destroy ali the information on a
number
of
sectors. This
usually causes information to be
lostfrom
most
ofthe
liles on the diskette.
5.
Do
noi
expose diskettes lo magnetic fields
or
excessive heat or
col d.
6.
Do
noi
piace !ape of any kind (masking or other) on the surface of a
diskette.
7.
Do
noi
remove a diskette !rom a drive il the drive
light
is on.
IF
YOU HAVE QUESTlONS
OR
NEED ASSISSANCE
Il
you have questions concerning
disk
system repair
or
peripheral,
accessory,
or
software purchase, please cali
your
RETAILER.
Because of the
number
of suggestions
which
come
to Texas
lnslru-
ments !rom many sources containing both new and old ideas, Texas
lnstruments
will
consider
such suggestions
only
il
they are freely
given to Texas lnstruments.lt is lhe
policyofTexas
lnstruments to refu-
se to receive any suggestions in confidence. Therefore,
il you wish to
share
your
suggestions with Texas lnstruments,
or
if you wish
us
lo
review any BASIC language program
which
you h ave developed, piea-
se include
lhe
lollowing stalemenl in
your
letter:
Ali ol the information forwarded herewith is presented
lo
Texas lnstru-
menls
on a nonconfidenlial, nonobligatory basis;
no
relalionship,
confidential
or
olherwise, expressed
or
implied, is established with
Texas lnstruments
by
this presentation. Texas
lnstruments
may use,
copyright, distribute, publish, reproduce,
or
dispose
of the informa-
tion in any way without compensation
lo
me.•
 Loading...


