17
speed to 3.0 km/h. If cut long grass, it is recommended
to use the slow speed.
To activate the self-drive function during use, push the
clutch handle – drive (4) all the way down.
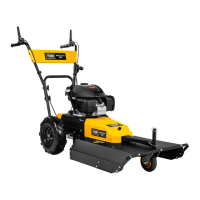
Front wheel/front spur
Front wheel or front spur: Illustration 7
The machine is delivered with both front wheels and
front spur. In very long grass and uneven terrain, it is
recommended to use the front spur. The front wheel is
suitable for flatter lawns and when mowing along tile
edges.
Fixed or rotating front wheel or front spur:
Illustration 8
The front wheel/front spur can be locked in the forward
position with the locking pin, which is helpful if you want
to drive straight out.
But the front wheel/front spur can also be made rotating
so that it follows the direction you are driving, which is
an advantage if you drive around freely with many
changes of direction.
Height adjustment:
To change the cutting height, the engine MUST first be
turned off and the blade stationary.
Changing the cutting height is done by pulling out the
upper locking pin (illustration 7) and putting washers
above or under the front wheel arm until the desired
cutting height is achieved.
Air filter
The air filter should be inspected and cleaned regularly.
If the filter has not been cleaned for a long time, the
engine’s power will drop.
1. Clean around the air filter before removing the cap.
2. Honda engine: carefully remove the paper filter and
inspect it. Brush it with a soft brush. If it is very
dirty, replace it. Be careful that no dirt gets into the
inlet.
3. Loncin engine: wash the black foam element in
warm water and soap.
4. Press the water out of the foam element and let it
dry. Put a few drops of SAE-30 oil on the filter to
moisten it lightly. Carefully squeeze any surplus oil
out of the foam element and reattach.
5. Air filter element is put back in place
6. Please note that all parts are assembled correctly
and properly closed.
Blade
Inspection of the blade:
Inspect blade for damage, cracks or excessive rust or
corrosion. Check that the blade bolt is tightened.
Note: A dull blade can be sharpened! But a blade that
is worn, bent, cracked or otherwise damaged must be
replaced.
Removing and mounting the blade
If you remove the blade to sharpen or replace it, you
must use a torque wrench and some heavy gloves to
protect your hands.
1. Loosen the blade bolts. Use a piece of wood to
prevent the blade from turning around.
2. Remove the bolt, washer, blade and blade holder
in that order
3. Sharpen or replace the blade.
4. Insert the blade holder, blade, washer and bolts in
that order.
5. Tighten the blade bolts again. Use a piece of wood
to prevent the blade from turning around.
Warning: A blade must be sharpened so it is in
100 % balance, otherwise it may cause vibrations that
could damage the engine. Damage to engine due to
faulty sharpening is not covered by warranty. We
therefore recommend letting a service center sharpen
the blade.
New blade has article no. 452982
Oil change
Oil should be changed for the first time after 5 hours,
then at least 1 time per year.
You will need an oil extractor kit. Art. no. 40-11336
Oil and oil extractor kit is not included
Use an extractor kit and do as follows:
1. Turn on the engine and let it run for 5 min or until
the engine is hot. A hot engine liquefies the oil
which makes it easier to drain.
2. Suck the oil up through the oil filler hole using the
syringe that came with the oil extractor kit. Use the
hose to reach the sump.
3. Transfer the used oil into a empty container.
4. Fill the engine with SAE-30 oil.
5. Check the oil level using the dipstick. (Min / Max)
Remember to dispose the used oil so that it does no
harm to nature. Use your local recycling station.
The oil level should always be between min. and max
on the dipstick.
Spark plug
1. Remove the spark plug.
2. Brush off dirt from the spark plug.
3. Use a spark plug wrench to loosen the spark plug.
4. Check the insulation is intact.
5. Clean the spark plug with a wire brush.
6. Measure the electrode, taking care not to damage
the electrode.
7. If the spark plug is undamaged refit or replace.
8. Reattach the spark plug.
Tire pressure
Illustration 9
The air pressure in the tires should be checked
regularly to ensure optimal grass cutting and long
lifetime of the tires. Keep same pressure in both right
and left wheel. Remove the tire valve cap and connect
a pressure hose with pressure gauge to the valves.
Correct tire pressure is 1,7 bar / 24 PSI.
Transport
Illustration 10
The machine is equipped with a bracket in each side,
so it can be strapped safely during transport in a van,
on trailer or similar.