CUSTOMER/OPERATOR SERVICE 5-2 Manual 0-2859
Art # A-02476
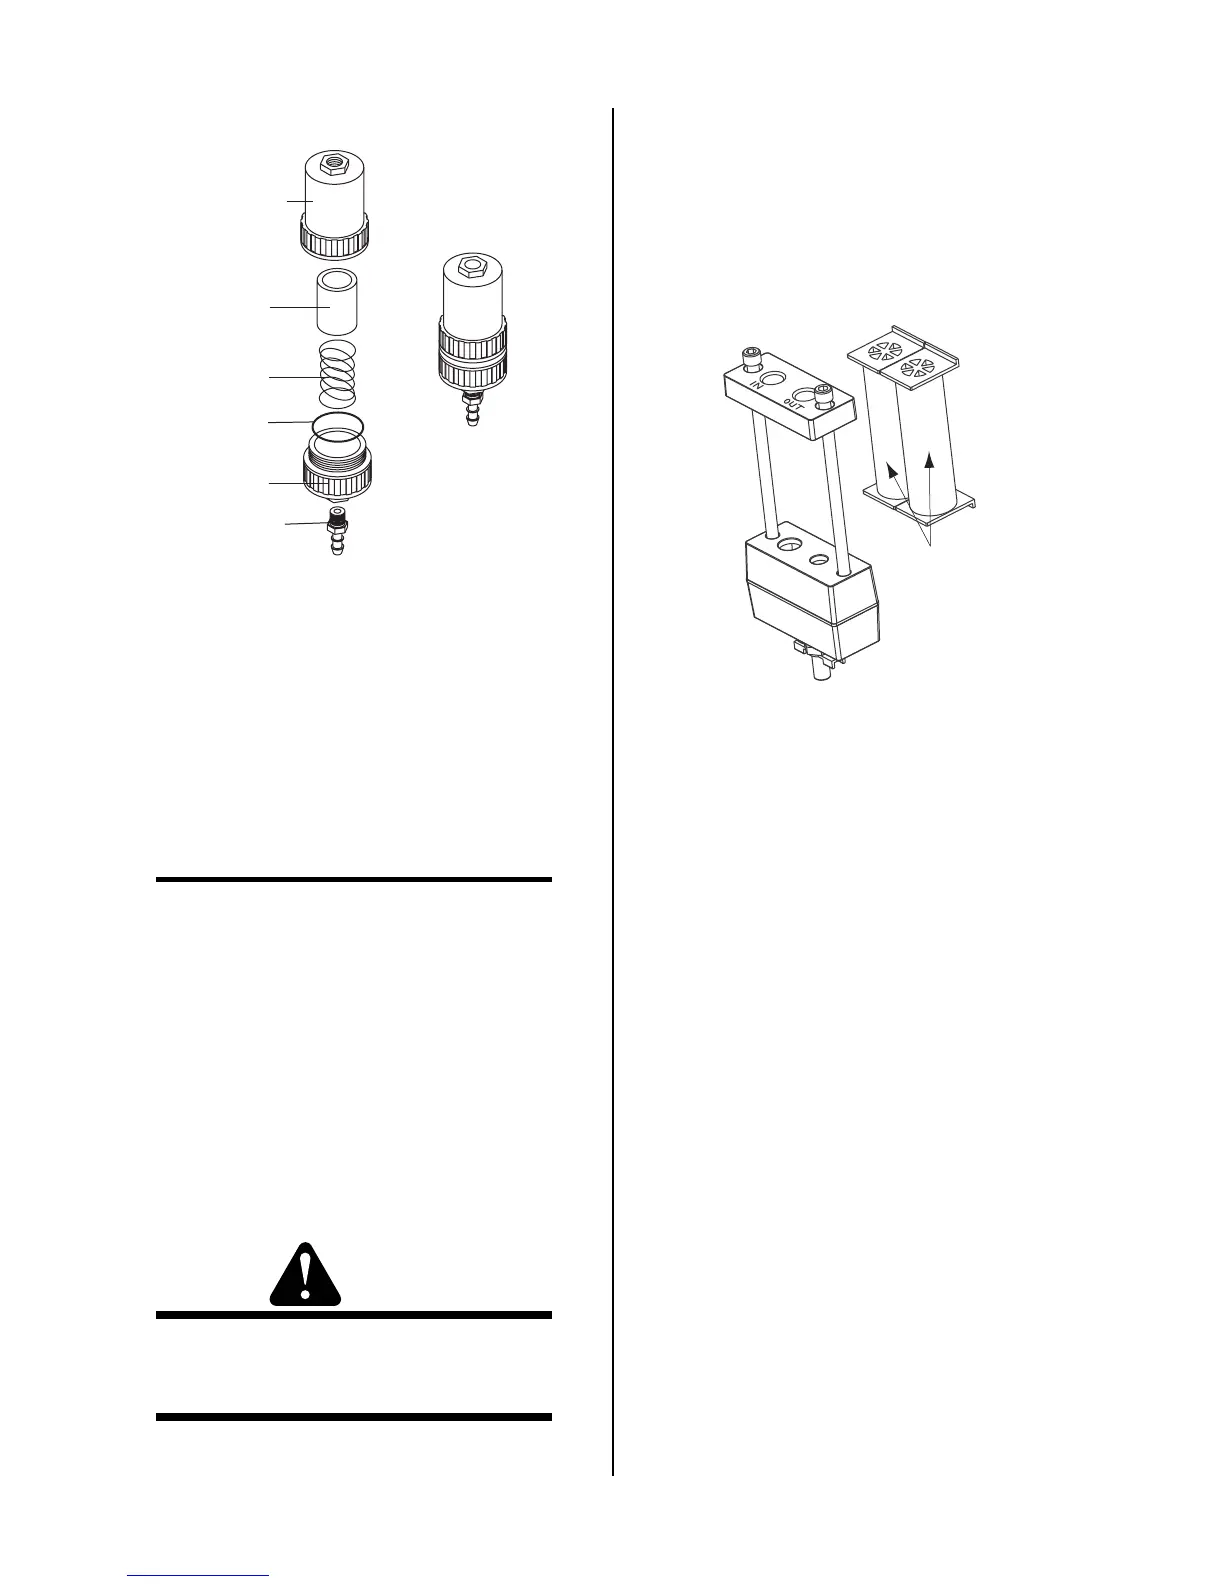
Filter
Element
(Cat. No. 9-7741)
Housing
Cover
Barbed
Fitting
Spring
Assembled Filter
O-ring
(Cat. No. 9-7743)
Optional Single-Stage Filter Element Replacement
5. Remove the Filter Element from the Housing and
set Element aside to dry.
6. Wipe inside of housing clean, then insert the re-
placement Filter Element open side first.
7. Replace Housing on Cover.
8. Reattach gas supply hose.
NOTE
If unit leaks between housing and cover, inspect the
"O" Ring for cuts or other damage.
D. Optional Two-Stage Filter Element
Replacement
The Two-Stage Air Filter has two Filter Elements. When
the Filter Elements become dirty the Power Supply will
continue to operate but cut quality may become unaccept-
able. Refer to Section 6, Parts List, for replacement filter
element catalog number.
1. Shut off primary input power.
2. Shut off air supply and bleed down system.
WARNING
Always turn off the air supply and bleed the system
before disassembling the Filter Assembly as injury
could result.
3. Loosen the two bolts on the top of the Filter Assem-
bly enough to allow the Filter Elements to move
freely.
4. Note the location and orientation of the old Filter
Elements.
5. Slide out the old Filter Elements.
First & Second
Stage
Cartridges
(as marked)
Art # A-02942
Optional Two-Stage Filter Replacement
6. Slide the replacement Filter Elements into the Filter
Assembly, with the same orientation as noted in
Step 4 above.
7. Hand tighten the two bolts evenly, then torque each
bolt to 20 - 30 in-lbs (2.3 - 3.4 Nm).
8. Slowly apply air pressure to the assembly, check-
ing for leaks.
5.03 Common Faults
1. Insufficient Penetration
a. Cutting speed too fast
b. Torch tilted too much
c. Metal too thick
d. Worn torch parts
e. Cutting current too low
f. Non-Genuine Thermal Dynamics parts used