Manual 0-2859 3-5 INSTALLATION PROCEDURES
3.07 Torch Connections
NOTE
Equipment ordered as a system will have the Torch
factory connected to the Power Supply.
The instructions for connecting the Torch Leads to the
Power Supply are different depending on the type of
leads. This sub-section covers connecting the Torch for
the following applications:
A. Hand Systems
B. Machine Systems (Unshielded Leads)
C. Machine Systems (Shielded Leads)
D. Remote Pendant Control (Optional)
The Torch Leads must be properly installed to the Power
Supply for proper operation. If the torch leads were not
factory-installed, make all torch connections to the Torch
Bulkhead Panel for the desired application.
A. Hand Systems
WARNING
Disconnect primary power at the source before dis-
assembling the torch or torch leads.
1. Remove the Cover of the Power Supply for ac-
cess to the Torch Bulkhead Panel. See Section 5.05.
2. Remove the retaining nut from the Strain Relief.
3. Feed the torch lead ends and the Strain Relief into
the hole in the front of the unit.
Strain Relief
Nut
Strain Relief
Torch Leads
Assembly
A-03607
Negative /
Plasma Lead
Pilot Lead
Retaining Nut Removal
4. Secure the Strain Relief with the retaining nut re-
moved earlier.
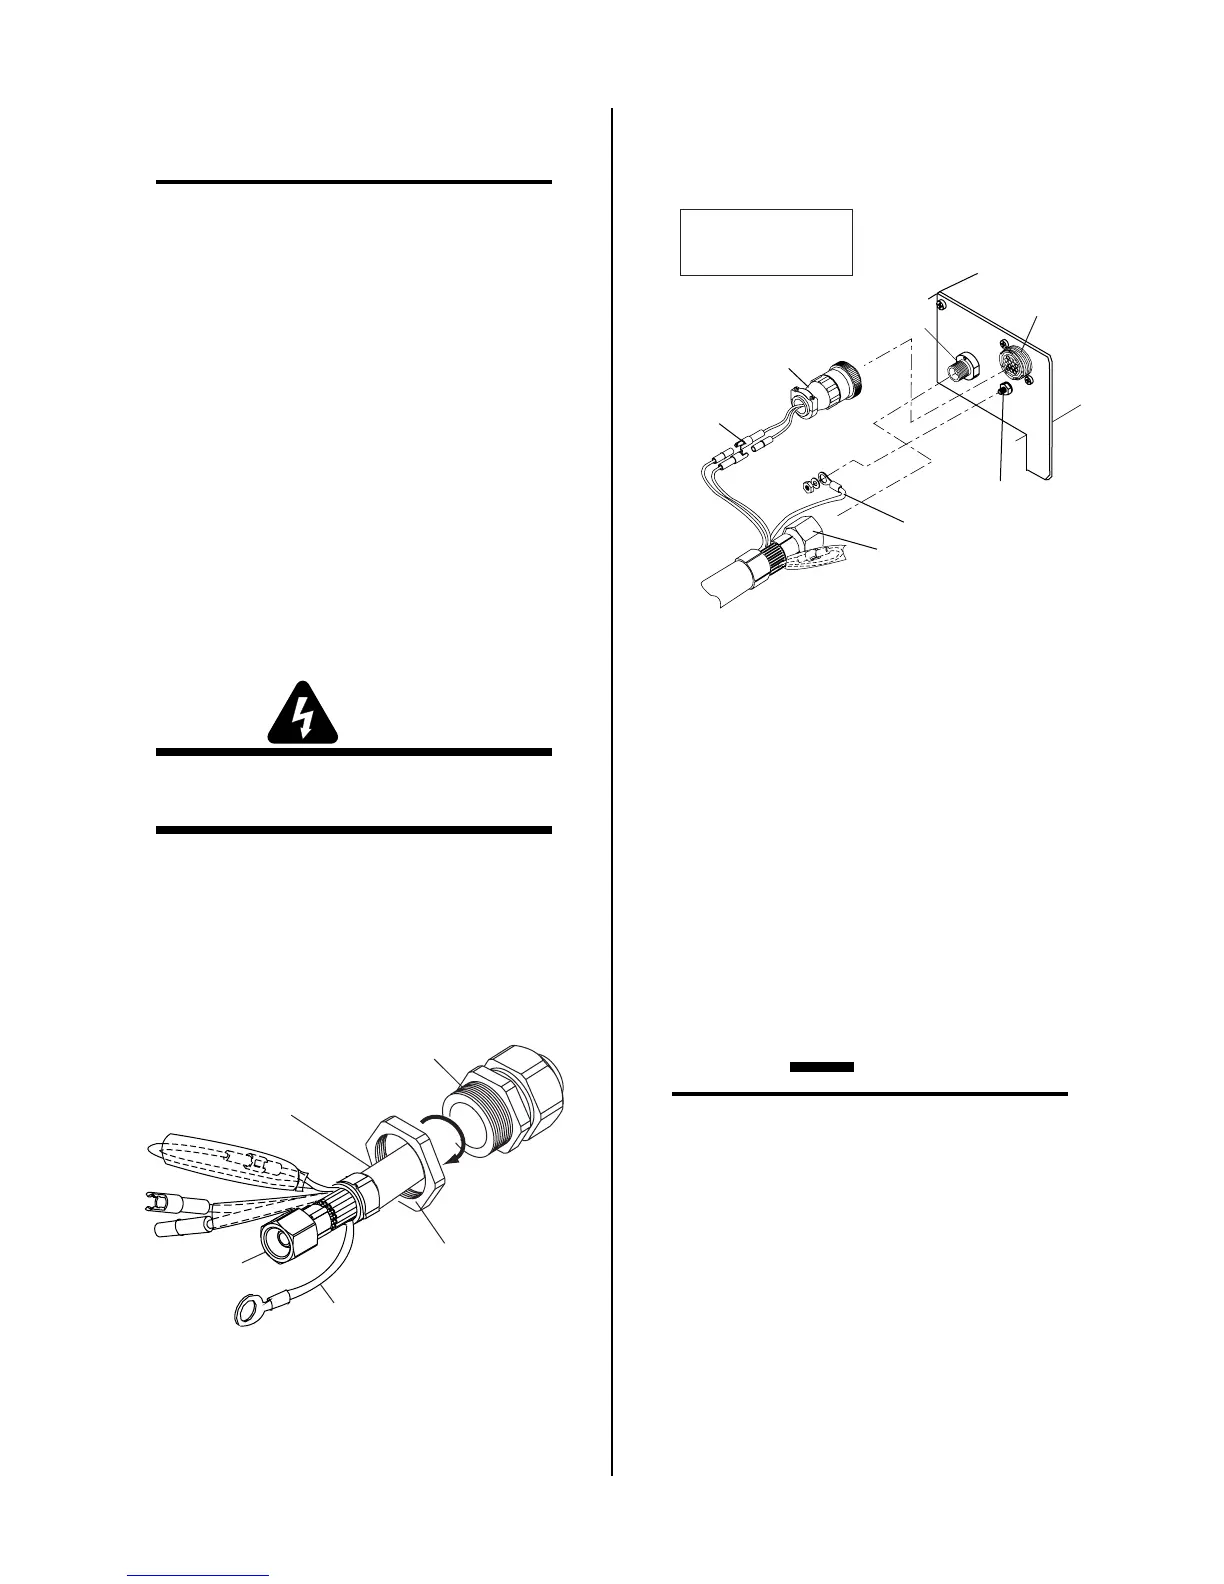
5. Connect the Negative/Plasma Lead to the bulk-
head connection inside the Power Supply.
Pilot Lead
Torch Lead
Assembly
Negative/Plasma
Lead
Adapter
Connector
Pilot Lead Stud
Negative/Plasma
Lead Connection
A-03608
Note: Actual Bulkhead
configuration may
differ from that shown.
Adapter
Control Circuit
Connectors
Torch Lead Connections To Bulkhead
6. Connect the Control Circuit Connectors to the
mating connectors on the Power Supply Adapter.
7. Remove the top nut and washer from the Pilot
Stud.
8. Place the lug on the Pilot Control Wire onto the
stud and secure with the nut and washer removed
in Step 7.
9. Tighten the Strain Relief onto the Torch Leads.
10. Check the torch for proper parts assembly.
CAUTION
The torch parts must correspond with the type of
operation. Refer to the appropriate torch manual
for proper parts selection.
11. Reinstall the Power Supply Cover on the Power
Supply.