Do you have a question about the Thermaltake Pacific RL360 Plus and is the answer not in the manual?
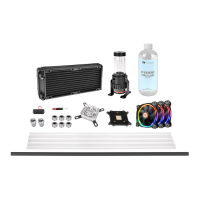
Lists and identifies all components included in the Pacific RL360 Plus RGB kit.
Instructions for installing the LED module onto the radiator.
Guide for connecting fan cables to the controller and the controller cable to the mainboard.
Steps for setting the controller number via DIP switch and connecting the power cable.
How to use bridge cables to connect two or more controllers.
Details the software's main window, profile settings, LED modes, and product selection options.
Guide on setting up and saving LED lighting profiles and controller assignments within the software.
Explains how to customize LED lighting effects, colors, speed, and brightness.
Procedure for setting a password to connect the Riing Plus RGB mobile application to the software.
| Brand | Thermaltake |
|---|---|
| Model | Pacific RL360 Plus |
| Category | Heater |
| Language | English |