-2-
-3-
EN
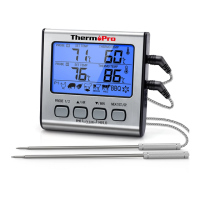
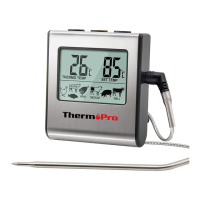
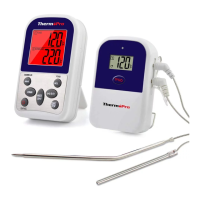
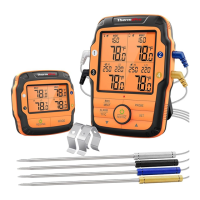
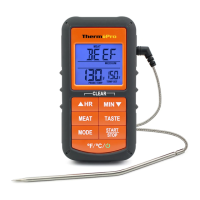
Product Image
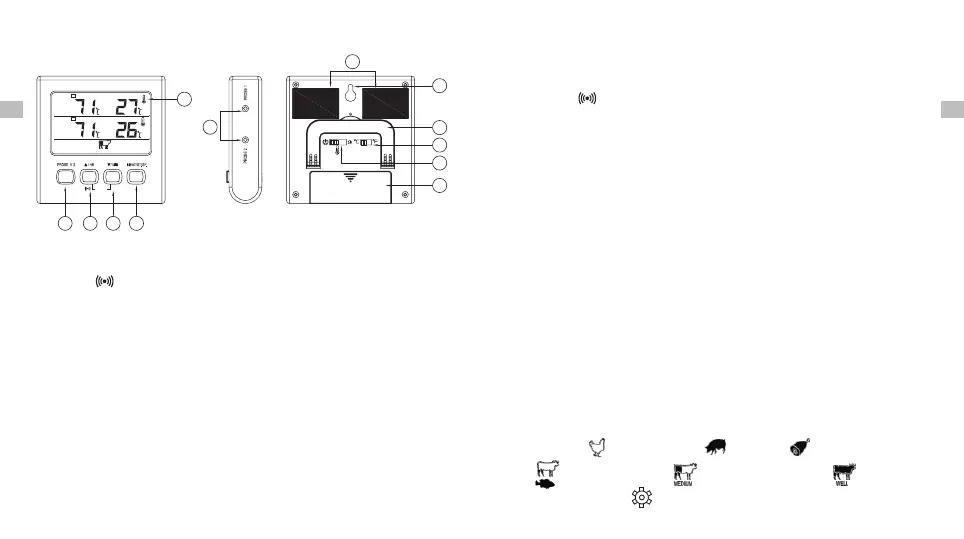
Keys Definition
1. LCD Screen: Displays temperatures, count up or count
down timer and other information.
1. LCD Screen
2. PROBE 1&2 Selection Button
3. HR Button
4. MIN/HI/LO Button
5. MEAT/START/STOP Button
6. Probe ½ Socket
▲ /
▼ /
7. Magnet
8. Hanging wall hole
9. Flip-out Counter Top Stand
10. C/ F Selector
11. Mode Selector
12. Battery Compartment
° °
2. Probe1/2 Button: In Cook mode, press the PROBE 1/2
select button to and enter Probe 1 or Probe 2 setting mode.
The last row of the screen will display the meat type for the
EN
corresponding probe. In timer mode, press the PROBE
1/2 button to toggle the display of the Probe 1 or 2 tem-
peratures in the first row of the screen.
3. /HR Button: In Cook mode, Press to select food ▲ ▲
types while in quick temperature setting. Press to increase ▲
your desired cooking temperature while in manual tempera-
ture setting. Press to turn ON/OFF the alarm in BBQ mode.
Press the HR button to set hours while in timer mode. To
clear time, press the HR and MIN buttons at the same time.
4. ▼/MIN/HI/LO Button: In Cook mode, press▼ to select
food types while in quick temperature setting. press ▼ to
decrease your desired cooking temperature setting while
in manual temperature setting. In BBQ mode, press it to
display HI or LO BBQ temperature. In Timer mode, press
this button to set count down minutes. To clear count
down timer setting, press the HR and MIN buttons at the
same time. Press and hold the button for fast setting.
( ), Beef Medium( ), Beef Well Done ( ), BBQ and
User-Defined ( ). The pre-programmed doneness
5. MEAT/ST/SP Button: In Cook mode, press the MEAT/ST/
SP button to enable the option to adjust quick temperature
settings. Press again to save selection. The meat types:
Poultry ( ), Pork/Veal ( ), Ham ( ), Beef Rare/Fish
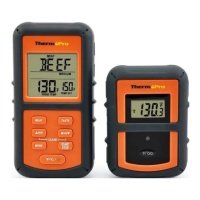
PROBE
SET TEMP
THERMO TEMP
1
PROBE
SET TEMP
THERMO TEMP
2
P1
MEDIUM
1
2
3
4
5
6
7
8
9
10
11
12
CLEAR
HI/LO