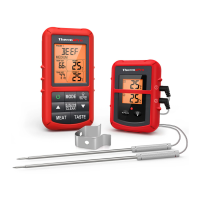
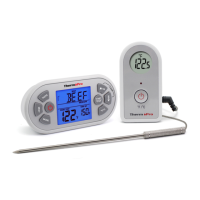
Installing Batteries
1. Base station: open the battery compartment of the base
station and insert two “AAA” batteries with correct
polarity.
installed in the remote sensor. Although there could be
some power in the rechargeable battery before the unit
leaves the manufacturing facility, it is always good to
fully recharge the remote sensor before using by
following the steps below:
a. Connect the charger to the charging socket located on
the back of the remote sensor;
b. Plug the charger into a standard AC outlet;
c. The red light on the remote sensor will light up;
d. Charge it for at least 4 hours until the light changes from
red to green which indicates charging is complete.
EN EN
-12- -13-
If the low battery icon for remote sensor appears, please
charge the remote sensor as soon as you can.
Note, the package does not INCLUDE a wall adapter.
Simply use any cellphone wall charger with USB socket to
charge the battery.
If the low battery icon for base station appears, please
replace the batteries with new batteries.
Low Battery Warning
If the battery power (base station or remote sensor) is low,
there will be low battery icon showing on the base station
display.
2. Remote sensor: A built-in rechargeable lithium battery is
© Sunnysoft s.r.o., distributor pro Českou republiku a Slovenskou republiku
© Sunnysoft s.r.o., distributor pro Českou republiku a Slovenskou republiku