DRD 1001
First issue 11 / 00 5
6
ADJUSTMENT PROCEDURES
Handling the optical pickup
The laser diode used in the optical pickup may break
down due to potential differences caused by electricity
produced by clothing or the human body, care should
therefore be taken to prevent electrostatic discharge
whilst repairing the optical pickup.
The following method is recommended.
(1) Place a conductive sheet on the work bench (The
black sheet used for wrapping repair parts.)
(2) Place the set on the conductive sheet so that the
chassis is grounded to the sheet.
(3) Place your hands on the conductive sheet (doing
this gives them the same ground as the sheet.)
(4) Remove the optical pickup block
(5) Perform work on top of the conductive sheet. Be
careful not to let your clothes or any other static
sources to touch the unit.
* Grounding the Human Body, use an antistatic wrist
strap to discharge static electricity from your body.
* Grounding the work place, use either an antistatic
matt or a sheet of steel on the area where the optical
pickup is to be placed and ground the matt/sheet.
(6) Short the short terminal on the PCB, which is in-side
the Pickup Assembly, before replacing the Pickup.
(The short terminal is shorted when the Pickup
Assembly is being lifted or moved.)
(7) After replacing the Pickup, open the short terminal
on the PCB.
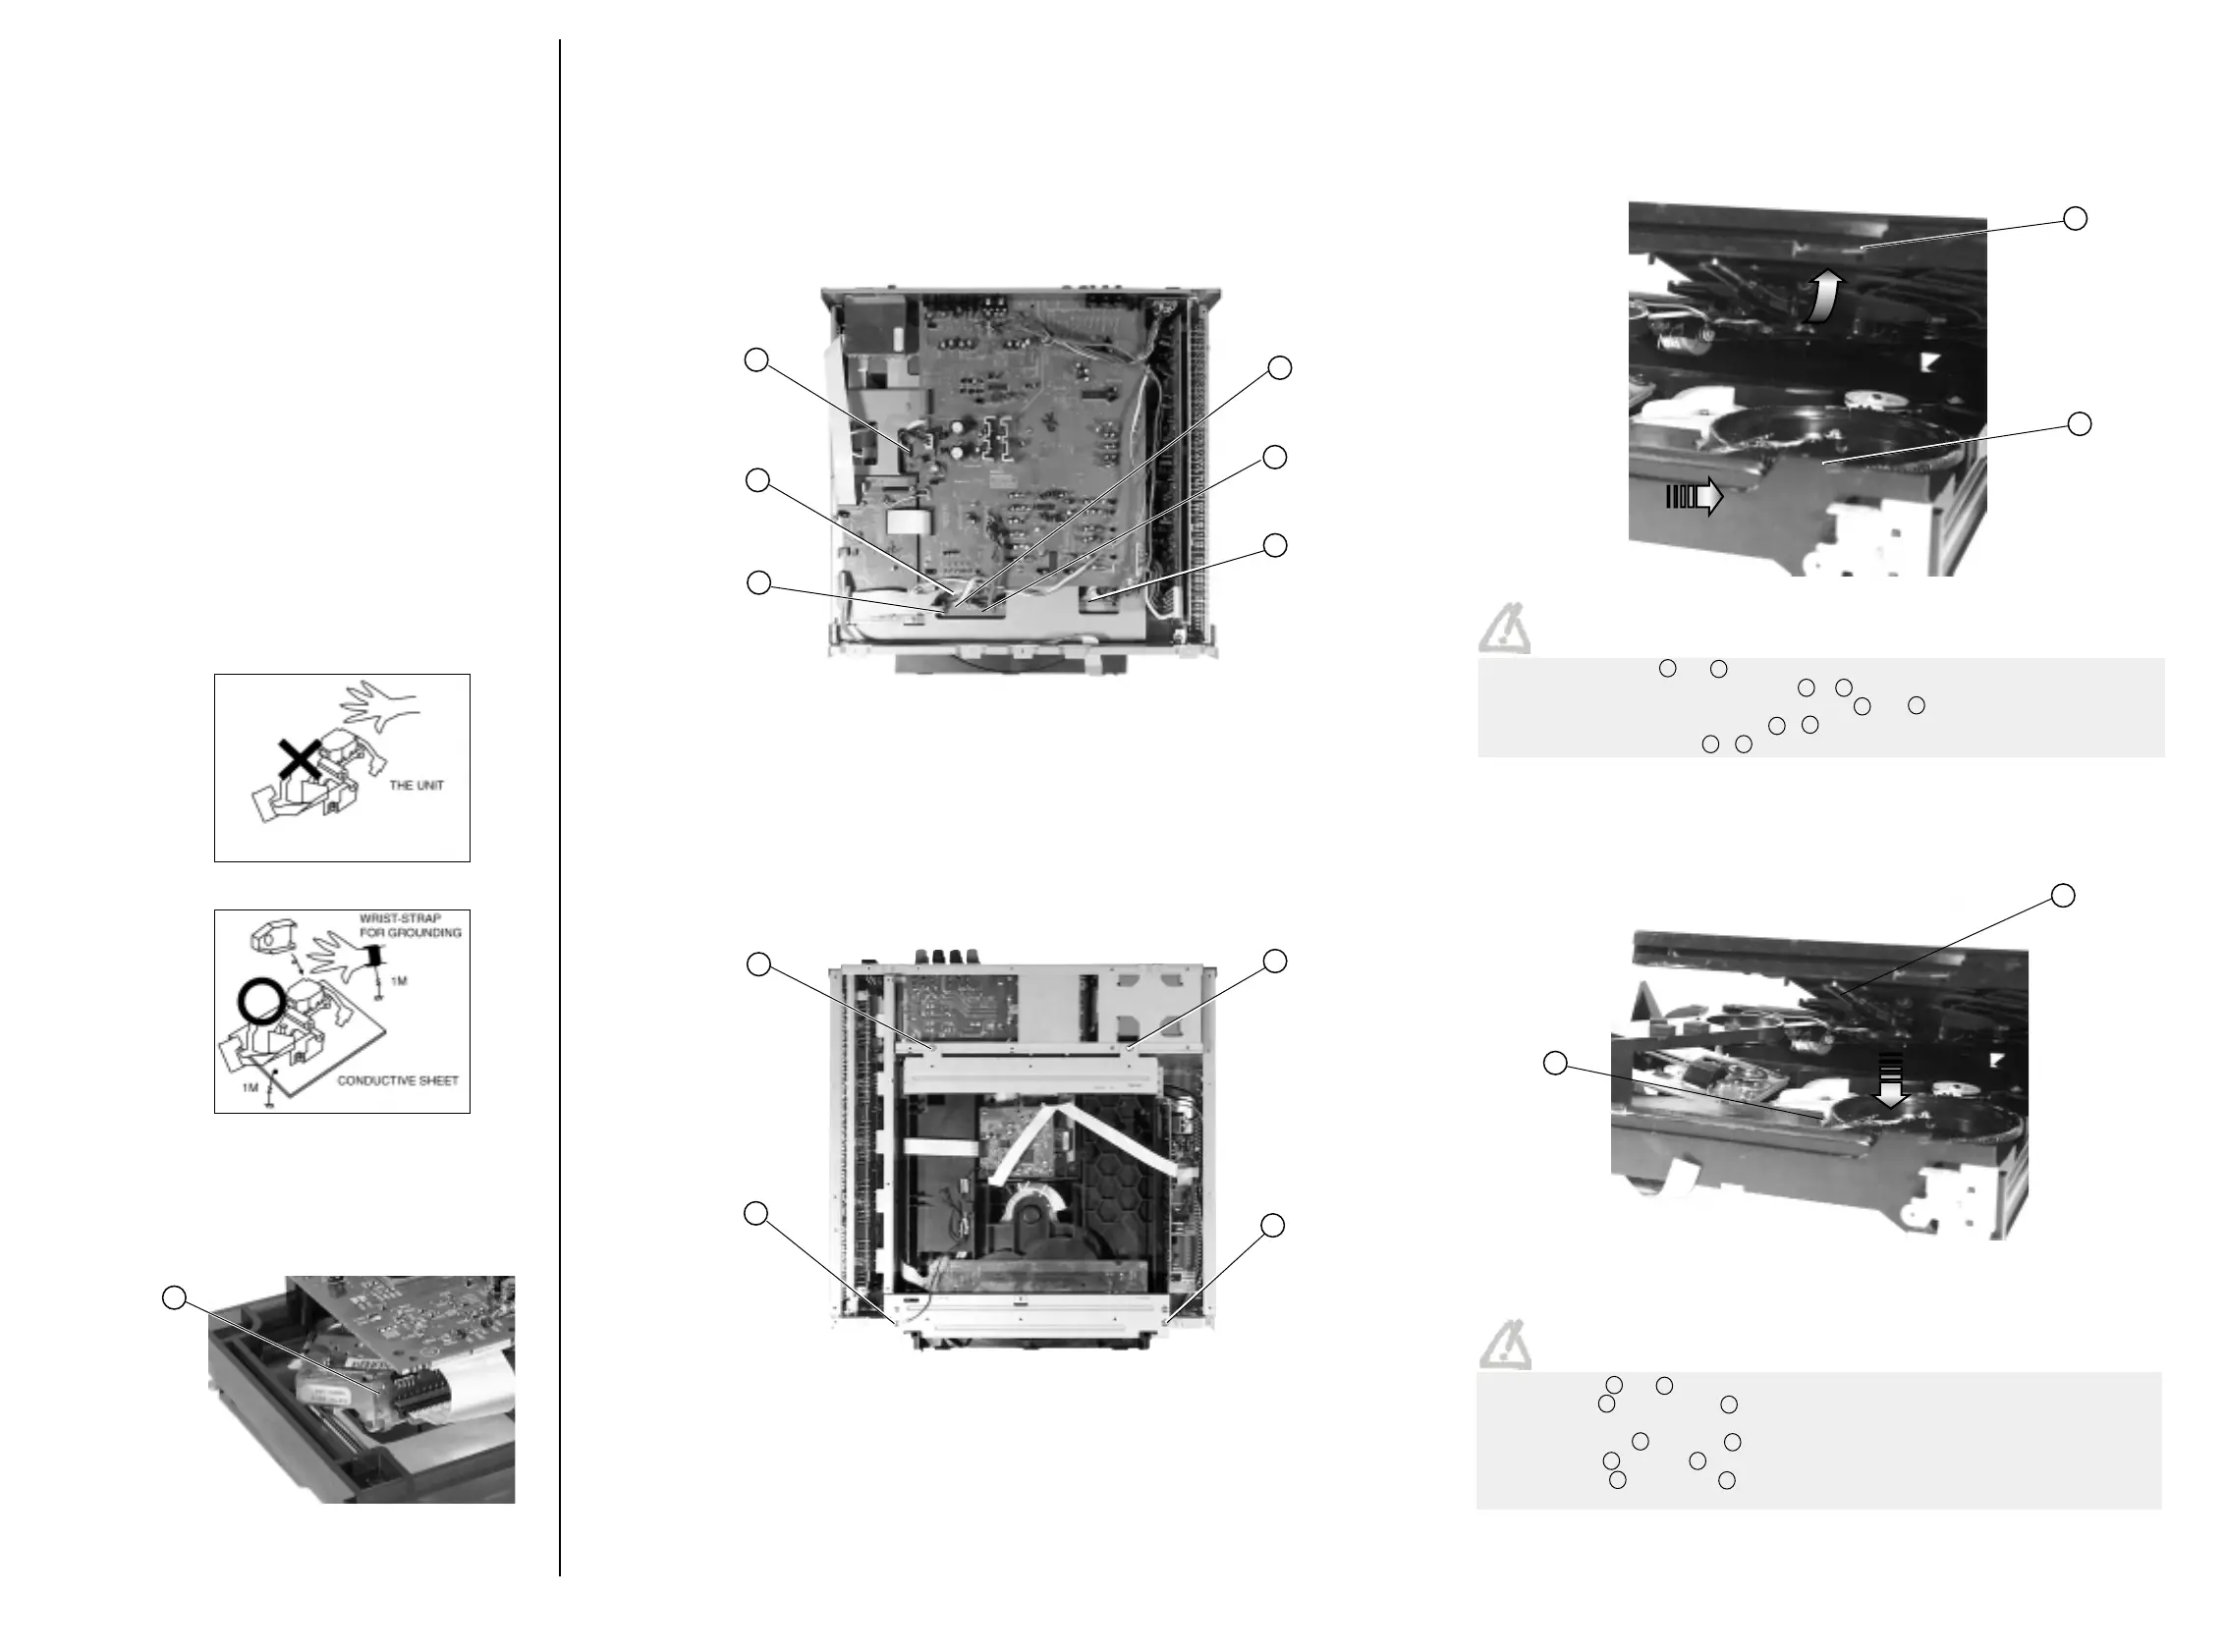
ACCESS TO DVD ASSEMBLY - ACCES A L’ENSEMBLE DVD - AUSBAU
DER DVD-EINHEIT - ACCESSO ALL’INSIEME DVD - ACCESO AL
CONJUNTO DVD
a) Disconnect - Déconnecter - Verbinder Lösen - Scollegare - Desconectar :
b) Unscrew - Dévisser - Schrauben lösen - Svitare - Desatornillar :
REPLACEMENT OF THE TRAY - REMPLACEMENT DU PLATEAU -
AUSTAUSCH DER TABLETT - SOSTITUZIONE DEL PIATTO -
SUSTITUCIÓN DE LA BANDEJA
a) Removal - Démontage - Ausbau - Smontaggio - Desmontaje :
- Slide the tray until parts A and B are facing each other, then lift it.
- Glisser le plateau jusqu'à ce que les parties A et B soient en regard, puis le soulever.
- Den Ladeschlitten soweit herausziehen, bis sich die Teile A und B gegenüberliegen, dann anheben.
- Far scivolare il Piatto fin tanto che le parti A e B siano uno di fronte all'altro, poi sollevare il piatto.
- Deslizar la bandeja hasta que A y B coincidan y levantarla.
b/ Refitting - Remontage - Einbau - Rimontaggio - Montaje :
- Insert the nipple C into D groove of the control slide (pickup in the down position).
- Insérer le téton C dans la gorge D de la glissière de commandes (bloc optique en position
basse).
- Führen Sie den Stift C in die Nut D des Steuerschiebers ein (Pickup in unterer Position).
- Inserire il perno C nel solco D dello scivolo dei comandi (pickup in posizione di riposo).
- Insertar el pivote C en la ranura D de la corredera de control de funciones (el lector láser en
posición baja).