15
EN
EN
OUTDOOR 1080P IP WIFI CAMERA
D - CONFIGURATION AND USE
• Check the "Connexion P2P [P2P connection]"
box.
• Click the "Recherche [Search]" button to nd
your camera on the network to which your
computer is connected.
• In the list of cameras found, click the one you
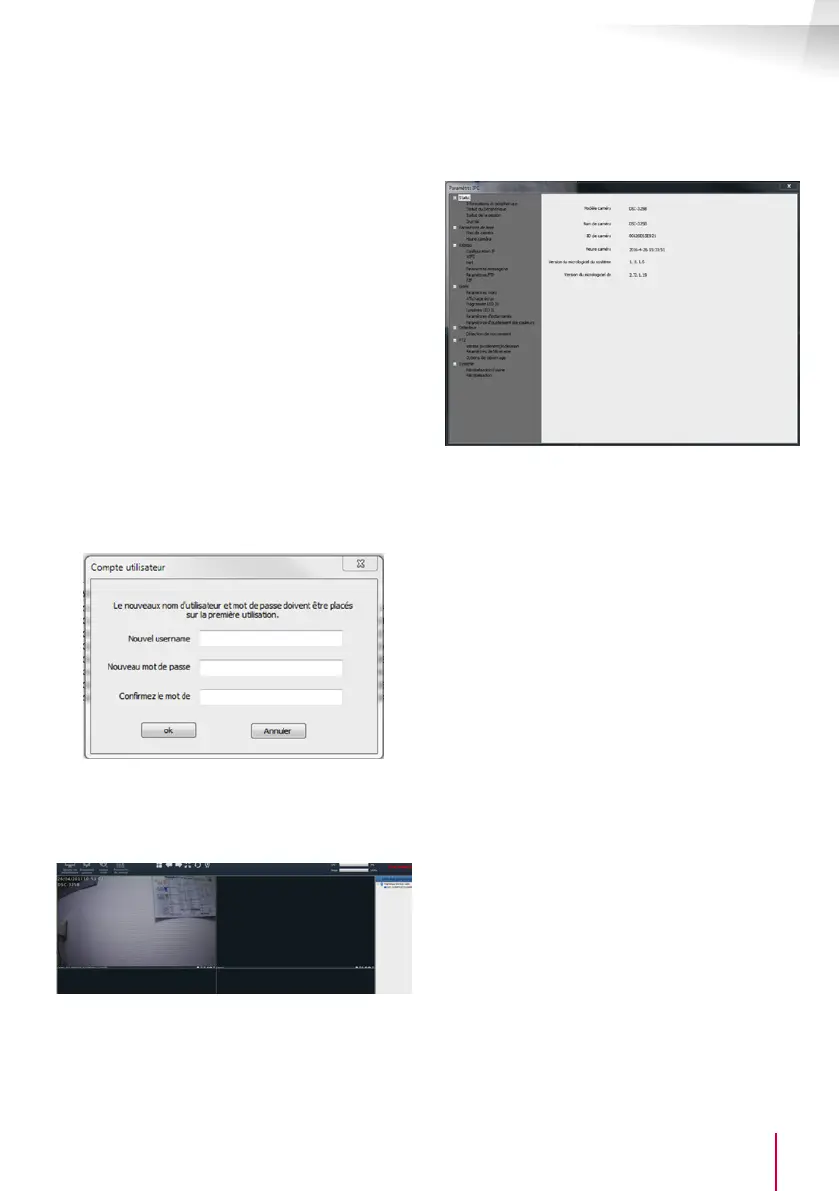
wish to add to the software. The information
in the top part of the window is lled in
automatically when you select a camera from
the list.
• If necessary, change the user name and
password to connect to the camera (the default
user name is "admin" and the password must
be left blank).
• Click "Vérication de la connexion [Check
connection]" to check the camera connection
and data entered.
• Finally, click "Ajouter [Add]".
When you connect your camera for the rst time,
you are immediately asked to change the user
name and password for camera connection, for
increased security:
Once you have modied the user name and
password, the camera appears on the list on the
right side of the software's main screen. Drag the
line of your camera into one of the viewing windows
to display the image:
Note: it is possible to connect a camera that is not
present on the network to which the computer is
connected. In step 3 above, enter the camera UID
manually: as it is not on the same network it will not
be detected and lled in automatically.
All of your camera settings can be accessed remotely
by right clicking on the name of the camera in the
list (or on the image that it displays) then clicking on
"Paramètres caméra [Camera settings]":
• Status menu: shows you the current status of
the camera: rmware version, user name, main
functions activated, last operations performed.
• Basic parameters: enables you to dene the
name and time of the camera that can be
embedded into the video of the camera.
• Network: here you have access to all of the
settings linked to network use: IP conguration,
WiFi conguration with the option of switching
the camera from a wired to a wireless
connection, ports used, email alert settings,
access to an FTP server, plug and play access
settings.
• Video: here you have access to all of the
settings linked to camera video management:
resolution, number of images per second, night
vision operation, conguration of photos taken
by the camera, contrast settings, brightness,
etc.
• Detector: here you can activate and congure
the movement detection function and the
actions to be launched if intrusion is detected.
• PTZ (compatible cameras only): here you will
nd all of the settings linked to camera motor
management if it is tted.
• System: enables you to reset the camera to 0
or restart it.
When a camera displays its image on the screen,
additional commands are displayed in the bottom
right corner:
 Loading...