LDC401 & LDC401A Automated Cleavers Chapter 12: Servicing and Troubleshooting
Rev B, July 19, 2017 Page 53
12.2. Frequently Asked Questions
Q: What is the micrometer used for?
The Micrometer Backstop process is primarily used for cleaving highly stressed (MM and PM) fibers and capillary
tubing. The Micrometer Backstop process utilizes a support or “backing” applied to the fiber during the fiber loading.
Similar to the Subcritical Process, a tension lower than that required to cleave is applied and the blade scribes the
fiber. The Micrometer Backstop enables the use of a lowered Cleave Tension while improving the end face quality.
A general rule is that the Cleave Tension should initially be lowered to 85% of the Auto Parameter value. Adjust
the tension based upon visual inspection of the end face. If there is no end face damage but the cleave has an
angle, increase tension. Decrease tension if there is end face damage but no angle. Do not go below 60% of the
Auto Parameter value. Severe blade damage may result. To use the Micrometer Backstop load the fiber in the left
FHB. Rotate the micrometer until it just contacts the fiber. Close the right FHB. Initiate the cleave as per standard
procedure. After cleaving, back the micrometer away from the cleaved fiber prior to unloading. This will ensure that
the fiber does not contact the micrometer during unloading. For more information, refer to the Process Selection
Chart in Section 7.9.2.
Q: How many cleaves per Blade?
With proper parameters, typical blade life is about 5,000 cleaves per position, with ~10 positions per Blade.
Q: How do I cleave Photonic Crystal Fiber?
The Subcritical Process is primarily used for cleaving microstructure fiber. The Subcritical Process applies a tension
that is lower than required to cleave, the blade scribes the fiber, and the tension is incrementally increased to
propagate the scribe and produce the cleave. To activate the Subcritical Process, select it in the Parameter Select
Screen, and set it to ‘Enable’. When enabled, three additional parameters values must be specified. These
parameters are Re-Tension Level, Post-Scribe Pause, and Re-Tension Pause. Please refer to section 8.8 for a
definition of these parameters. In addition to specifying these new parameter values, two existing parameter values
may require adjustment. These are Cleave Tension and Cleave Oscillation Counter (peck cycles).
Experimentation will be required in order to set these Parameters. A general rule is that the Cleave Tension should
be lowered to 60% of the Auto Parameter value and the Cleave Oscillation Counter should be set at 30. Optimal
settings for these values are achieved when then the Cleave Blade will scribe the fiber in the last few oscillations
without causing the cleave to propagate or the fiber to bow significantly. Please note: all Subcritical Process
parameters settings are VERY fiber dependent.
Q: When do I use the thumbscrews?
The FHBs are designed to accommodate a wide range of fiber buffer and cladding sizes through the use of
changeable, top and bottom, FHB inserts. Thumbscrews on the FHB tops provide added clamping force for large
diameter fibers (>400 µm) or for fibers with very slippery coatings requiring additional clamping force. If the
thumbscrews are not required, they may be kept out of the way by threading backwards into the tops or by removing
completely.
Q: How can I check the quality of my cleaves?
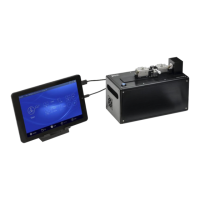
One way to check cleave quality is to use an interferometric cleave checker. If you are working with a GPX3000,
you can instead use the software included to measure the cleave angles and view the end face.
Q: How do I know how many degrees to twist the fiber to achieve an angle cleave?
Experimentation is required to determine the ideal parameters for an angle cleave of any particular fiber. The Auto
Parameter tool built into the Tablet Controller can provide a first estimate for the cleave parameters. If you have
further questions, contact Thorlabs’ tech support at techsupport@thorlabs.com.
Q: How do I know which Inserts I need to use with my fiber?
Refer to the “Insert Selection Guide” (Section 10.1) or use the Insert Selection tool (Section 9.5.5).
Q: How do I figure out the meaning of all the Parameters referenced by the Tablet Controller?
Refer to Chapter 9: Controlling the LDC401.
Q: Is there a way to neatly cleave highly stressed fibers and very delicate fibers?
Yes, refer to Section 7.9: Specialty Cleave Processes.
Q: What should I do if the unit does not seem to be working properly?
Refer to Section 12.3: Troubleshooting.
For other questions, contact the distributor you bought the Cleaver from.
 Loading...