8 9
Template Mounting
Template mounting demands a flat, smooth tabletop apron at least 3” (75mm) high with 2” (50mm)
back-side clearance. Otherwise, a mounting bracket is required.
Mounting Surface:
TigerFence mounts to the side of the tabletop. It requires a flat, smooth mounting surface at least 3” (75mm)
high. Mounting surface deviations cause inaccuracies and excessive wear on TigerFence.
Lay the Template Over the Table:
Remove the paper template from the cardboard tube. Fold it over the table as shown on the template. The
template has several suggested drilling locations. Use a center punch to mark a bolt pattern that suites your
table saw. Mark at least 4 drilling locations (2 upper and 2 lower) and no more than 8. Mark the cutting line safe
distance noted on the template, as well.
Drilling:
Drill the marked holes using a 3/8” drill bit.
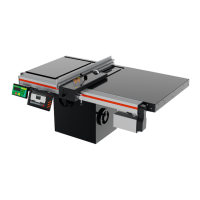
Insert Mounting Hardware:
Slide TigerFence onto Hardware:
TigerFence Installation
Tighten Mounting Hardware:
Have a helper hold TigerFence in position while you tighten the nuts.
Tighten 1/4 turn past finger tight, only.
Final Checks:
Ensure the TigerFence beam is level and sits ½” (13mm) below the tabletop.
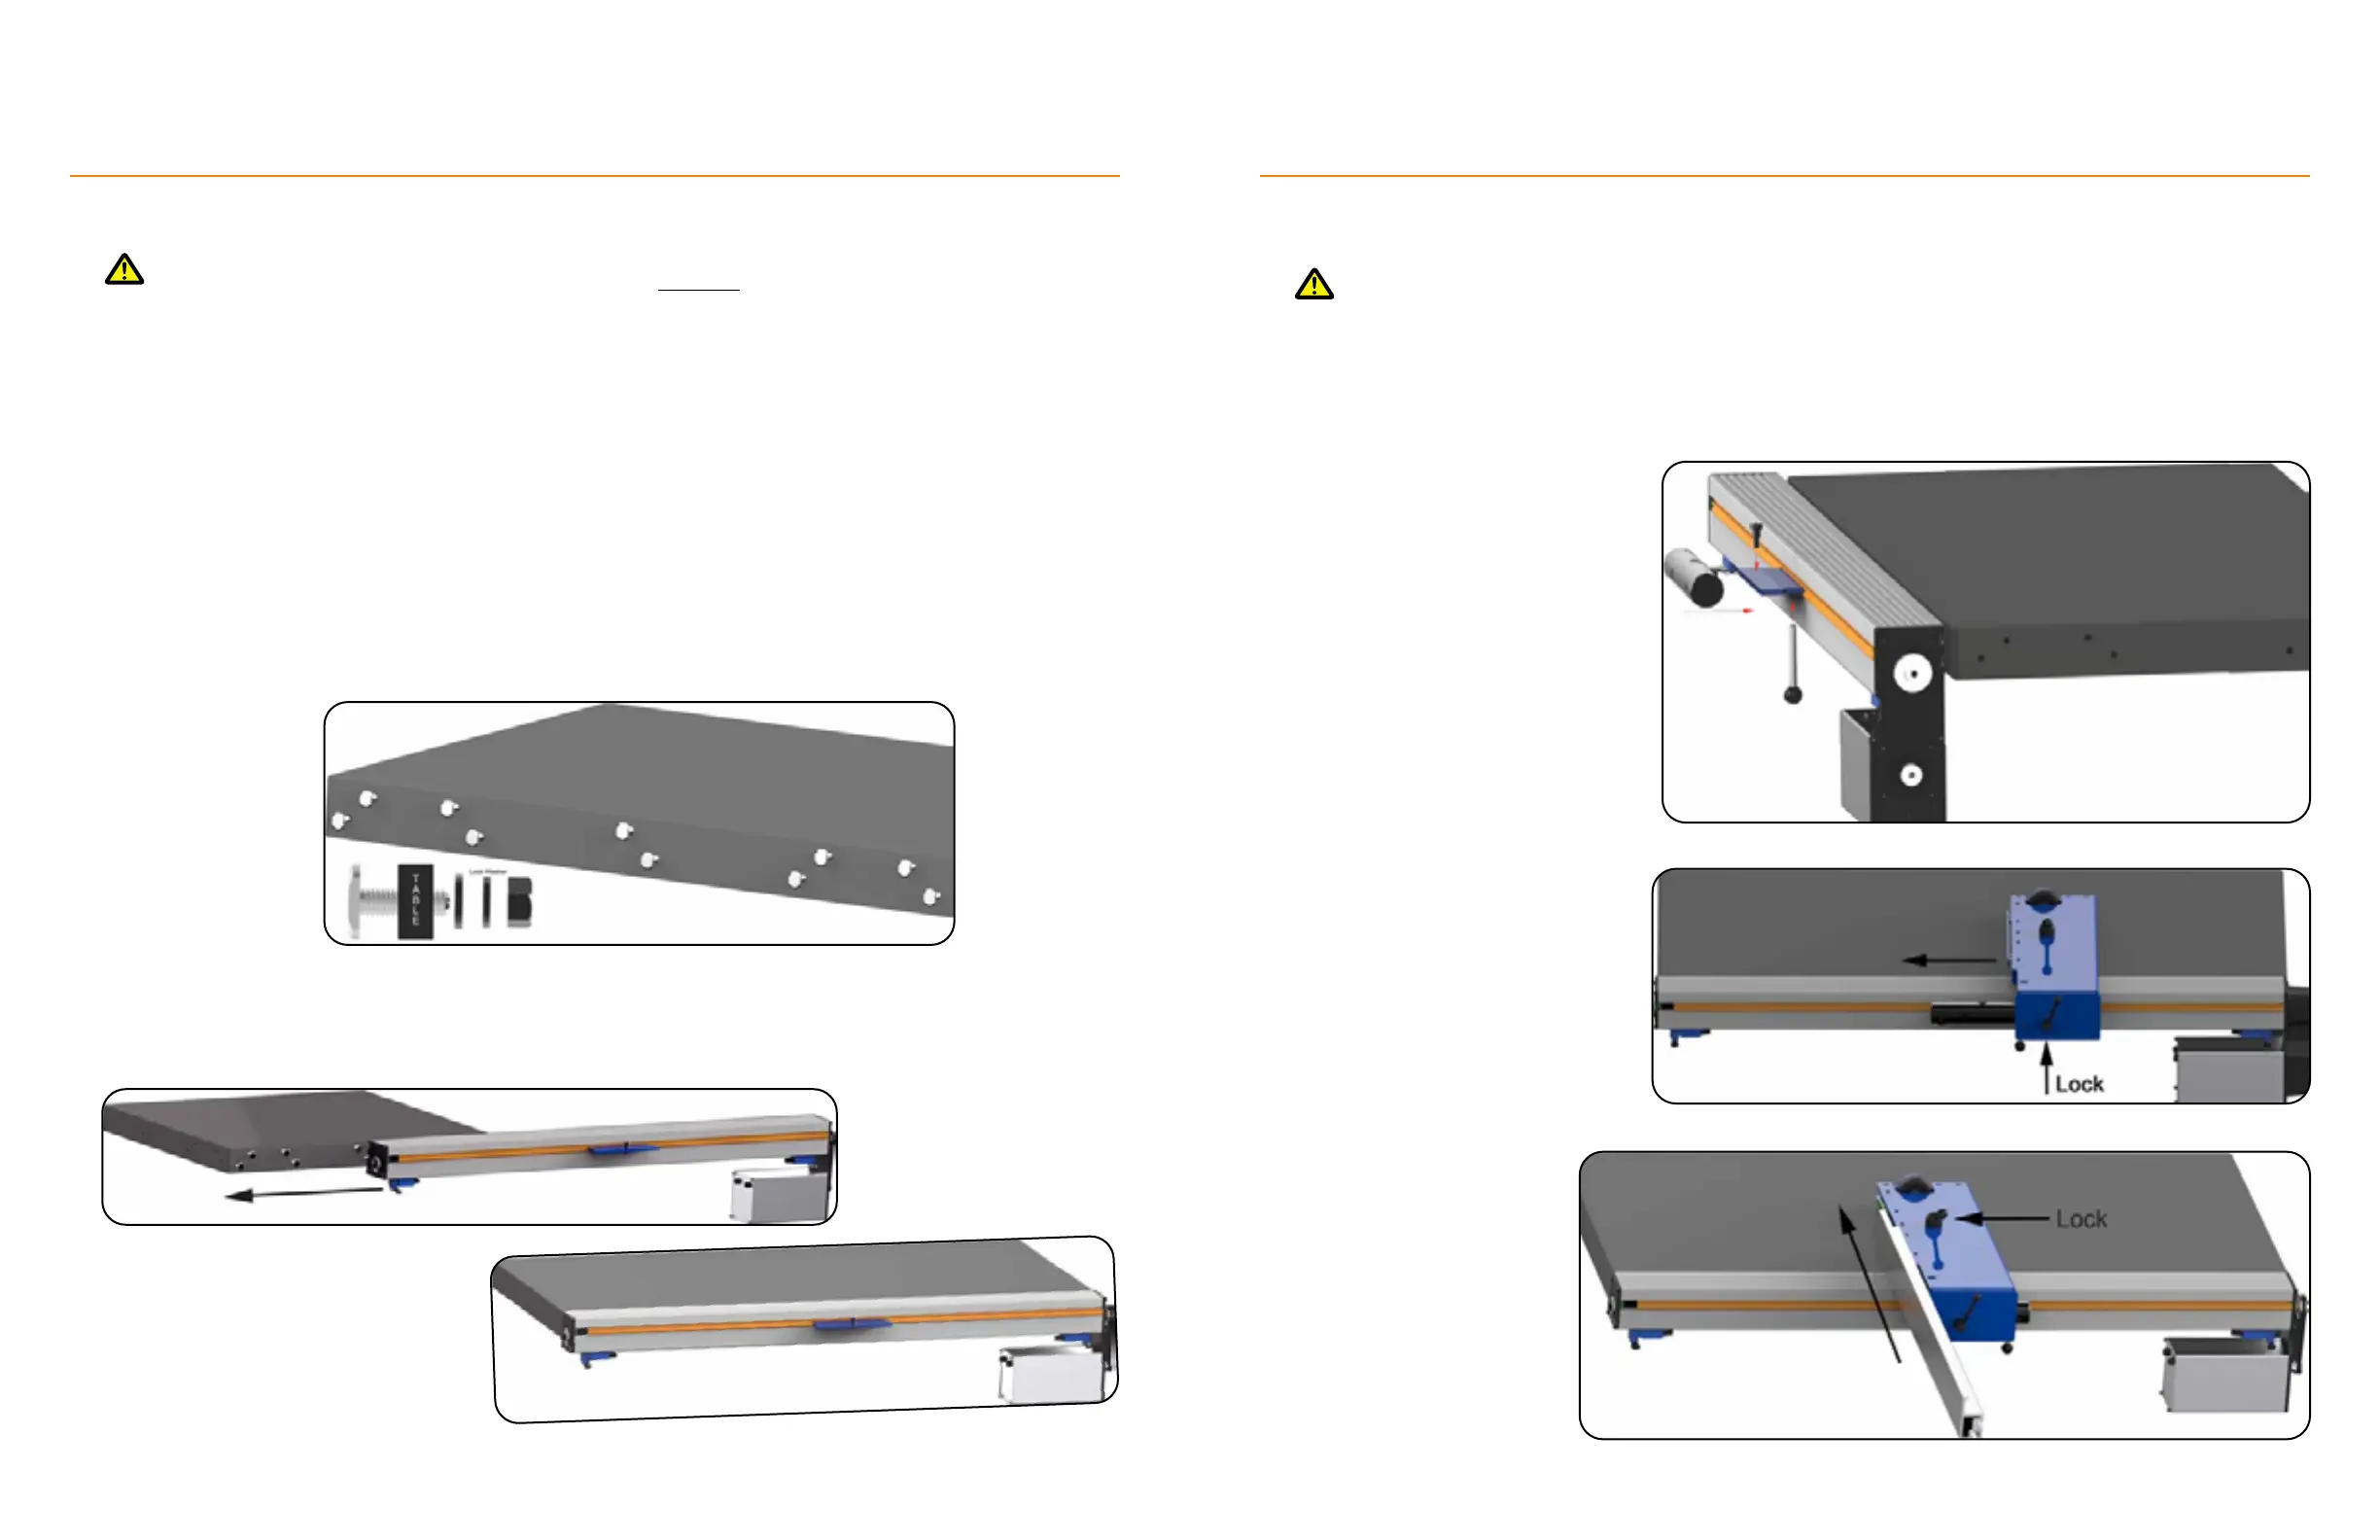
Attach the Fence Body
Attach Ripping Fence
1. Fasten the Limit-Switch Post to the
underside of the carriage.
2. Slide the Clamp Bar onto the
carriage and fasten from the top
with the Shoulder Bolt.
1. Slide the Fence Body onto the
Clamp Bar.
2. Fasten the Fence Body using the
Body Handle.
TigerFence Installation