6 7
TigerFence Installation
Electrical Requirements
Power
TigerFence requires a dedicated circuit.
VOLTS CIRCUIT BREAKER
120V 15A
208/230/240V 20A (USA)/16A (EU)
Remove Existing Fence
Remove the existing fence. Inspect the mounting surface carefully. File down any bumps and fill any valleys.
If this is not possible, you may need to shim TigerFence to make it perfectly parallel with the saw blade.
Mounting Options
There are two ways to mount a TigerFence.
1. Bracket mounting involves installing a metal bracket to the table saw and then fastening the TigerFence to
that bracket. This method works on a wide variety of table saws (page 6).
2. Template mounting involves installing the Tigerfence directly to the table saw. This method has specific
requirements to be a viable option (page 8).
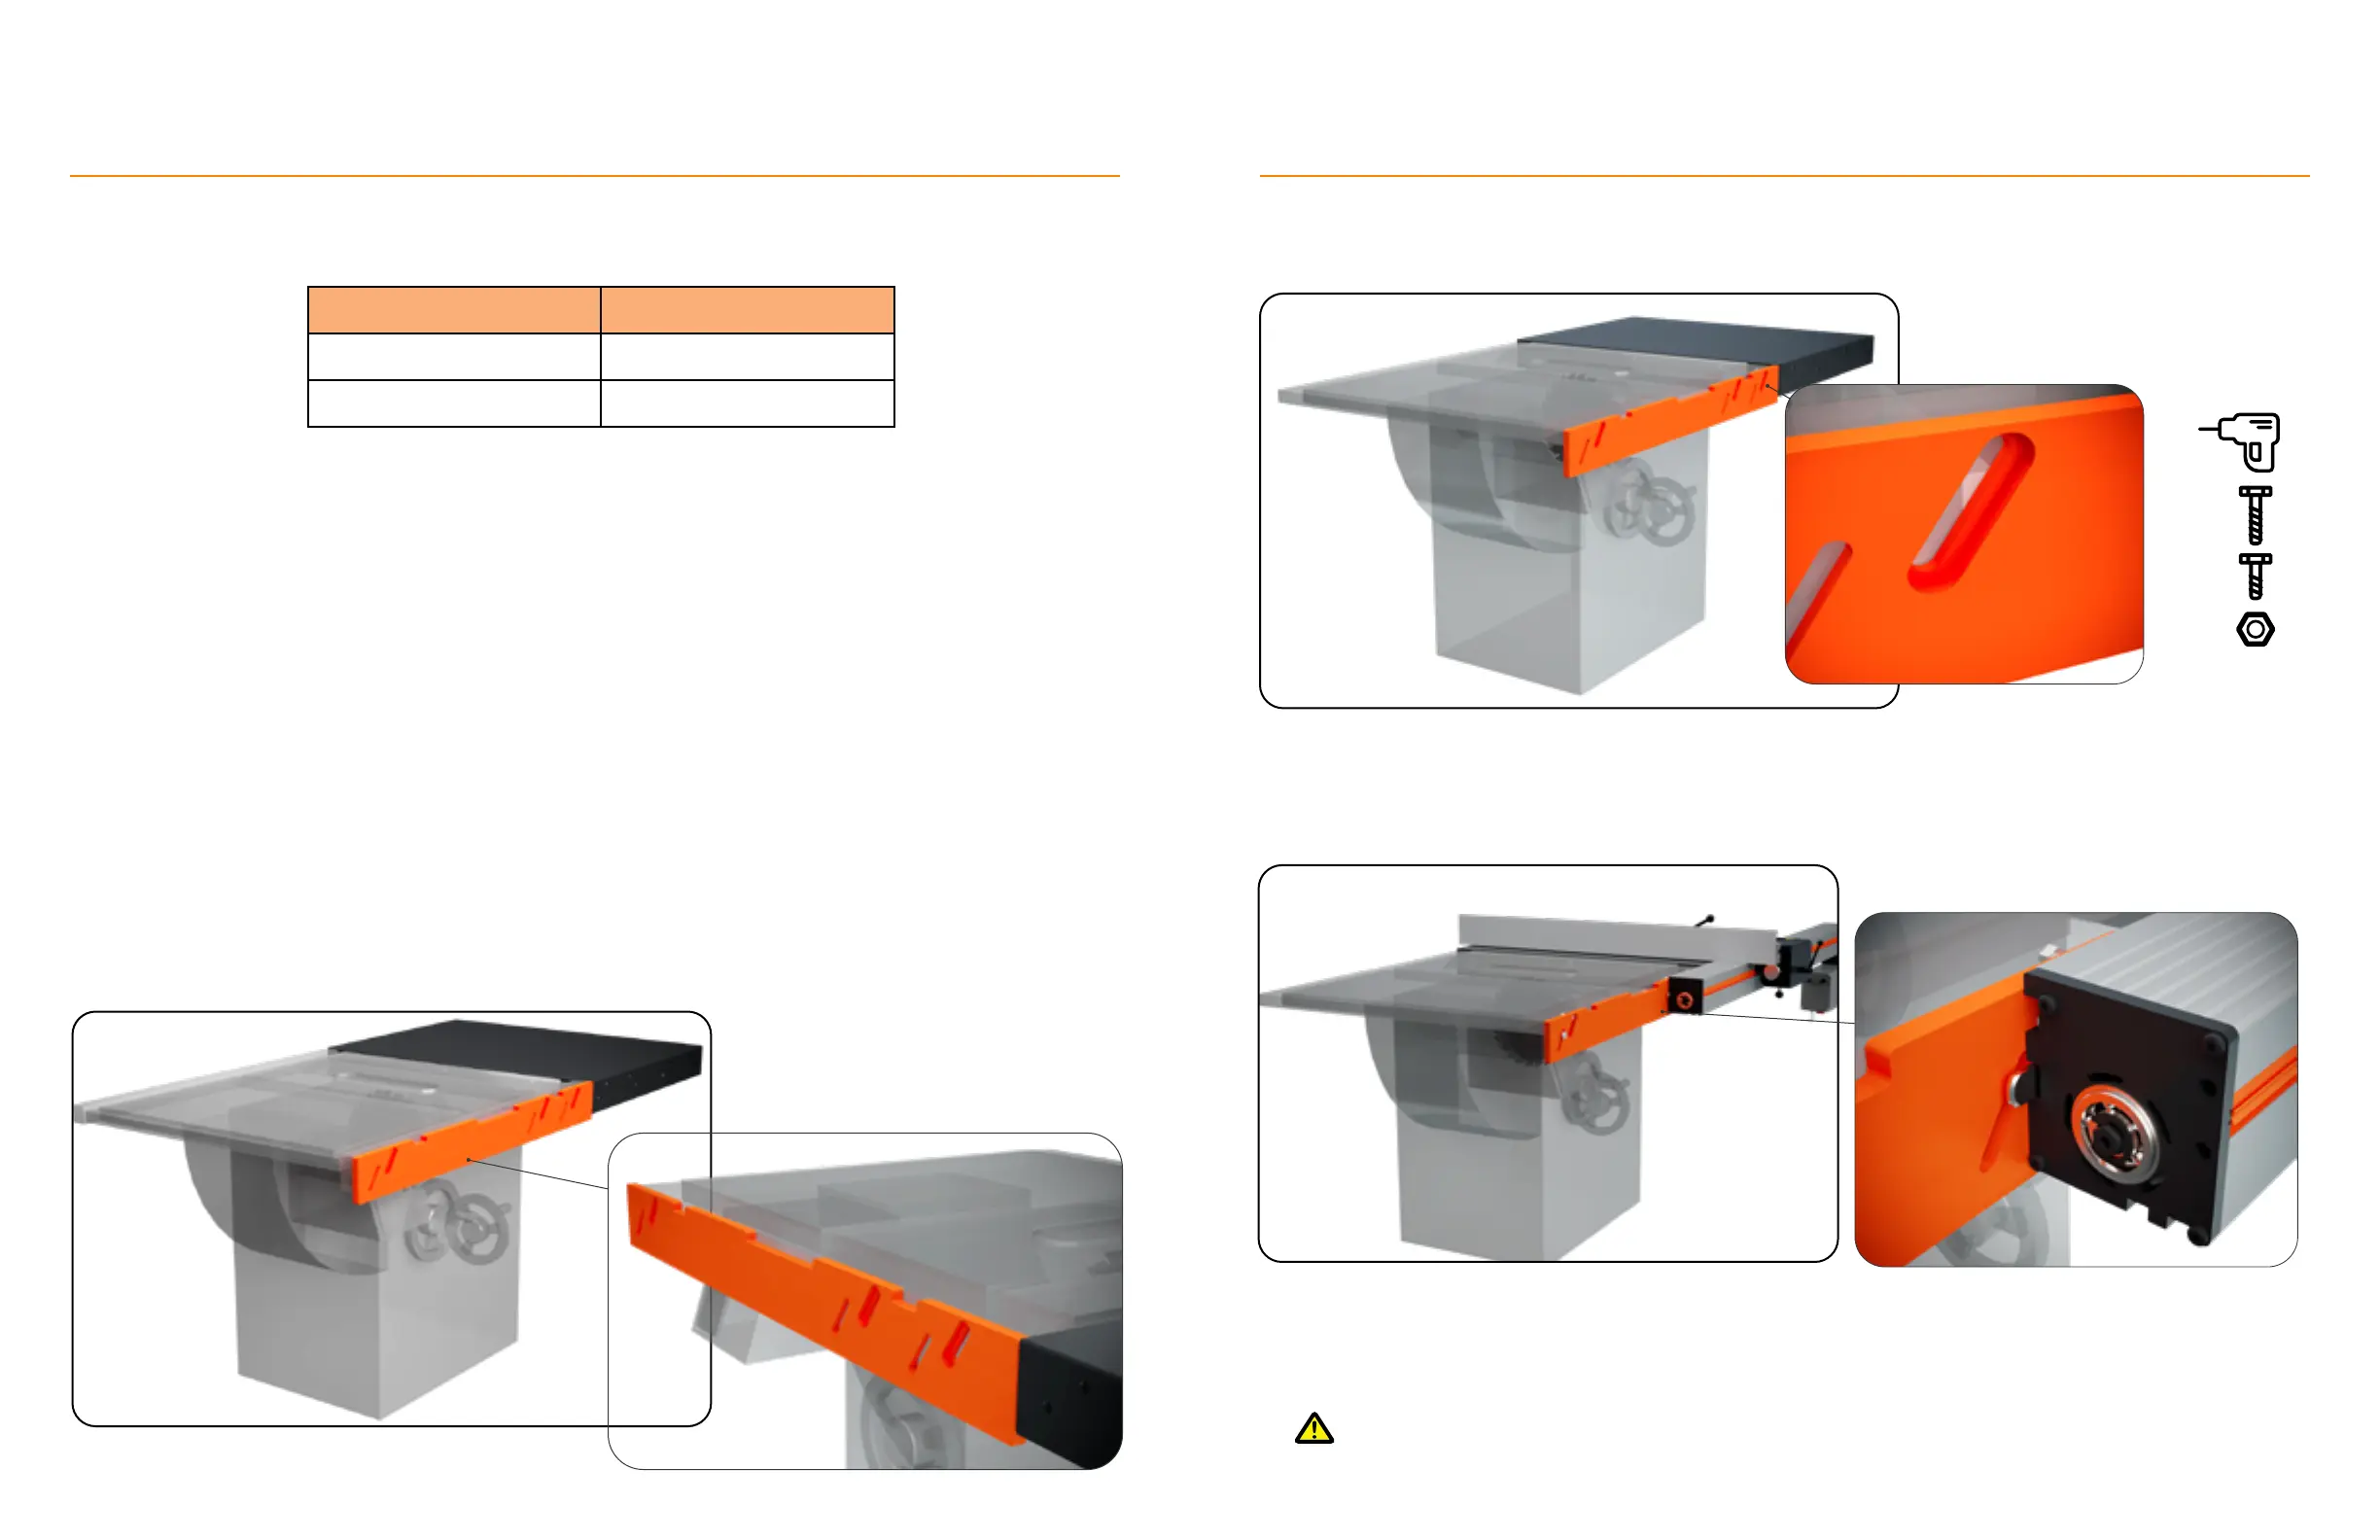
Bracket Mounting
Positioning the Bracket:
Place the mounting bracket flush and parallel to the tabletop and align the U-cuts with the table runners. Check
that the bracket’s upper slot counter-bores are facing the user. Ensure that there is 3” (75mm) between the end
of the TigerFence beam and the cutting line, when mounted.
Mounting TigerFence
Drilling:
Mark one drilling location in each of the bracket’s 3 upper slots. Drill and tap for M8x30mm screws.
Mounting:
Fasten the bracket to the table using the M8x30mm screws. Insert one M8x35mm T-bolt through each of the 3
lower slots. Fasten using the washer, locking washer, then nut. Slide the TigerFence onto the T-bolts.
Final Checks:
Ensure the TigerFence beam is level and sits ½” (13mm) below the tabletop. Have a helper hold TigerFence in
position while you tighten the nuts.
Tighten 1/4 turn past finger tight, only.
TigerFence Installation