10 11
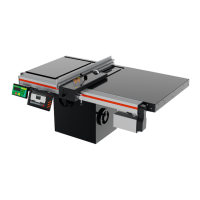
Adjusting Square
The clamp bar has 6 adjustment set screws.
Adjust each one as necessary to square the fence.
Reinstall the fence body and check for square.
Check Pulleys
Ensure the belt is tight on the pulleys
and the set screws are secure. See
“Maintenance Schedule” (page 31)
for belt tension instructions.
Attach Cover
Fasten the Motor Cover using 3
M4x8mm (or 12mm) screws.
Adjust the set screws using a 5mm hex wrench.
TigerFence Installation
Controller Stand
Description and Use
The controller stand is used for mounting the standard controller to any
support structure.
The controller stand can be adjusted between 0-90° with the base
hardware.
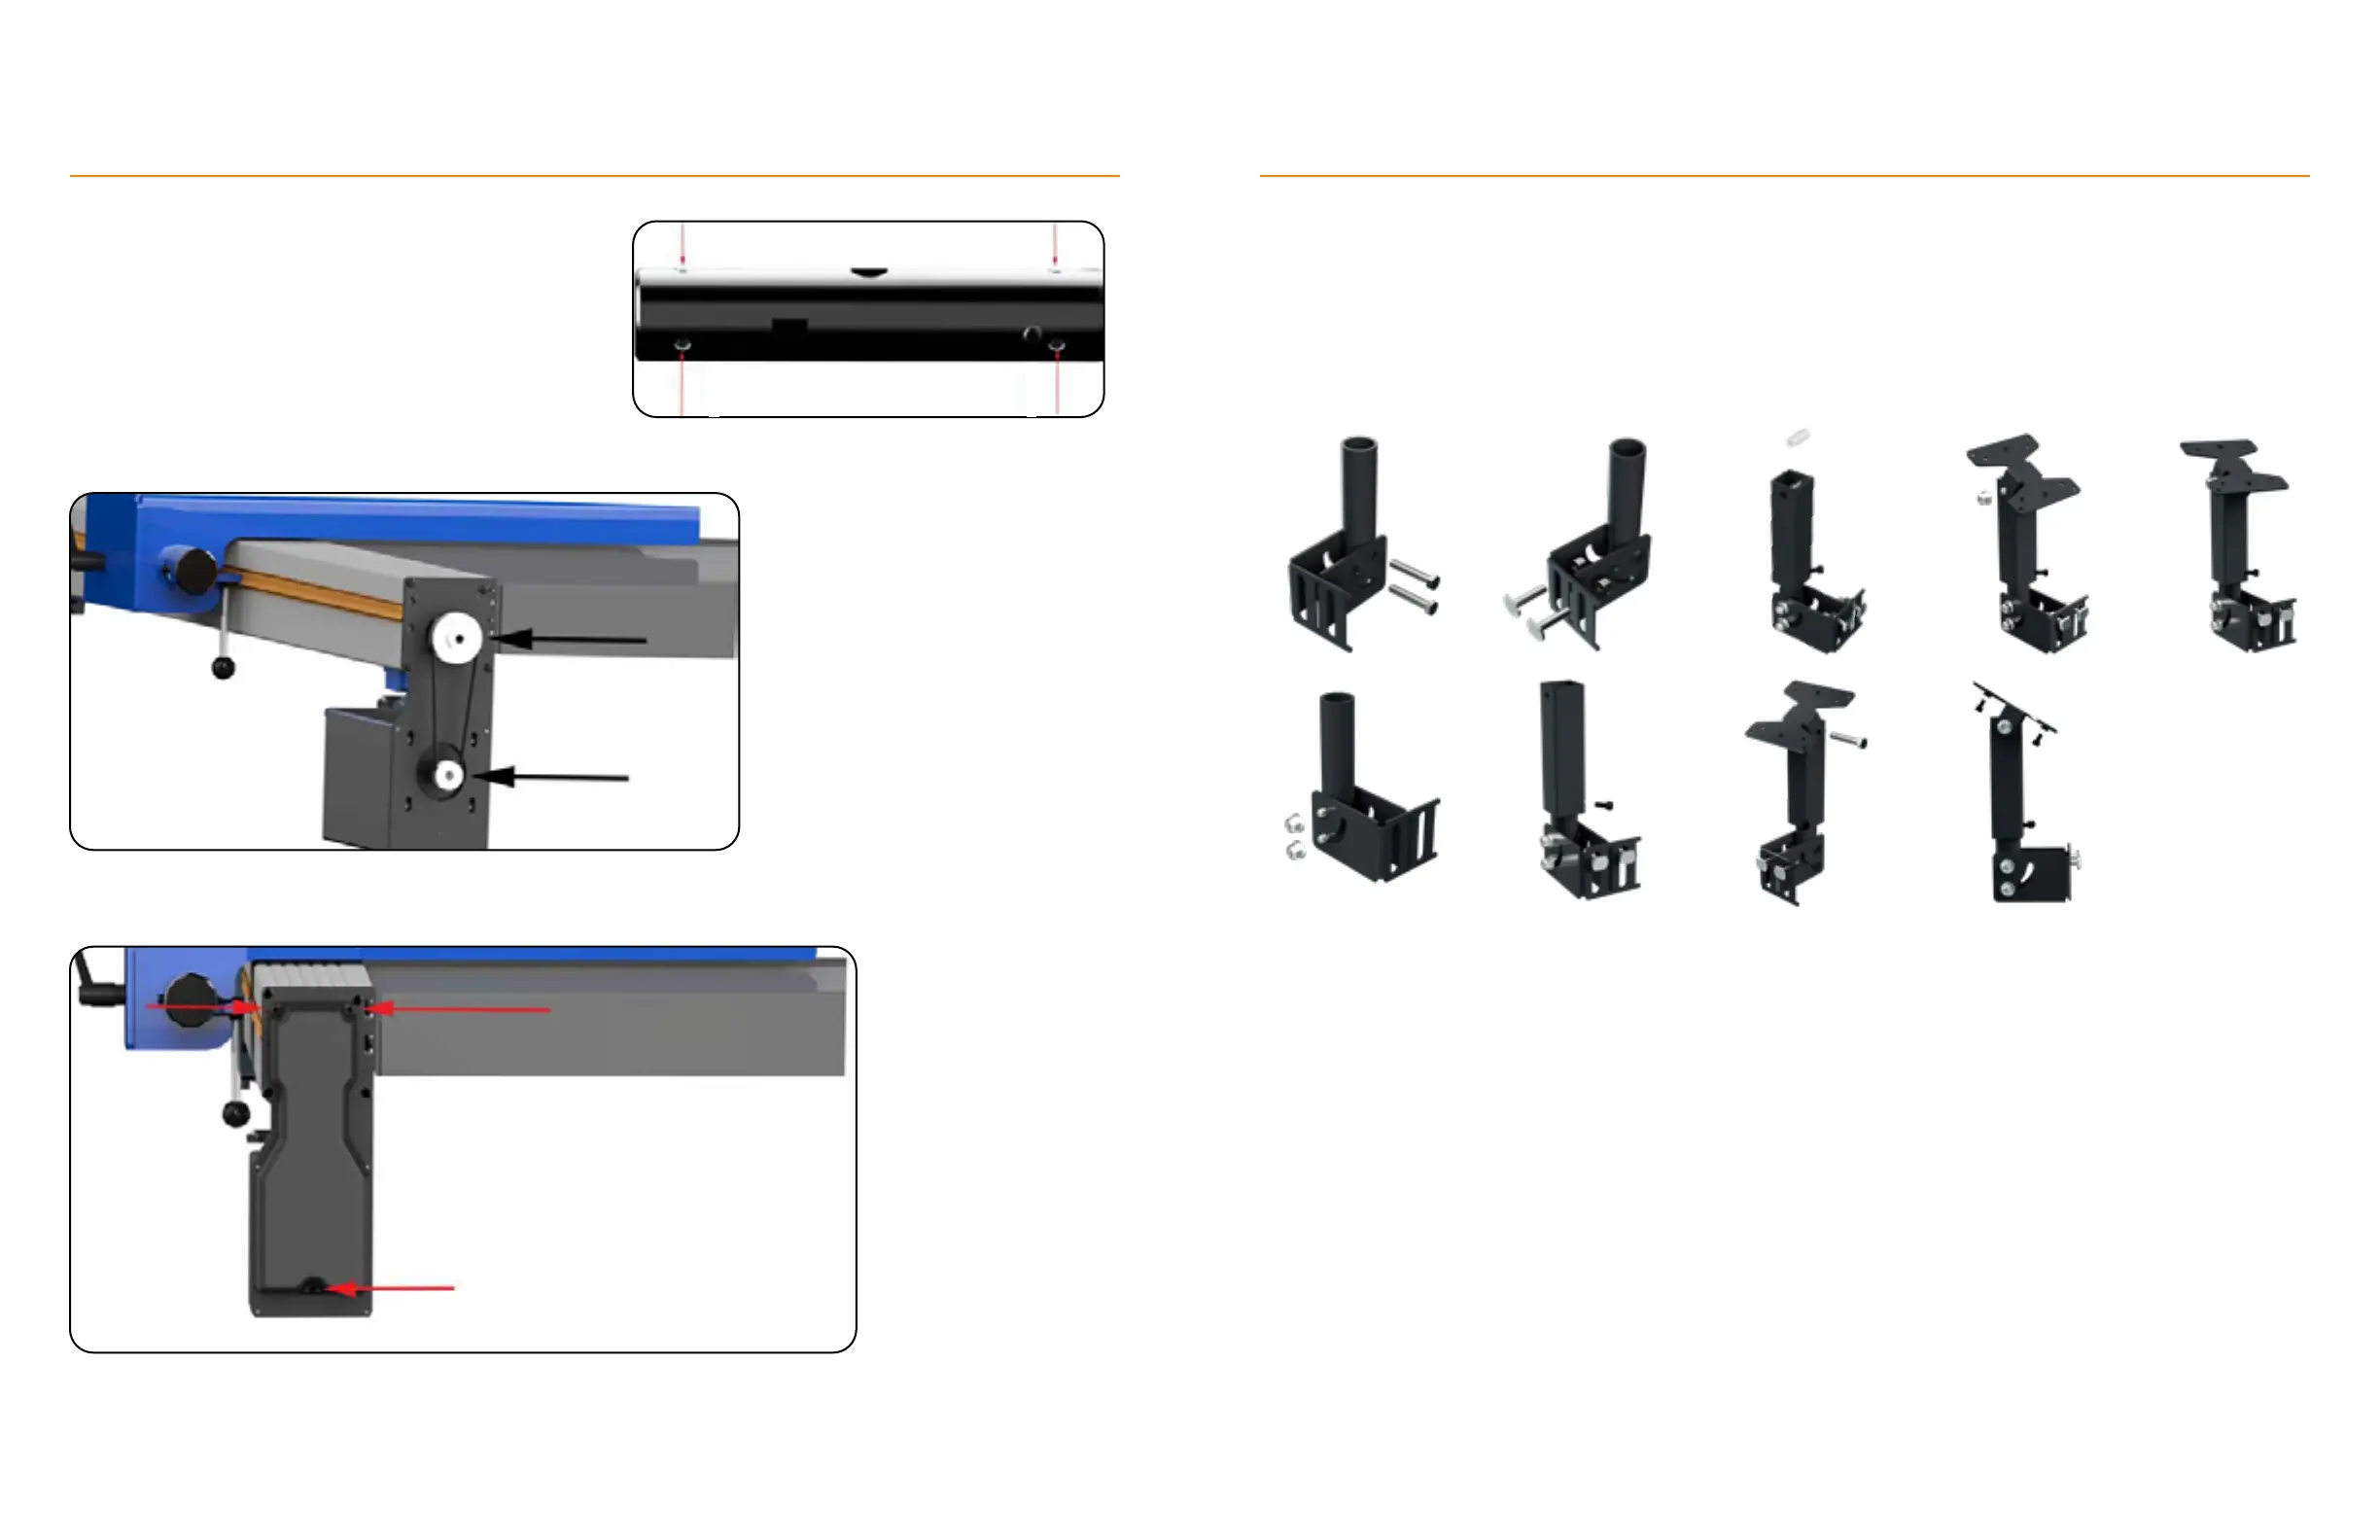
Assembly
1. Place the Controller Stand Base Brackets against the Round Tube and insert two M8x45mm Hex-Head
Screws through all three parts.
2. Fasten the Base Brackets to the round tube with M8 Flange Nuts.
3. Insert one M8x35mm T-bolt through each vertical slot in the Controller Stand Base Brackets. Fasten with
M8 Flange Nuts.
4. Insert the Round Tube into the Square tube and fasten with an M6x14mm Socket-Head Screw.
5. Place the Spacer between the Square Tube’s holes.
6. Connect the Spacer, Top, and Tube with an M8x50mm Hex-Head Screw.
7. Fasten with an M8 Flange Nut.
8. Attach the TigerStop
Standard Controller to the Controller Stand Top using an M6x10mm Socket-Head
Screw.
TigerFence Installation
9.1.
2.
3.
4.
5.
6.
7.
8.