21
E
N
G
L
I
S
H
Remote Line Adapter (optional equipment)
NOTE: The following includes instructions for installation, turning on, and turning off the air/
CO2 cylinder of the Tippmann H-01 Remote Line. If your remote line is not this Tippmann
model, follow the instructions provided with your remote line for installation, turning on, and
turning off the remote air/CO2 cylinder.
Connecting, Disconnecting, and Removing a Remote Air/CO2 Cylinder
1. Eye protection designed for paintball use must be worn by the user and any person
within range. Put trigger safety in Safe mode (see page 6). Install the barrel blocking
device (see page 4). Remove and unload the Magazine (go to page 9 and follow
Magazine Removal, Loading, and Unloading instructions).
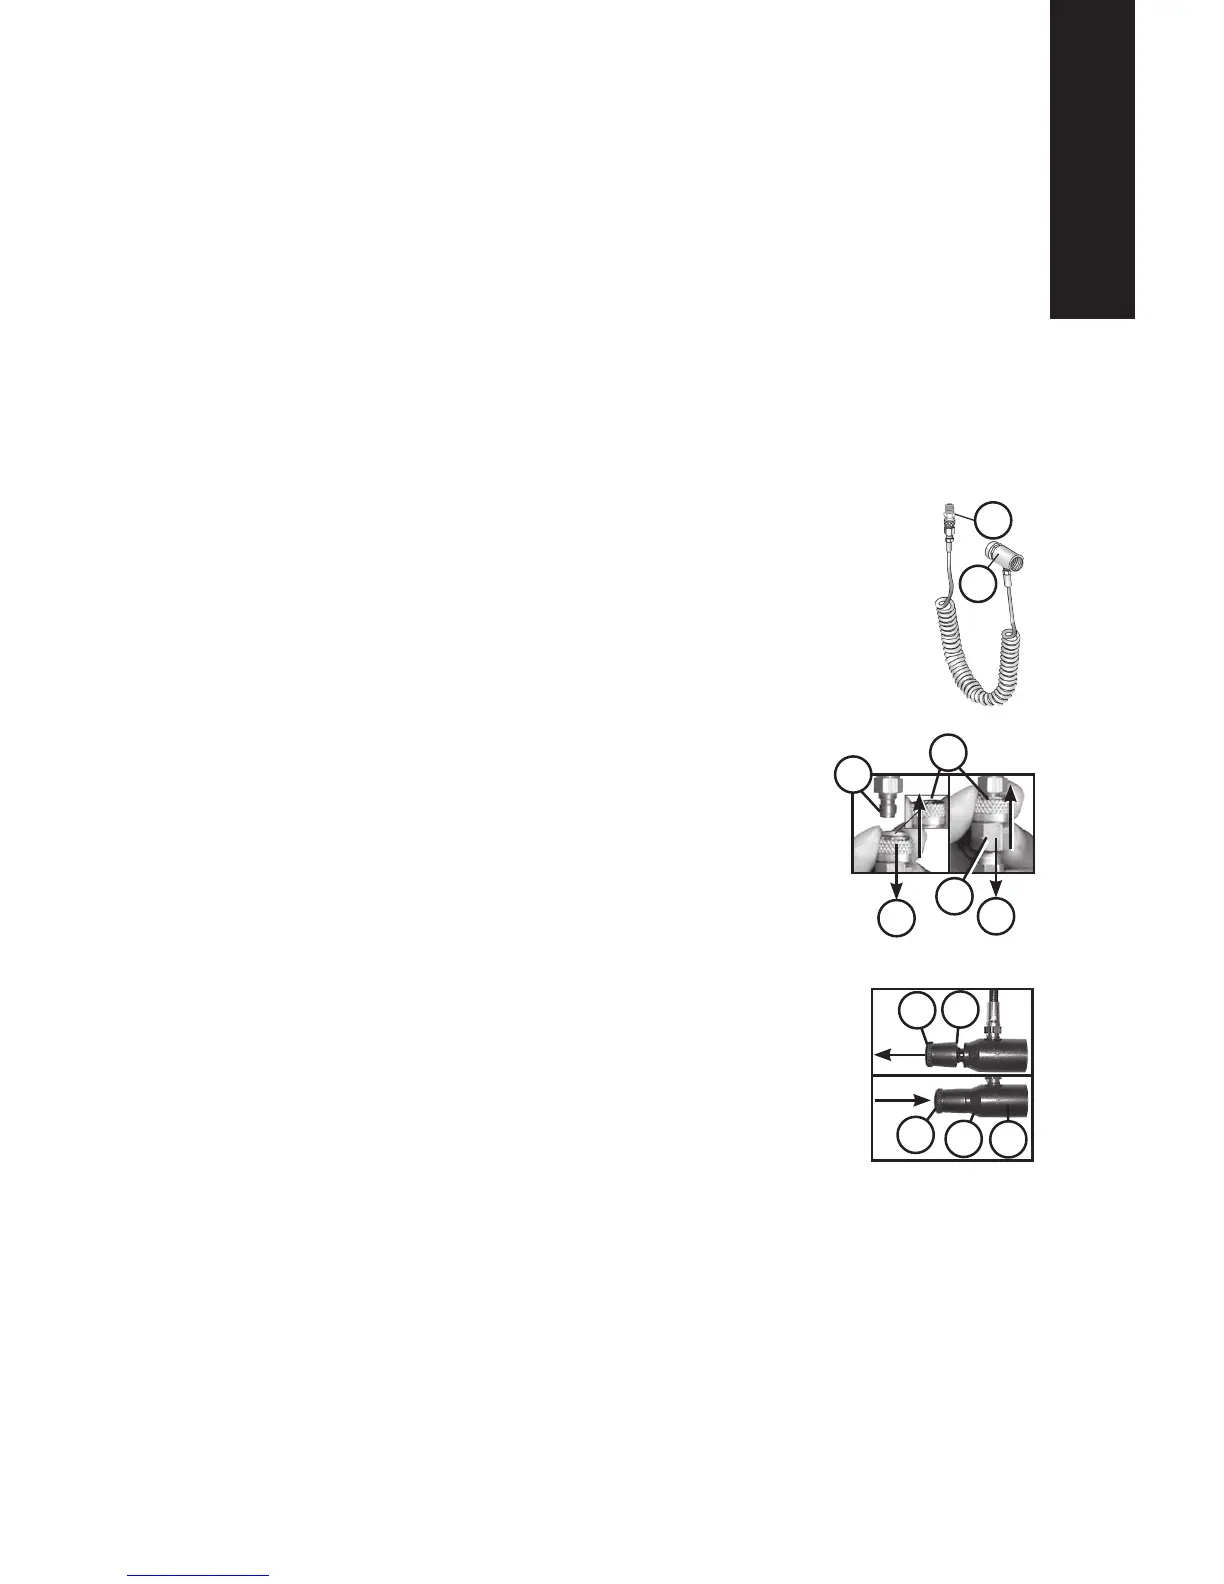
2. Pull and hold the Remote Coil tting Locking Ring (A) down to connect or remove the
Remote Coil tting (B).
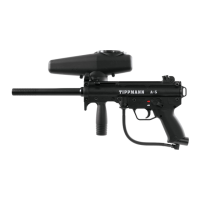
3. To connect to the marker, with the Locking Ring (A) held down, push the
coil tting (B) up onto the nipple (C) and release the locking ring up to
lock (D). Pull down on the Remote Coil tting (E) to be sure it is locked
properly.
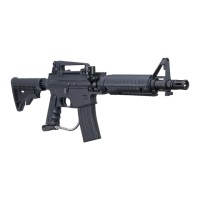
4. Before attaching the air/CO2 cylinder to the Remote Line, markers with
a Remote Line Adaptor must rst have an empty 12 gram CO2 cartridge
installed to operate properly. Turn off the Remote Line air/CO2 ow control
valve (F) by turning the ow control (G) counterclockwise outward until it
stops (see illustration at right). Install a 12 gram CO2 cartridge
by following the CO2 Cartridge Installation instructions on
page 8. Empty the cartridge of all CO2 by following steps 1-6 in
Removing a Used CO2 Cartridge (Punctured) on page 11,
leaving the empty cartridge installed in the marker.
5. Install the air/CO2 cylinder. First mark the cylinder and cylinder
valve if necessary (see Air/CO2 Cylinder Warnings and
Safety Tips on pages 22-24). Lubricate the cylinder valve
O-ring with a little marker grease, then insert the cylinder valve
end into the Air Supply Adapter (ASA) of the Remote Line. Twist
the cylinder clockwise into the ASA (H) until it stops. Your marker is
ready to re once you:
• turn on the ow control (G) clockwise all the way in (J),
• remove the barrel blocking device, and
• switch the trigger safety from Safe mode to Fire mode.
To turn off the air/CO2 supply, turn the ow control (G) completely
clockwise out (F). To turn on air supply, turn ow control
counterclockwise completely in (J).
NOTE: If the air/CO2 cylinder is full, and you do not hear the marker pressurize, the Pin
Valve could be too short or the Pin Valve Seal is damaged. You will need to remove the
remote air/CO2 cylinder and take it to a “C5” Certied Airsmith for repair.
6. Air/CO2 Cylinder Removal — You must rst read the Air/CO2 Cylinder Warnings and
Safety Tips on pages 22–24 before beginning the cylinder removal process in
step 7.
H.
B.
A.
C.
D.
E.
B.
F.
G.
J.
H.
G.