8 RX-80
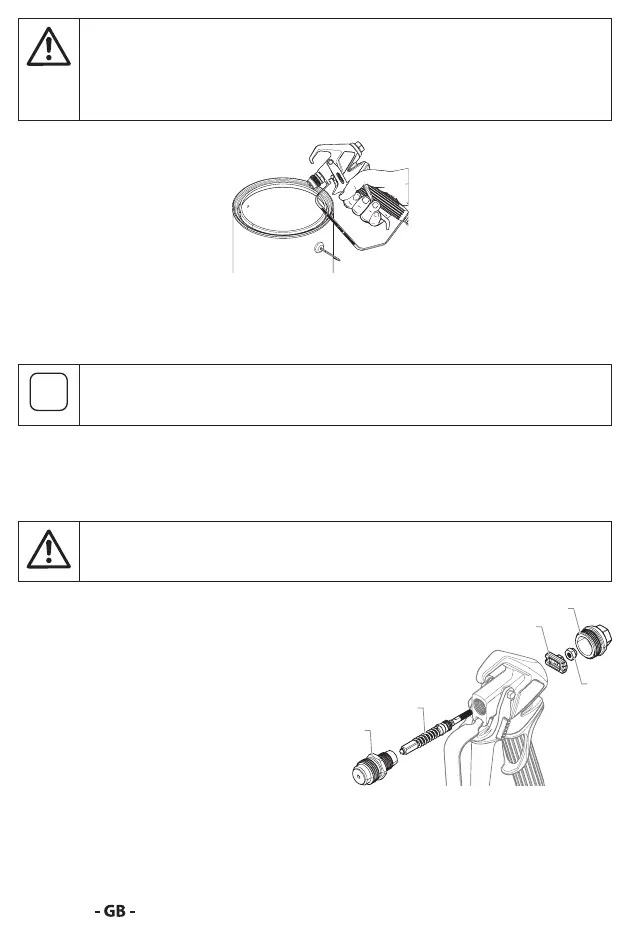
Always spray at the lowest possible pressure when the tip and tip
guard have been removed. To clean the airless gun, hose and spray
device, use only water or a suitable solvent. Static electricity buildup
may result in a re or explosion in the presence of ammable vapors.
Hold the gun rmly against a metal container while ushing.
MAINTENANCE
Follow all safety precautions as described in the Safety Precautions section of
this manual before proceeding.
Refer to the Parts List section in this manual for part identication.
REPLACING/SERVICING THE SEAL ASSEMBLY
If your spray gun leaks or spits at the tip when you release the trigger, the
needle is worn, damaged, or dirty and must be replaced or cleaned.
Never attempt to perform maintenance on the spray gun without
rst performing the “Pressure Relief Procedure.”
5
4
3
1. Disconnect the uid hose from the gun.
2. Remove the tip and tip guard.
3. With the trigger depressed, remove the
diuser (1) from the front of the gun.
4. Using an adjustable wrench, loosen and
remove the rear housing (2).
5. Using a 3/8” ratchet, remove the lock
nut (3) from inside the rear of the gun
head. Remove the retractor plate (4).
6. Remove the seal assembly (5) from the front of the gun head by pushing or
gently tapping at the back of the seal assembly.
7. Soak the removed parts in the appropriate solvent and wipe clean.
8. Inspect the parts for wear or damage and use new parts during reassembly
of the gun, when necessary.