First time usage
Assemble the Tobii T60/T120
Assemble the monitor to the desk stand. Make sure all parts are mounted correctly and
secured. Read more on page 7.
Configure the network card
Install and configure the separate USB Ethernet adapter, configure the built in network card in
your computer, your network router, or your office LAN. For complete details see pages 8-10.
Install the eye tracker software
Install Tobii Studio or Tobii Eye Tracking Tools. For complete details see page 8.
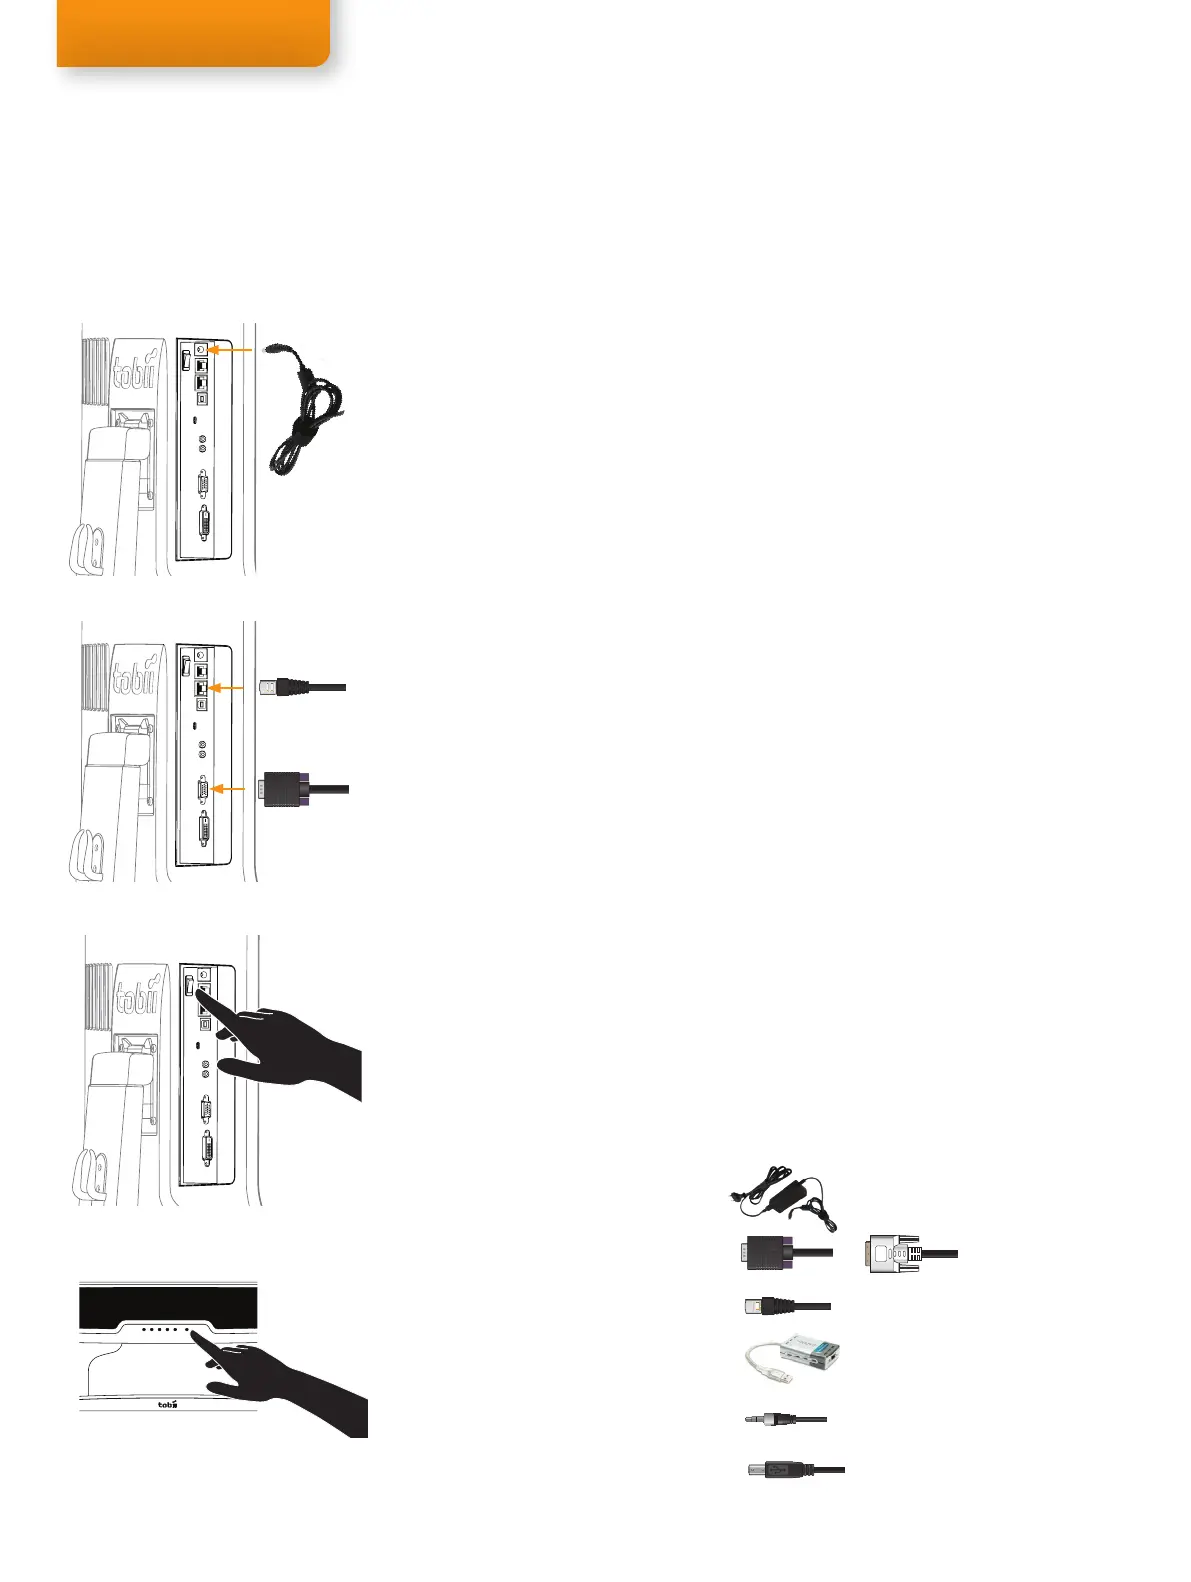
Connect the eye tracker to your computer
Connect the Power, LAN and VGA cables and turn on the eye tracker by pressing the Power
switch. Press the Power button on the front panel to choose the input mode (Digital). See
figures on the left. For details on connecting the User Camera and Built-in Speakers
read page 8.
Reboot your computer
Connect the eye tracker to Tobii Studio
Start Tobii Studio or other supported software and make sure the eye tracker is connected. For
complete details see pages 9-11.
Adjust your physical setup
Adjust the physical setup of the eye tracker and other devices. For details see page 13.
Create your Project and Tests in Tobii Studio
For details read chapter 4 of the Tobii Studio User Manual.
Calibrate and record in Tobii Studio
For details read chapter 4 of the Tobii Studio User Manual.
Component checklist
Tobii T60 or T120 Eye Tracker
Computer with Tobii Studio or other supported software
(Download the Tobii System Recommendations document from www.tobii.com)
Tobii Studio or Tobii T/X Series Eye Trackers Resources CD
Power supply cable
VGA or DVI-D cable
LAN cable
USB - LAN Adapter
Audio Cable
User Camera USB Cable A/B
Quick Start
1.
2.
3.
4.
5.
6.
7.
8.
9.
•
•
•
•
•
•
•
•
•
Step 3. First time usage
Power cable
VGA cable
LAN cable
Rear connections panel
Power switch
Front control panel
Power button
Rear connections panel
Rear connections panel
or