LAN cable
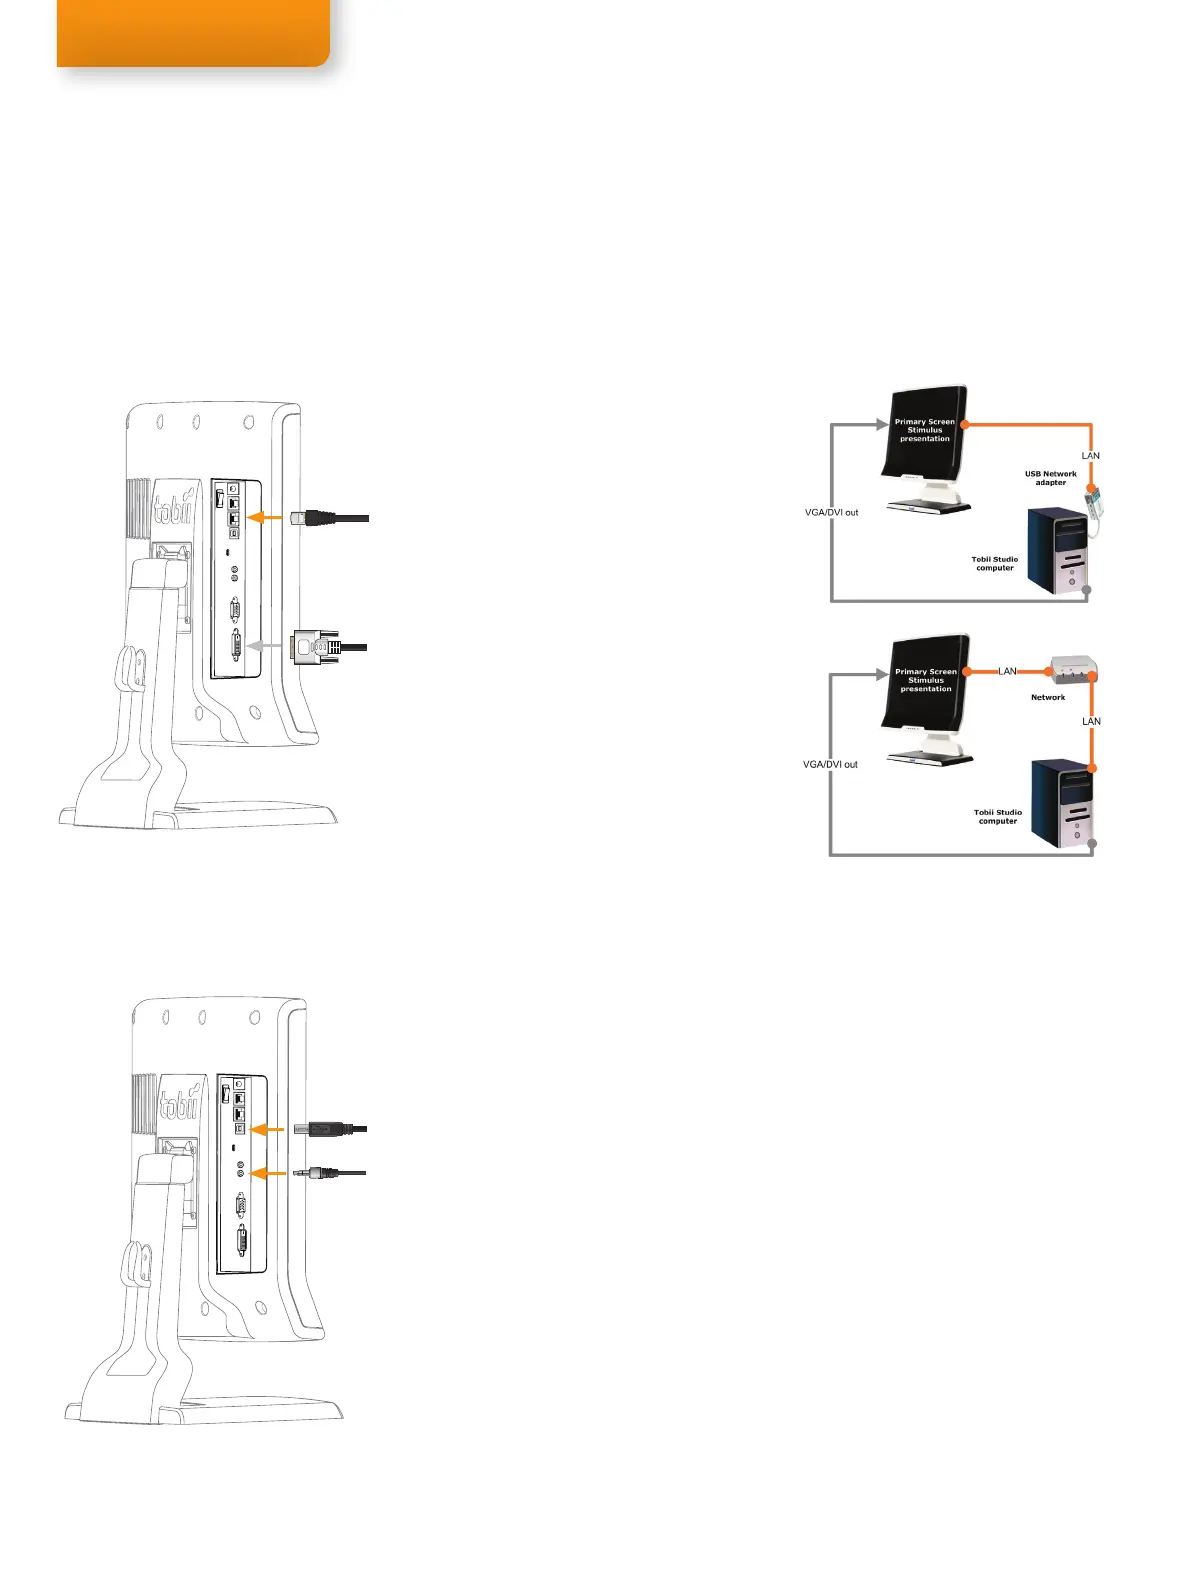
Rear connections panel
Setting up the connection to your computer
The eye tracker communicates with the computer via a standard network cable. Connect the eye
tracker to your computer using the LAN cable (LAN). There are two different ways you can setup the
communication between the eye tracker and your computer:
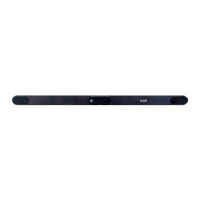
Option A
Connect the eye tracker directly to your computer
by using the USB Ethernet adapter included (see
installation instructions below) or by connecting
the eye tracker to the built in network card in your
computer. The network card must be configured in
Windows to obtain an IP address automatically (see
instructions on next page). Windows will say limited
connectivity for the eye tracker LAN connection.
This is correct, ignore the warning. Please note that
if you connect the eye tracker directly to the built in
network card in your computer you wont be able to
access Internet unless you use an additional network
card or a wireless network.
Option B
Connect the eye tracker directly to your office LAN or
to a separate network Router. The office LAN or the
Router must be configured to automatically give the
eye tracker an IP address via DHCP. After properly
being recognized by the office LAN or the Router the
eye tracker can be accessed by any other computer
on the same network running Tobii Studio, ClearView
or Tobii SDK.
Installing the USB Ethernet Adapter
If you want to use setup option A explained above start by installing the USB Ethernet adapter
on your computer. Plug the USB cable into an available USB port on your computer. Windows will
detect new hardware and prompt you for the Drivers, which can be found on the Tobii T/X Series Eye
Trackers Resources CD provided. Please follow the on screen instructions. For detailed instructions on
driver installation, please refer to the network adapter manual on the CD.
Installing the USB User Camera Driver
Plug the USB cable into an available USB port on your computer. Windows will detect new hardware
and prompt you for the Drivers, which can be found on the Tobii T/X Series Eye Trackers Resources
CD provided with the eye tracker.
Installing eye tracker software
Install Tobii Studio, ClearView, Tobii SDK or other supported eye tracking software on the computer
you intend to use. To install Tobii Studio just insert the Tobii Studio CD and follow the on screen
instructions. Please refer to the Tobii Studio Manual for more information.
Using the eye tracker without Tobii Studio
If you will not be using Tobii Studio on your computer you must install the Tobii Eye Tracking Tools to
be able to access and configure the eye tracker. The installation file called tobii-eye-tracking-tools-X.
msi (where X is replaced with the version number of the software) can be found on the Tobii T/X
Series Eye Trackers Resources CD provided. After installing the Tobii Eye Tracking Tools you can
browse for the eye tracker by going to Start > All Programs > Tobii > EyeTracker Browser. If you
install Tobii Studio on your computer the EyeTracker Browser is installed automatically.
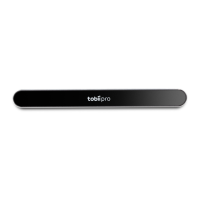
Connecting the
eye tracker
Connect the USB User Camera and the
speakers (Audio in) to the computer if
you wish to use the built-in user camera
and audio speakers.
Option A & B. Eye tracker connectors
DVI cable*
USB cable
Audio in cable
Rear connections panel
*
To connect a VGA cable see the second figure in page 4.