Front Panel User Guide Page 17
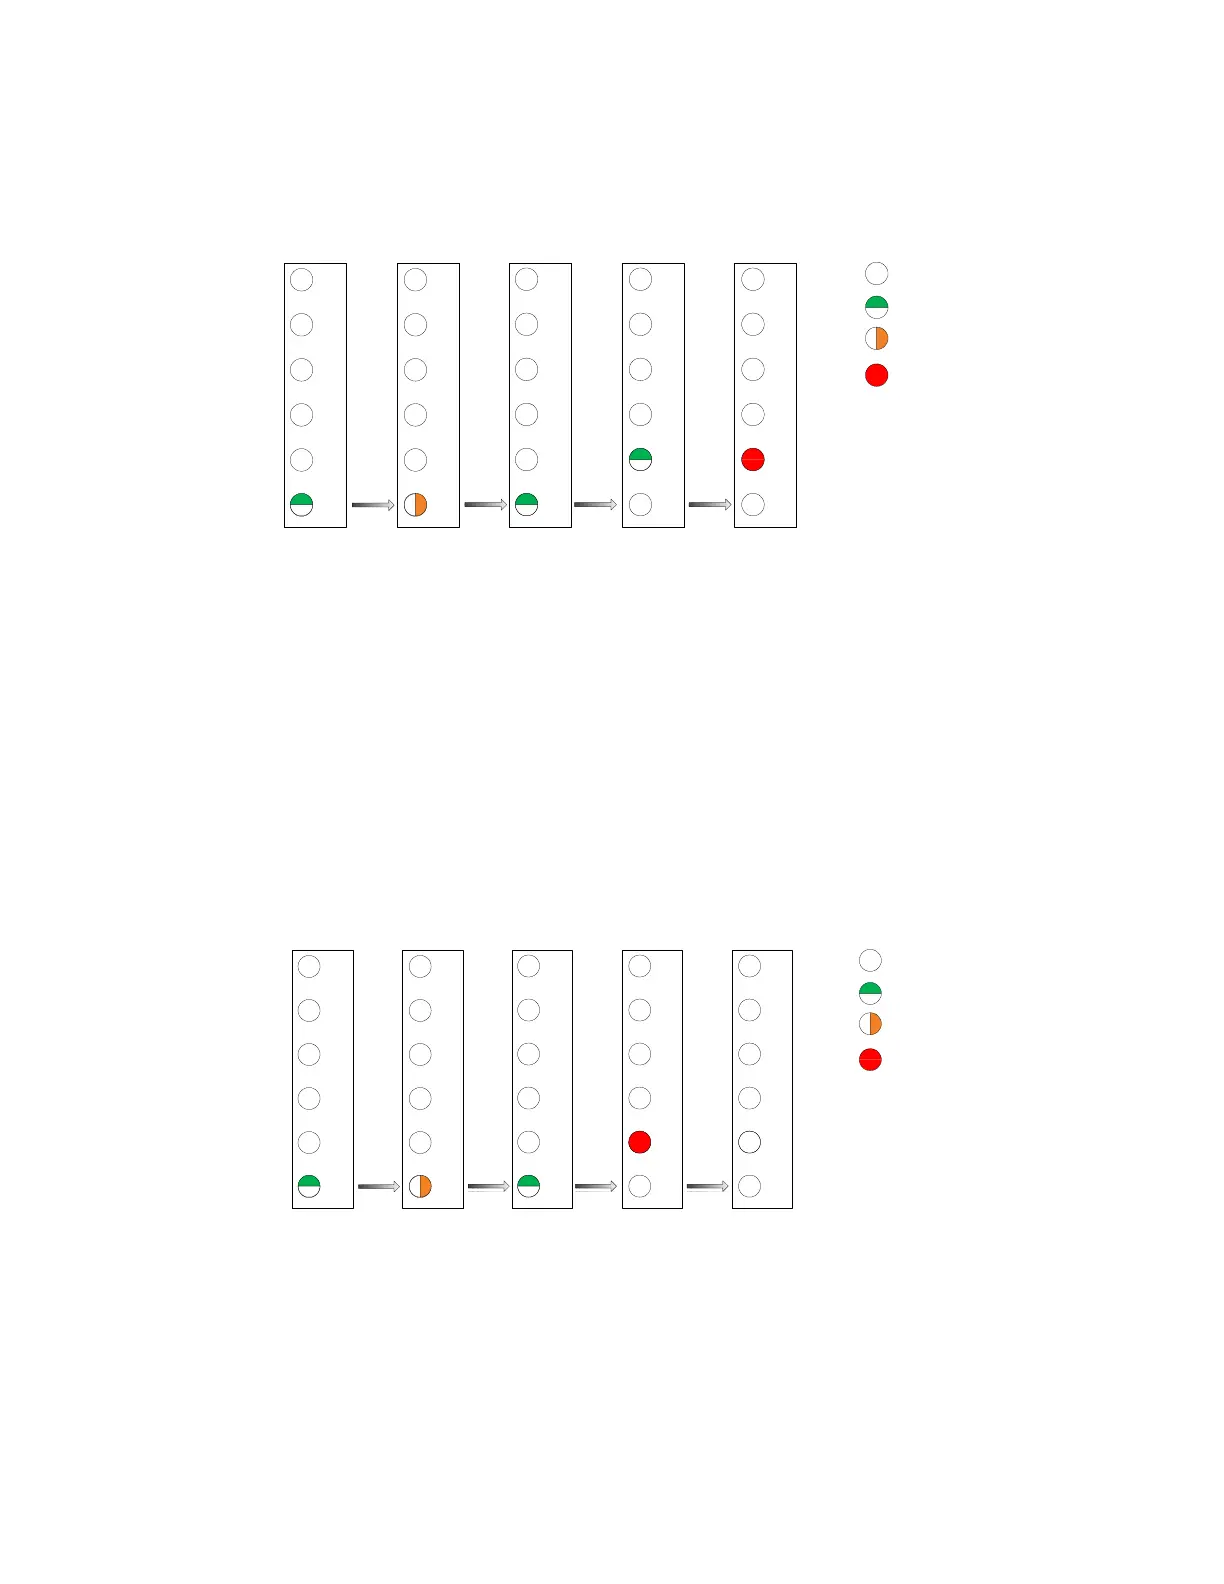
5.2 Disabling a Channel
In this example, the goal is to disable channel 2. The status of the front panel after each button
operation is shown. In the final view channel 2 LED is red, indicating the channel has been disabled.
4
5
3
2
6
1
4
5
3
2
6
1
Enable/Disable Menu:
Top Level
4
5
3
2
6
1
4
5
3
2
6
1
4
5
3
2
6
1
Utilize
Utilize Select Activate
LED Off
LED Green
LED Amber
LED Red
Enable/Disable Menu:
Channel Submenu
Enable/Disable Menu:
Channel 1 Selected
Enable/Disable Menu:
Channel 2 Selected
Enable/Disable Menu:
Channel 2 Disabled
Note: During the channel select process the LED will be green if the channel is currently enabled or red if
currently disabled. In this example, channels 1 and 2 are initially green – indicating they are enabled.
5.3 Enabling a Channel
The figure below shows a view of the front panel after each button action. In this example, channel 2
has been previously disabled. Section 5.2 depicts the process for disabling channel 2. Prior to entering
the menu, the channel 2 LED should be red – indicating the channel has been disabled. The final view
shows that after activation of the channel enable command that channel 2 is no longer disabled.
4
5
3
2
6
1
4
5
3
2
6
1
Enable/Disable Menu:
Top Level
4
5
3
2
6
1
4
5
3
2
6
1
4
5
3
2
6
1
Utilize
Utilize Select Activate
LED Off
LED Green
LED Amber
LED Red
Enable/Disable Menu:
Channel Submenu
Enable/Disable Menu:
Channel 1 Selected
Enable/Disable Menu:
Channel 2 Selected
Enable/Disable Menu:
Channel 2 Enabled
Note: During the channel select process the LED will be green if the channel is currently enabled or red if
it is currently disabled. In this example, channel 1 is green – indicating it is enabled. However, channel 2
is red – indicating it is currently disabled.