Front Panel User Guide Page 6
1.4 Front Panel Full Command Menu
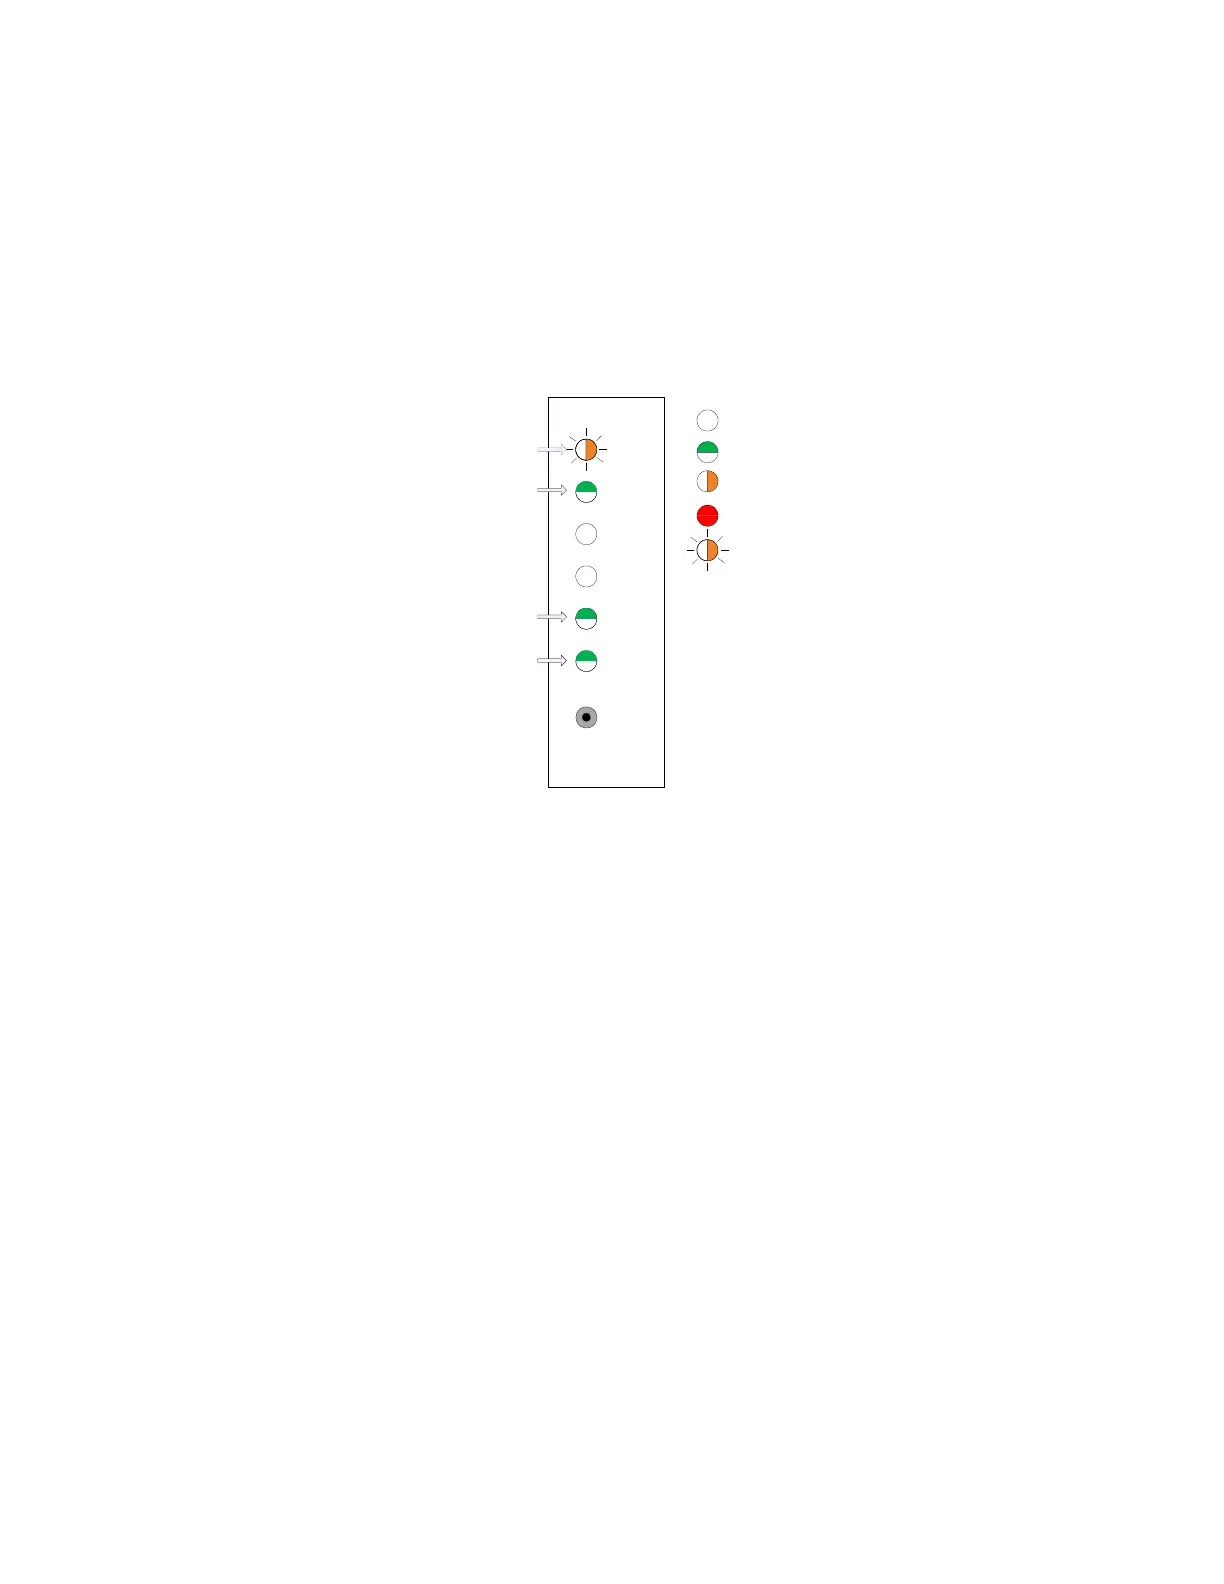
The full menu is comprised of three levels. The first level provides selection of a command group. The
second level comprises command sets within that group. The lower level is the activation of the
command on a specific channel or channels. Menu navigation and currently selected items are
depicted using the front panel LED display. In the figure below, the active LED locations that are utilized
at the top level of the menu navigation are shown in green. The pushbutton is used to navigate the
menu system.
Enable/Disable Menu
Top Level
4
5
3
2
6
1
Select
Test/Range Menu
Top Level
Unused
(Indicator)
LED Off
LED Green
LED Amber
LED Red
LED Amber
Flashing
Flashes amber to
indicate operations
within full menu
The top level menu and its submenu items are arranged as shown in the following list.
Channel 1 LED: Enable/Disable
o Enable or disable channels (Channel 1 LED)
o Enable or disable transit on channels (Channel 2 LED)
Channel 2 LED: Ranging and Test
o Test emergency band on a channel (Channel 2 LED)
o Test transit band on a channel (Channel 3 LED)
o Arm the ranging process on a channel (Channel 4 LED)
Channel 5 LED: Reserved
o This channel LED will light up along the top level menu navigation as a simple progress
indicator.
Channels 3 and 4 LED: Reserved
o These channel LEDs will remain off while navigating the top level menu system
Channel 6 LED: Full menu indicator
o This channel LED will flash amber while using the pushbutton within the full menu only.
Note: During active preemption, the front panel menu system is overridden. The user should not use
the front panel pushbutton during preemption events.