CAL Optional Design
- 7-
the specified rate.
When it comes off from the rated flow remarkably and
it drives, it causes the following accidents, and do the
flowing quantity adjustment surely.
When flowing quantity is too small:
abnormal vibration, abnormal noise, pumped
liquid temperature abnormal rise
When flowing quantity is too large:
abnormal vibration, abnormal noise,
overloaded motor
Even when restarting after log-term shut-down of the pump, be
sure to check each of the above items for normality.
2.2. Stopping
For stopping the pump, follow the instructions given below.
(1) Fully close the discharge valve. Generally the pumps with
check valve do not need this operation. However, if water
hammer may occur when the pump suddenly stops, the
discharge valve must be fully closed.
(2) Switch off the motor. In this step, make sure that the pump
smoothly slows down to stop.
(3) If the pumped liquid may freeze up, completely drain the
pumped liquid from inside of the pump and the
water-cooled jacket.
2.3. Start/stop frequency
If start/stop operations are frequently repeated, it causes a fault of
the pump and the motor. Do not repeat start/stop operations more
than the specified frequency.
If start/stop operations may exceed the specified frequency, consult
us.
(1) 2P type: Up to once in 5 hours
(2) 4P type: Up to twice in one hour
3. Maintenance Control
3.1. General
While the pump is running, check the following items and, if
anything abnormal be found, stop the pump immediately, and
check the following items:
(1) Is the pump running free from abnormal noise and
vibration?
(2) Does the suction pressure meet the NPSH required for the
pump? (Read the suction line pressure gauge for checking.)
(3) Is the discharge pressure kept as specified?
(4) Is the motor free from overload?
(5) Is the pump casing full with lifted liquid during the pump
running? And is the discharge valve kept closed?
(6) Is each bearing free from abnormal temperature rise?
3.2. Shaft seal
3.2.1. In the case of mechanical seal type
It is one outstanding feature of mechanical seal that requires almost
no maintenance while the pump is in running. However, the sliding
surface of seat (4750) and washer (4720) may eventually wear after
long-term running. Of course, the degree of this wear depends on
various factors such as running conditions, lubricity of pumped
liquid, existence of impurities in pumped liquid, etc. It is
impossible to define a replacement interval for wearable parts (seat,
washer). Therefore, it is recommended to store the running data,
which can be utilized to know the approximate replacement
interval of such wearable parts. Furthermore, it is recommended to
always stock spare parts for the mechanical seal and to replace all
when replacement is required.
In the case of the pump with mechanical seal, do not operate it in
dry condition and be sure to carry out priming before starting and
start the pump, with the stuffing box filled up with liquid. For
further take note, occasionally liquid may leak a little from the
mechanical seal, after started, until the seal becomes stable. This is
not abnormal.
Refer to Section 5 (P.13) for the detail of the mechanical seal.
3.2.2. In the case of gland packing type
The surface of gland packing (4610) and that of the shaft that slides
over it must be smooth at all times. If the shaft is scratched on the
surface, or gland (4520) is tightened unevenly or over-tightened, it
will cause the shaft seal to overheat or cause the gland packing to
wear quickly. When replacing gland packing, use a new one in a
material that will withstand the type of pumping liquid, and insert it
into casing cover (1610) so that its mating faces are shifted by 90
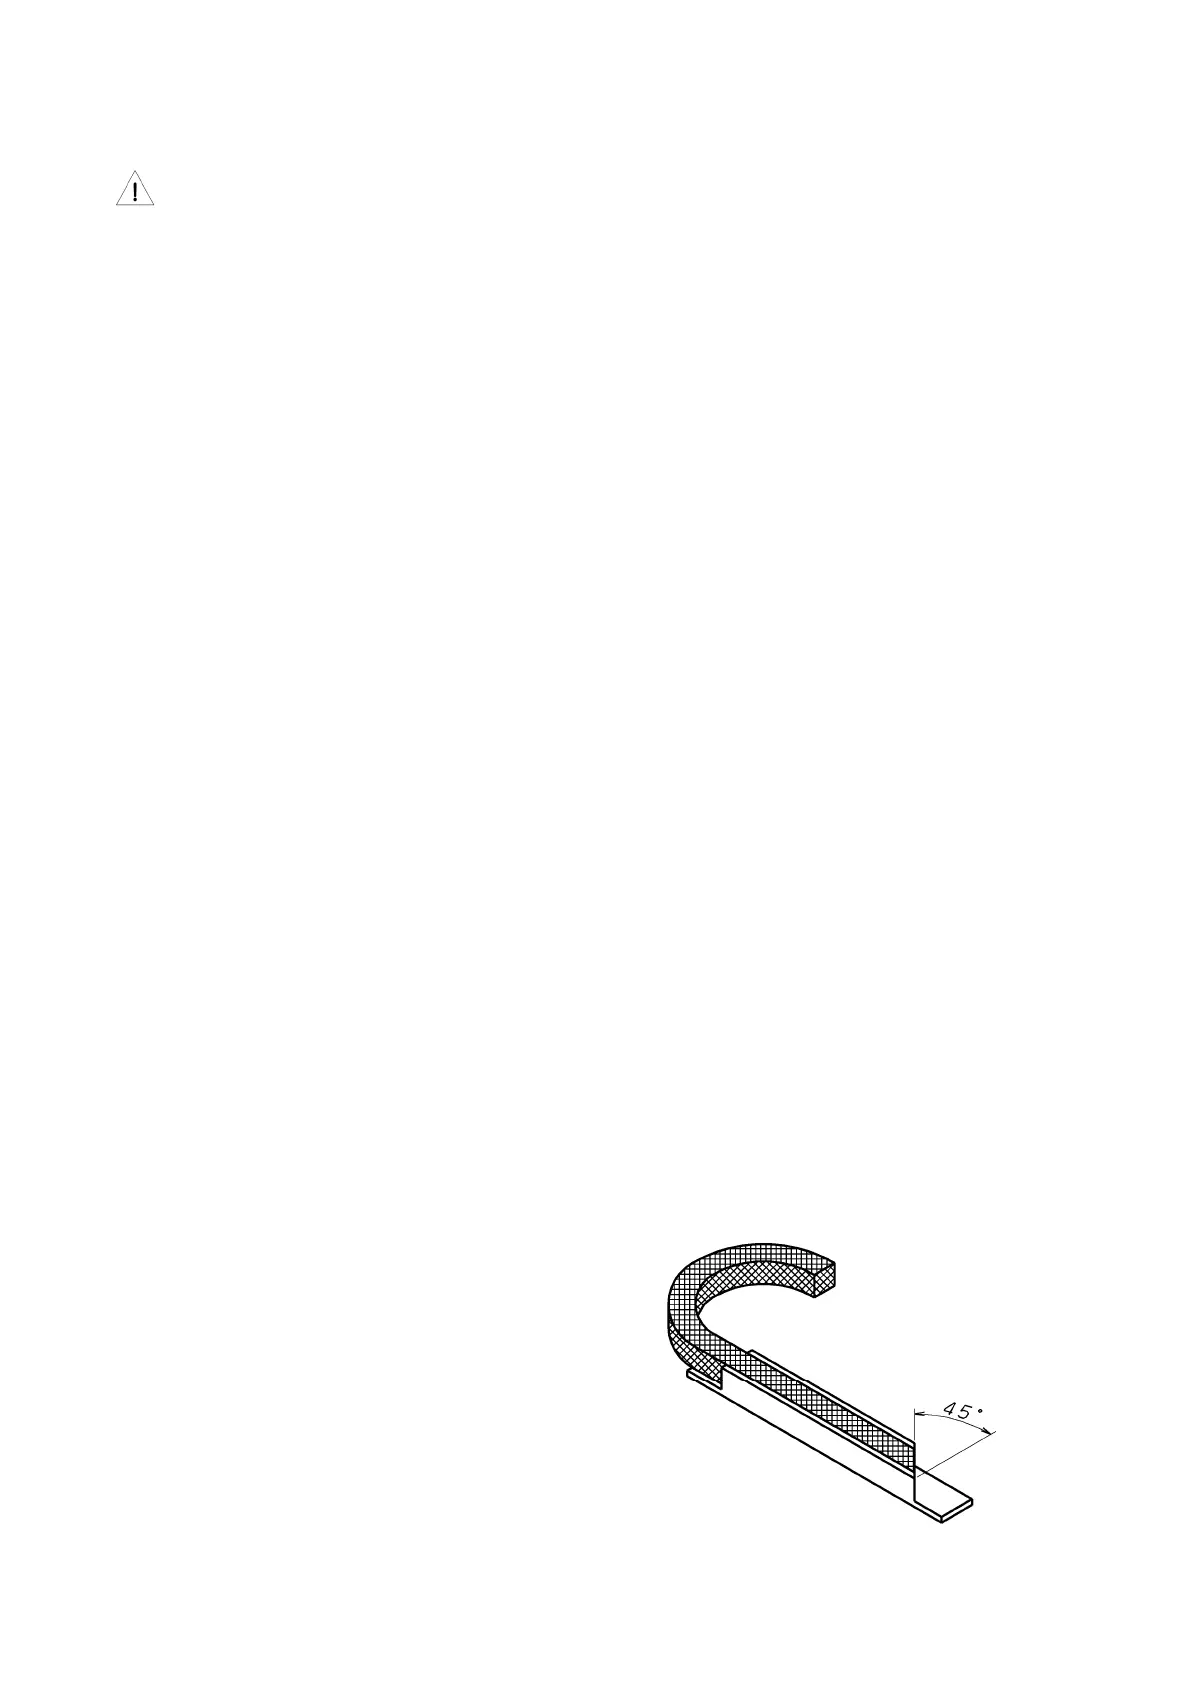
degrees to each other. For the gland packing, ring-shaped molded
packing is recommended.
If string-shaped gland packing is to be cut, use a tool such as the
one shown in Fig 3.2-1 when cutting.
Fig 3.2-1