g031270
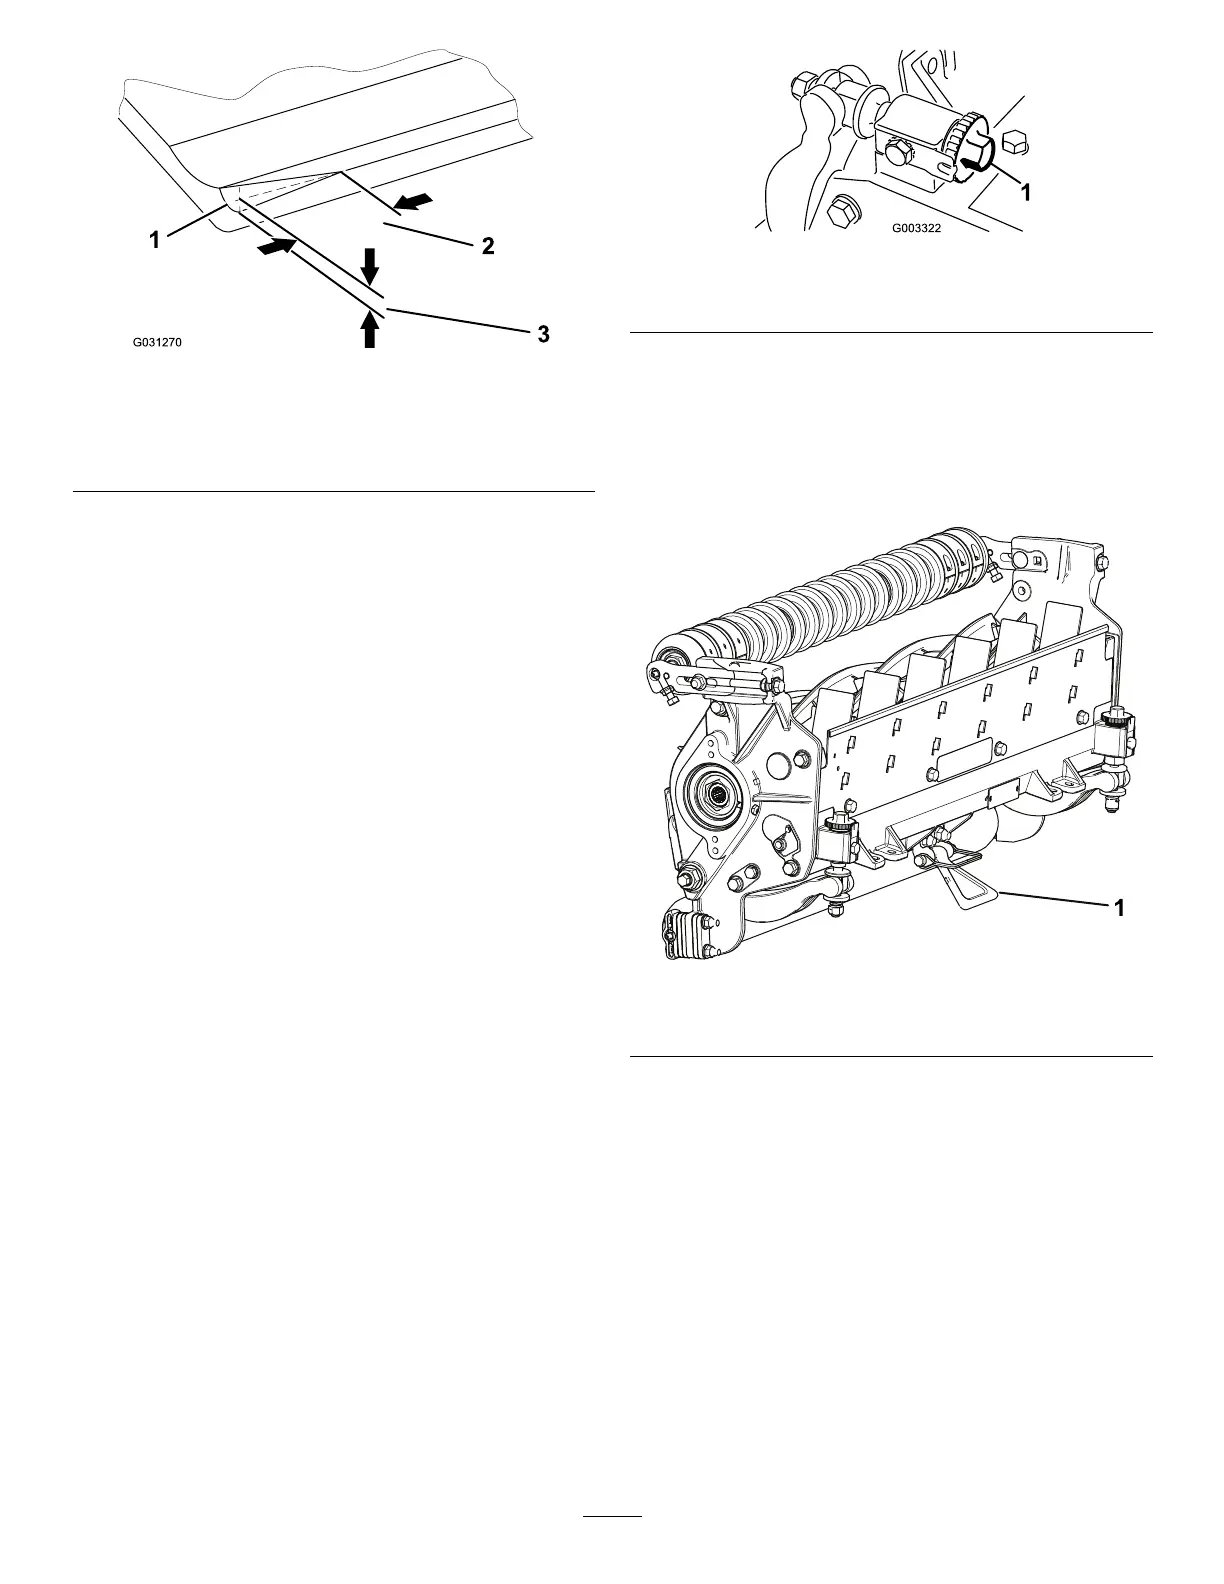
Figure8
1.Lead-inchamferonright
endofbedknife
3.1.5mm(0.060inch)
2.6mm(0.25inch)
Note:Donotmakethelead-inchamfertoo
largeasitmaycauseturftufting.
AdjustingtheBedknifetotheReel
Usethisproceduretosetthebedknifetothereeland
tochecktheconditionofthereelandbedknifeand
theirinteraction.Aftercompletingthisprocedure,
alwaystestthecuttingunitperformanceunderyour
eldconditions.Youmayneedtomakefurther
adjustmentstoobtainoptimalcuttingperformance.
Important:Donotovertightenthebedknifetothe
reeloryouwilldamageit.
•Afterbacklappingthecuttingunitorgrindingthe
reel,youmayneedtomowwiththecuttingunitfor
afewminutesandthenperformthisprocedure
toadjustthebedknifetothereelasthereeland
bedknifeadjusttoeachother.
•Youmayneedadditionaladjustmentsiftheturfis
extremelydenseoryourcuttingheightisverylow.
Youwillneedthefollowingtoolstocompletethis
procedure:
•Shim0.05mm(0.002inch)(PartNo.125-5611)
•Cuttingperformancepaper(PartNo.125-5610)
1.Positionthecuttingunitonaat,levelwork
surface.
2.Turnthebedbar-adjustingscrews
counterclockwisetoensurethatthebedbardoes
notcontactthereel(Figure9).
g003322
Figure9
1.Bedbar-adjustingscrew
3.Tipthecuttingunittoexposethebedknifeand
reel.
Important:Makesurethatthenutsonthe
backendofthebedbar-adjustingscrews
arenotrestingontheworksurface;usethe
kickstand(Figure10).
g191340
Figure10
1.Kickstand
4.Rotatethereelsothatabladecrossesthe
bedknifeapproximately25mm(1inch)infrom
theendofthebedknifeontherightsideofthe
cuttingunit.
Note:Putanidentifyingmarkonthisbladeto
makesubsequentadjustmentseasier.
5.Insertthe0.05mm(0.002inch)shimbetween
themarkedreelbladeandthebedknifeatthe
pointwherethebladecrossesthebedknife.
6.Turntherightbedbaradjusterclockwiseuntil
youfeellightpressure(i.e.drag)ontheshim,
thenbackoffthebedbaradjuster2clicksand
removetheshim.
9