g229304
Figure82
1.Bladesfronttorear3.Measurefromthetipofthe
bladetotheatsurface
here.
2.Bladetip
8.Settheanti-scalprollerstotopholesorremove
themcompletelyforthisadjustment.
9.Place2blocks(seetablebelow)undertherear
edgeofthecuttingdeckskirt;1oneachsideof
thecuttingdeck(Figure83).
10.Settheheight-of-cutlevertothe3inch(76mm)
position.
11.Place2blocksundereachsideofthefrontedge
ofthedeck,butnotundertheanti-scalproller
bracketsorwelds.
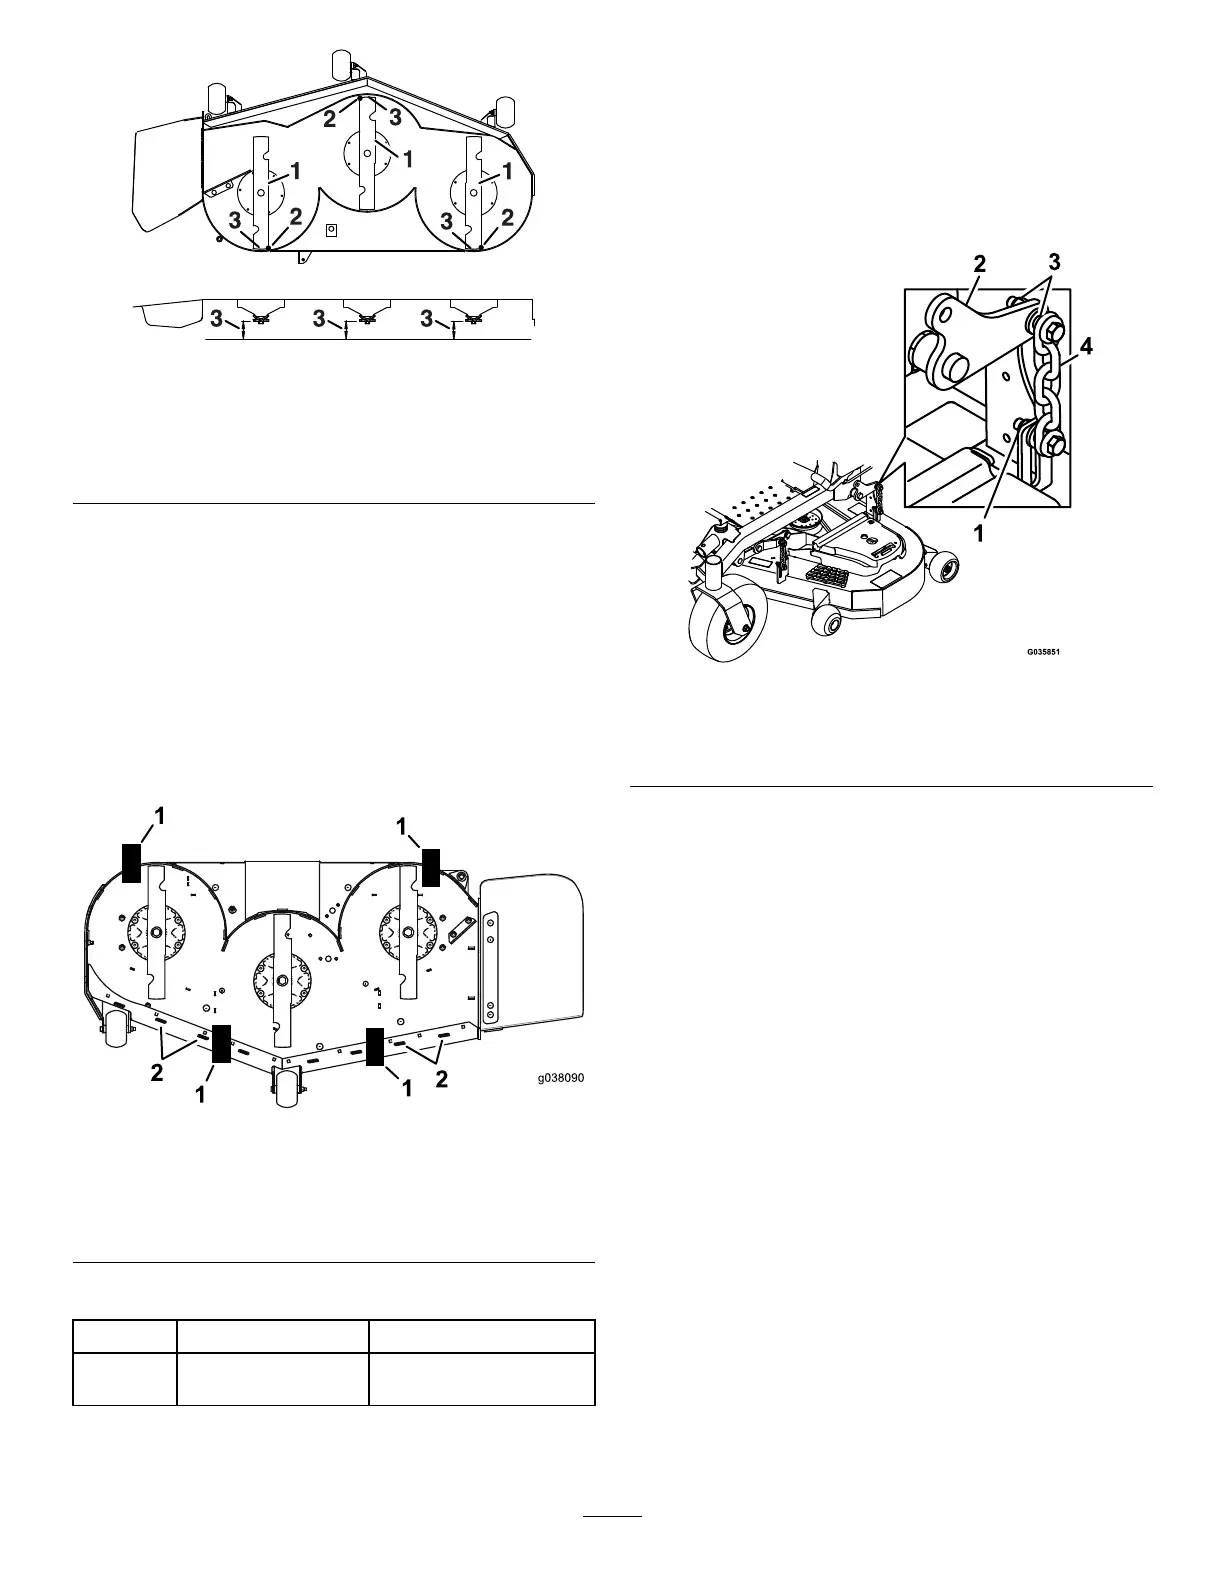
g038090
Figure83
Bottomview
1.Block—7.3cm(2.87
inches)
2.Welds
BlockHeightandRakeTable
DeckSize
BlockHeightRake
Allmower
decks
7.3cm(2.87inches)4.8to6.4mm(3/16to1/4
inch)
12.Carefullyrotatethebladessidetoside(Figure
81).
13.Loosenthelocknuts(Figure84)onall4corners
andensurethatthemowerdeckissitting
securelyonall4blocks.
14.Removeanyslackfromthedeckhangersand
makesurethedeck-liftfootleverispushedback
againstthestop.
15.Tightenthe4locknuts.
g035851
Figure84
1.Locknuts3.Deckhanger
2.Deck-liftarm4.Chain
16.Ensurethattheblockstsnuglyunderthedeck
skirtandthatallattachmentboltsaretight
17.Continuelevelingthedeckbycheckingthe
front-to-rearbladeslope.
18.Checkthebladesforlevelnessandrepeatdeck
levelingprocedureifnecessary.
RemovingtheMowerDeck
1.Parkthemachineonalevelsurface,disengage
theblade-controlswitch(PTO),andengagethe
parkingbrake.
2.Shutofftheengine,removethekey,and
disconnectthespark-plugwiresfromthespark
plugs.
3.Placetheheight-adjustmentpininthe7.6cm(3
inch)cutting-heightlocation.
4.Removethebeltcovers.
5.Loosenthemowerdeckidlerandremovethe
mowerbelt;refertoBeltMaintenance(page49).
6.Removetheboltsandnutsfromthefrontofthe
plateunderthefootrest.
7.Removeandretaintheboltsandnutsonboth
sidesofthemachine(Figure85).
60