BeltMaintenance
InspectingtheBelts
ServiceInterval:Every50hours
Replacethebeltifitisworn.Thesignsofawornbelt
includesquealingwhilethebeltisrotating;theblades
slippingwhilecuttinggrass;andfrayededges,burn
marks,andcracksonthebelt.
ReplacingtheMowerBelt
1.Parkthemachineonalevelsurface,disengage
theblade-controlswitch(PTO),andengagethe
parkingbrake.
2.Shutofftheengine,removethekey,andwait
forallmovingpartstostopbeforeleavingthe
operatingposition.
3.Lowerthemowertothe76mm(3inch)height
ofcut.
4.Loosentheboltoneachbeltcover.
5.Loosenthebottomboltholdingthemower-deck
curtaintothemowerdeck;refertoReleasing
theMower-DeckCurtain(page34).
6.Removethesheet-metalguard;referto
RemovingtheSheet-MetalGuard(page35).
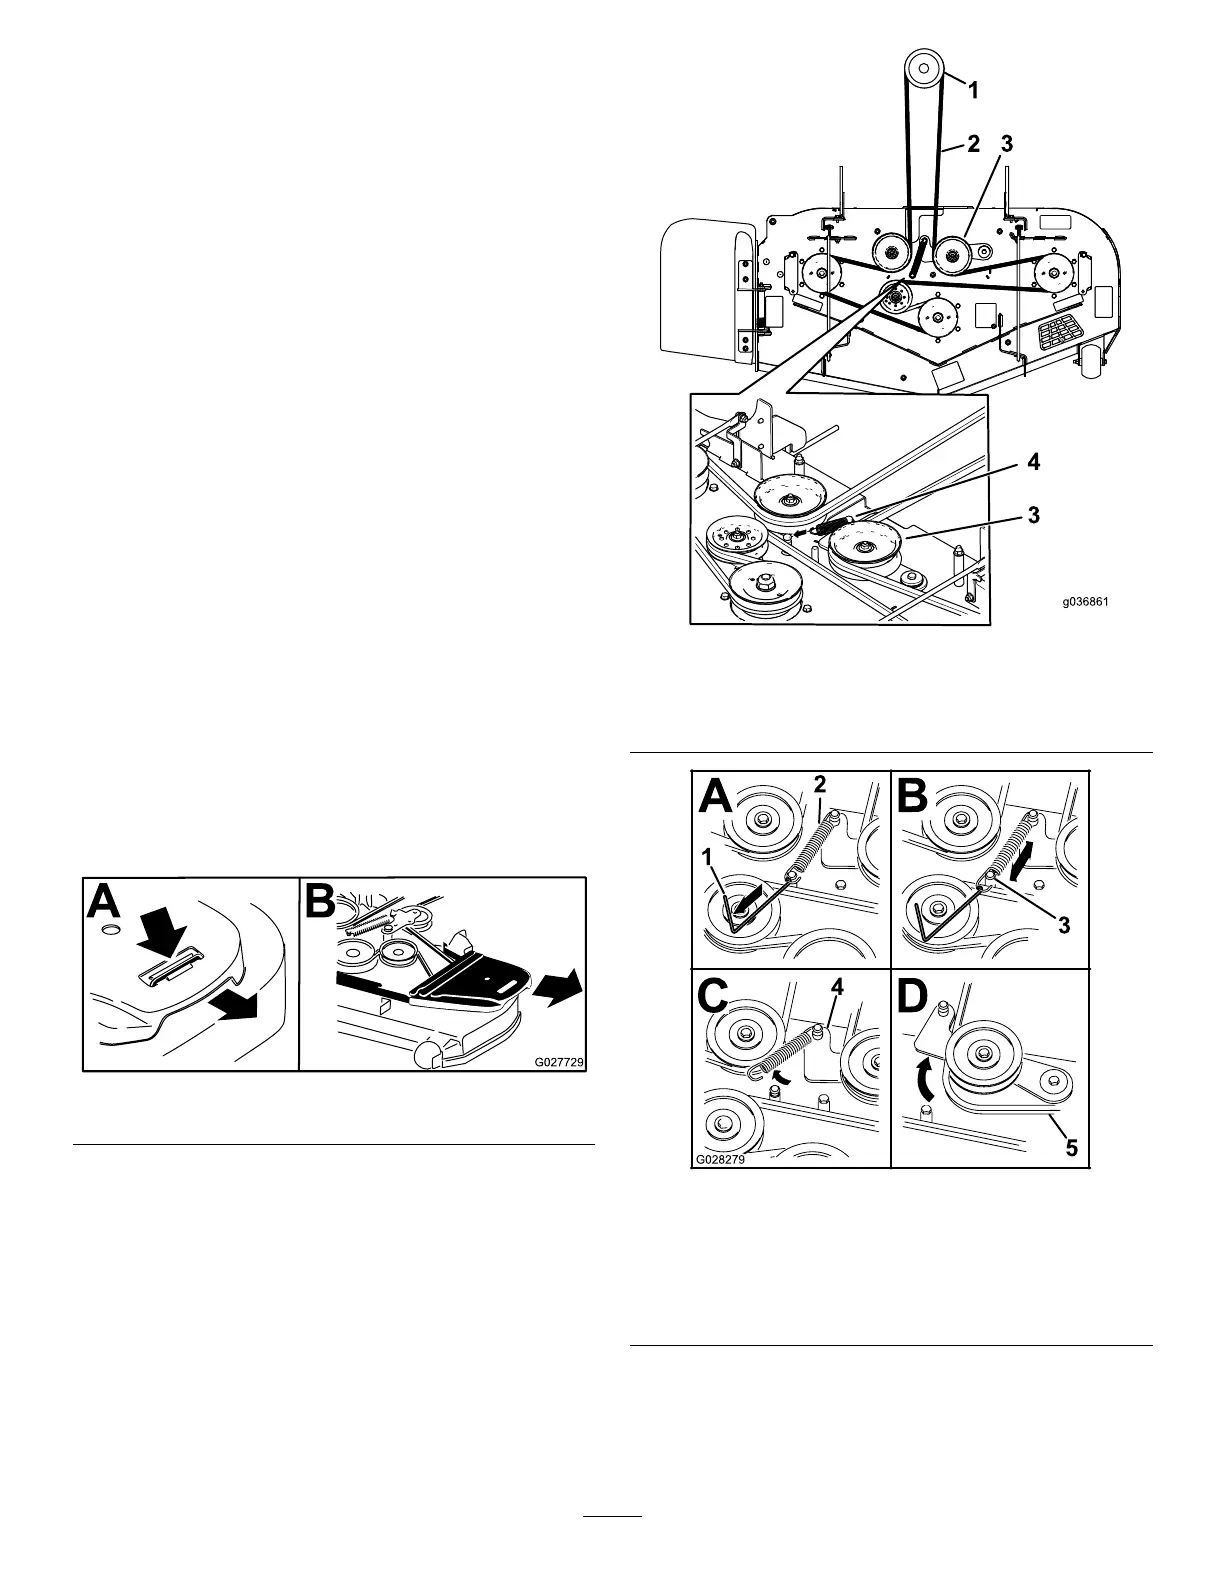
7.Removethebeltcoversandtheboltsattached
tothem(Figure60).
g027729
Figure60
8.Removethespringtensionfromthe
spring-loadedidlerpulley.RefertoFigure62.
Note:Usethespringremovaltool(ToroPart
No.92-5771)toremovethespringfromthe
mower-deckpost(Figure62).
9.Removethebeltfromthemower-deckpulleys
andtheclutchpulley.
10.Installthenewbeltaroundthemowerpulleys
andtheclutchpulleyundertheengine(Figure
61).
g036861
Figure61
1.Clutchpulley3.Spring-loadedidlerpulley
2.Mowerbelt
4.Spring
g028279
Figure62
1.Spring-removaltool(Toro
PartNo.92–5771)
4.Idlerarm
2.Idlerspring5.Mowerbelt
3.Mower-deckpost
11.Installtheidlerspring(Figure62).
Note:Seatthespringendsintheanchor
grooves.
49