ProcedureDescription
Qty.
Use
11
Nopartsrequired
–
Installtheundercarriageshroud.
12
Nopartsrequired
–
Finishtherinsetankkitinstallation.
1
PreparingtoInstalltheKit
NoPartsRequired
Procedure
WARNING
Incorrectbatterycableroutingcoulddamage
thesprayerandcablescausingsparks.
Sparkscancausethebatterygassesto
explode,resultinginpersonalinjury.
•Alwaysdisconnectthenegative(black)
batterycablebeforedisconnectingthe
positive(red)cable.
•Alwaysconnectthepositive(red)battery
cablebeforeconnectingthenegative
(black)cable.
WARNING
Batteryterminalsormetaltoolscouldshort
againstmetalsprayercomponentscausing
sparks.Sparkscancausethebatterygasses
toexplode,resultinginpersonalinjury.
•Whenremovingorinstallingthebattery,
donotallowthebatteryterminalstotouch
anymetalpartsofthesprayer.
•Donotallowmetaltoolstoshortbetween
thebatteryterminalsandmetalpartsof
thesprayer.
•Alwayskeepthebatterystrapinplaceto
protectandsecurethebattery.
1.Movethemachinetoalevelsurface,fullypress
inthebrakepedal,andsettheparking-brake
pedal;refertotheOperator’sManual.
2.RotatethekeyswitchtotheOffposition,and
removethekey;refertotheOperator’sManual.
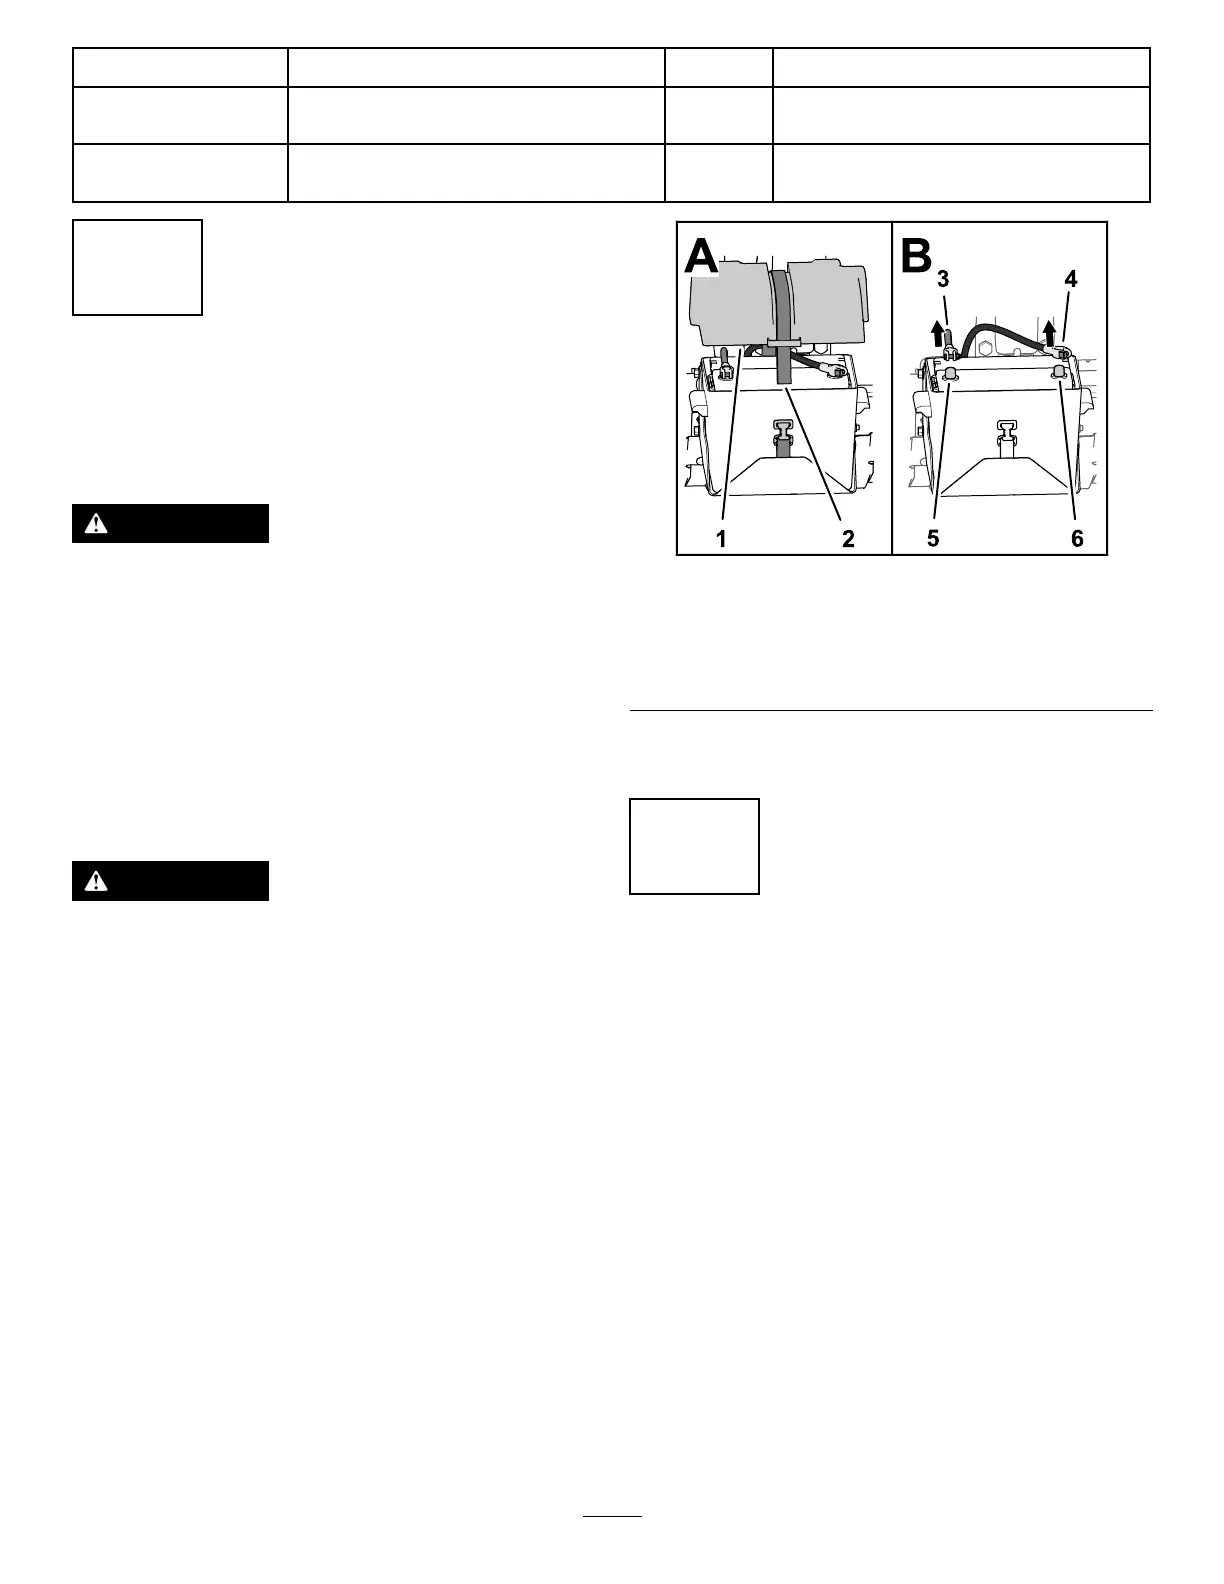
3.Removethebatterycoveranddisconnectthe
negative(black—ground)cablefromthebattery
post(Figure2).
g207342
Figure2
1.Batterycover4.Negativebatterycable
2.Strapandbuckle
5.Positivebatterypost
3.Positivebatterycable6.Negativebatterypost
4.Disconnectthepositive(red)cablefromthe
batterypost(Figure2).
2
RemovingtheForwardHeat
ShieldandUndercarriage
Shroud
NoPartsRequired
RemovingtheForwardHeatShield
1.Engagetheparkingbrake,shutoffthespray
pump,shutofftheengine,andremovethekey.
2.Raisethefrontandbackofthemachine
andsupportitwithjackstands;refertothe
Operator’sManual.
3.Removethe6hex-headboltsand6washers
thatsecurethefront,forwardheatshieldtothe
chassisandremovetheshield(Figure3).
Note:Retainthebolts,washers,andheatshield
forinstallationinInstallingtheForward-Heat
Shield(page26).
3

 Loading...


