g207904
g207896
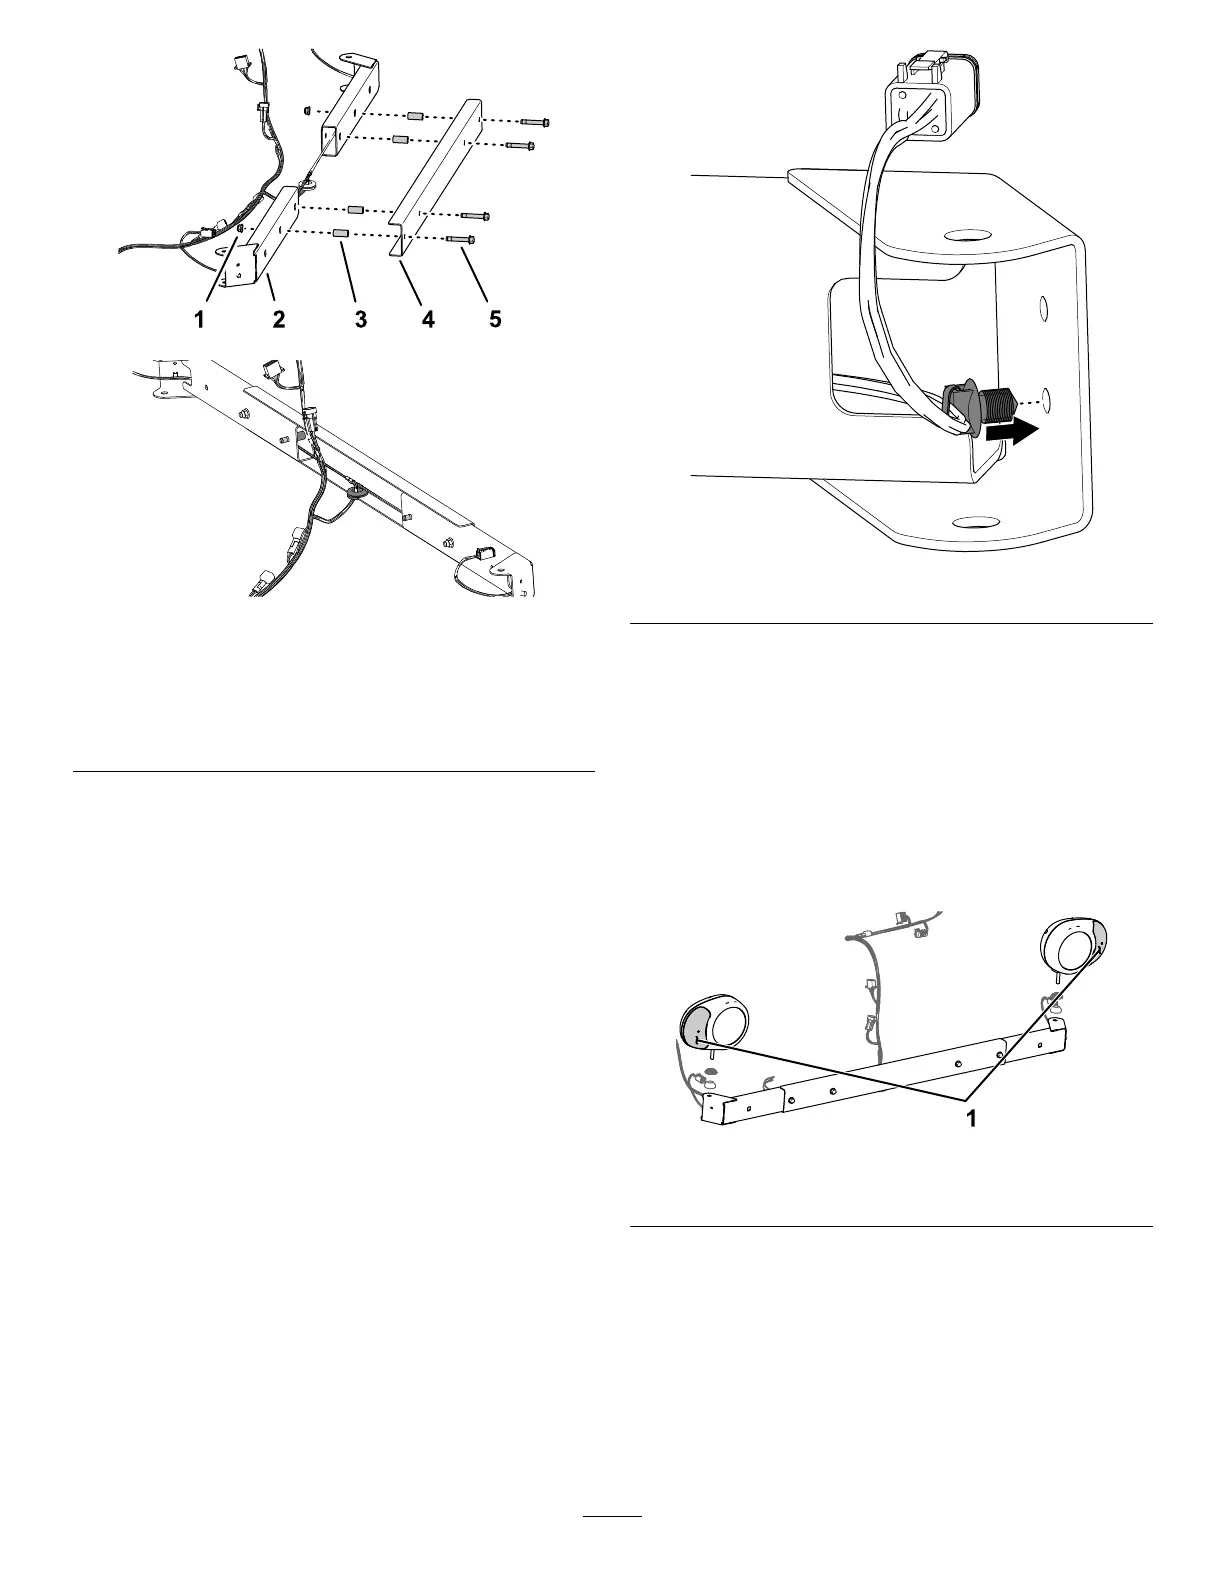
Figure11
1.Flangelocknut(3/8inch)4.Supportchannel
2.Worklightmount
5.Flange-headbolt(3/8x
2-1/4inches)
3.Spacer
3.Assemblethesupportchanneltotheworklight
mount(Figure11)withthe4ange-headbolts
(3/8x2-1/4inches),4spacers,and2ange
locknuts(3/8inch).
Note:Assemblethelocknutontothe
ange-headboltattheoutboardposition.
4.Assemblethesupportchanneltotheworklight
mount(Figure11)withthe4ange-headbolts
(3/8x2-1/4inches),4spacers,and2ange
locknuts(3/8inch).
Note:Assemblethelocknutontothe
ange-headboltattheoutboardposition.
5.Tightentheange-headboltandangelocknut
toremovethegapbetweentheworklightmount,
spacer,andsupportchannel.
6.Insertthepush-infastenerofthewireharness
intotheholeintheendoftheworklightmount
asshowninFigure12.
g208157
Figure12
7.Repeatsteps2through6fortheworklightmount
attheotherendofthesupportchannel(Figure
11).
InstallingWorklightstothe
Support
1.Aligntheleftandrightworklightassemblieswith
theamberlensesoutwardasshowninFigure
13.
g207936
Figure13
1.Amberlenses(worklights)
2.Assembleaserratedshellandasphericaljoint
ontothestudofaworklight(Figure14).
7

 Loading...


