g207892
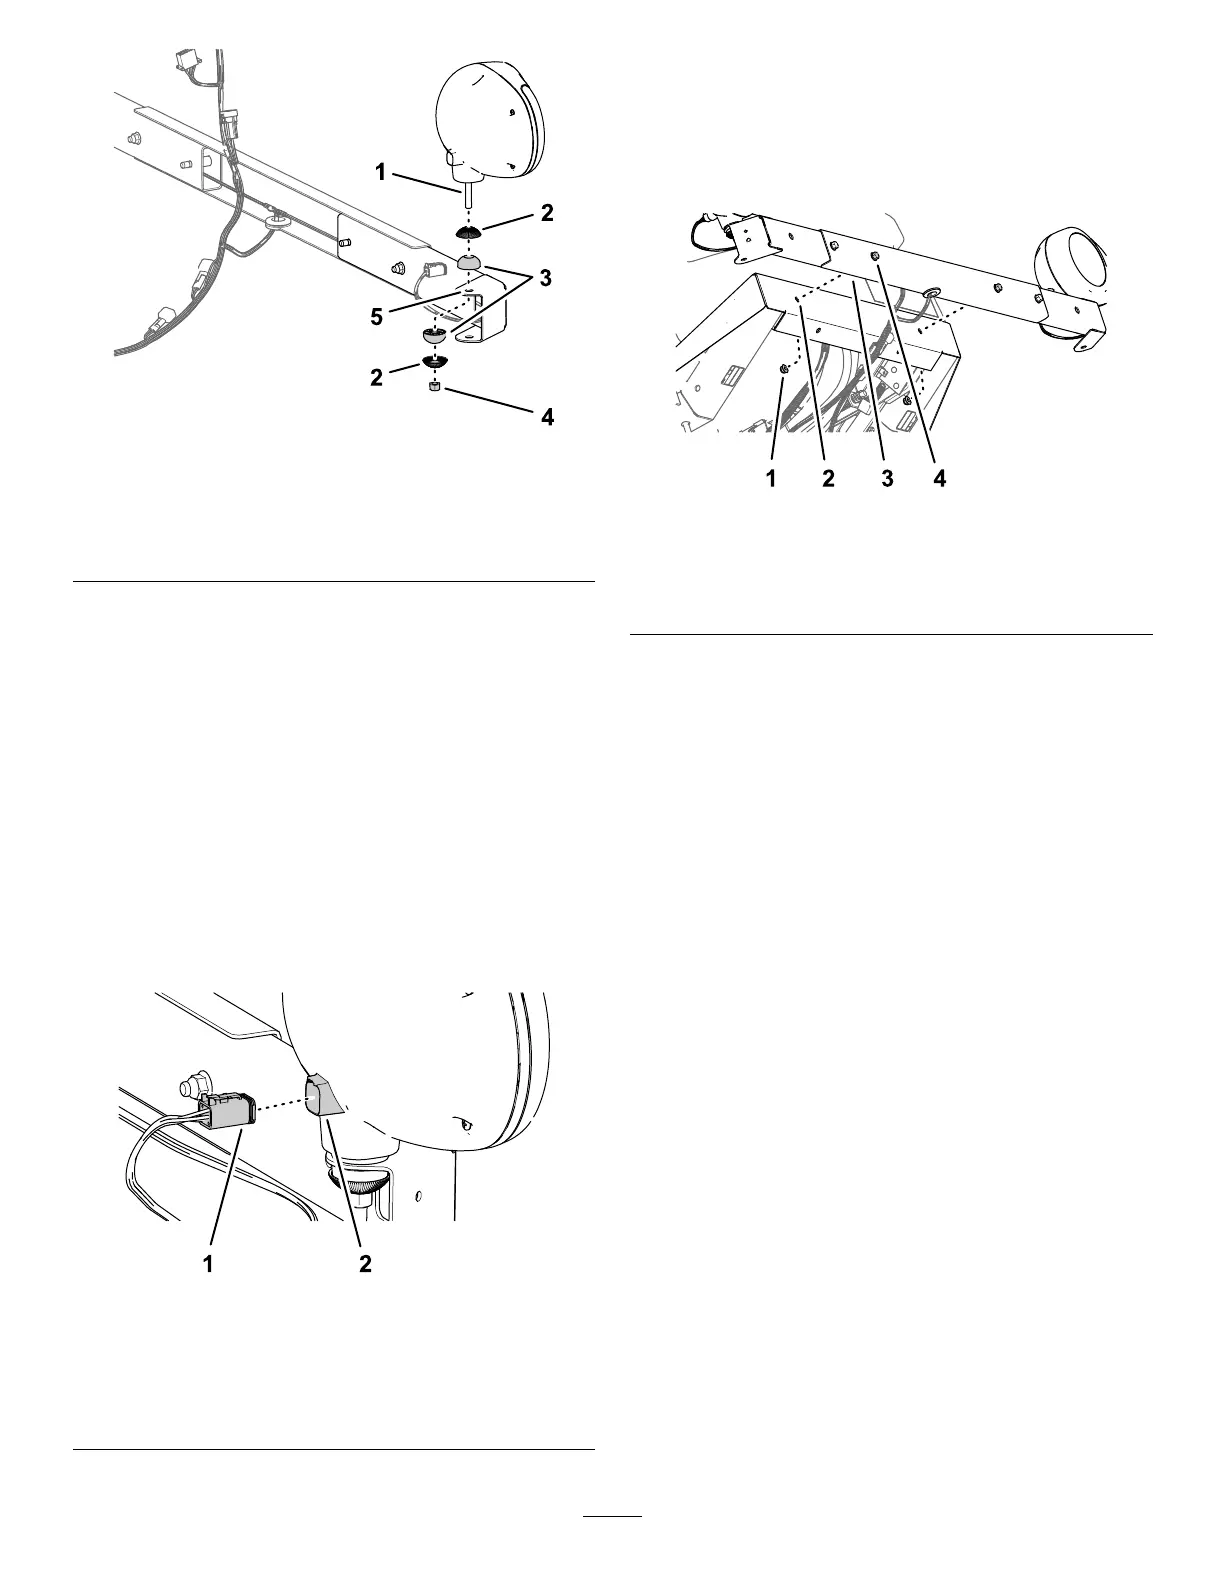
Figure14
1.Stud(worklight)4.Locknut(10mm)
2.Serratedshell5.Flange(worklightmount)
3.Sphericaljoint
3.Assembletheworklightintotheholeinthe
angeoftheworklightmount(Figure14)witha
serratedshell,sphericaljoint,andlocknut(10
mm),andtightenthelampbyhand.
Note:Tightentheworklightenoughtomaintain
itsposition,butallowtheoperatortoalignthe
lightifneeded.
4.Repeatsteps2and3fortheworklightatthe
otherhead-lampmount.
5.Plugthe6-socketconnectorslabeledRIGHT
FRONTTURN/RUNNINGLIGHTand6-socket
connector(RIGHTFRONTTURN/RUNNINGLIGHT
intothe6-pinconnectorsoftheworklights
(Figure15).
g207894
Figure15
1.6-socketconnector(RIGHT
FRONTTURN/RUNNING
LIGHTor6-socket
connector(RIGHTFRONT
TURN/RUNNINGLIGHT)
2.6-pinconnector(worklight)
InstallingtheWorklightAssembly
totheMachine
1.Assembletheworklightmountandsupport
channeltotheframeoftheoorplatewith2
angelocknutsasshowninFigure14.
g207893
Figure16
1.Flangelocknut(3/8inch)3.Supportchannel
2.Frame(oorplate)4.Flange-headbolt(3/8x
2-1/4inches)
2.Torquethe4ange-headboltsand4ange
locknutsto37to45N∙m(27to33ft-lb).
8

 Loading...


